

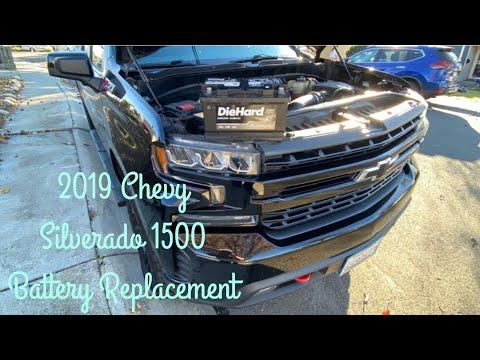






How to Replace the Battery in a 2014-2026 Chevrolet Silverado 1500 (Engine: V8 5.3L)
Step-by-step DIY instructions with required tools, parts, torque specs, and safety tips for 2014, 2015, 2016, 2017, 2018, 2019, 2020, 2021, 2022, 2023, 2024, 2025, 2026
How to Replace the Battery in a 2014-2026 Chevrolet Silverado 1500 (Engine: V8 5.3L)
Step-by-step DIY instructions with required tools, parts, torque specs, and safety tips for 2014, 2015, 2016, 2017, 2018, 2019, 2020, 2021, 2022, 2023, 2024, 2025, 2026


🔧 Silverado 1500 - Battery Replacement
This is a very manageable first repair. Disconnect the negative cable first, remove the battery hold-down, lift out the old battery, then install the new one in the same orientation.
Difficulty Level: Beginner | Estimated Time: 30-45 minutes
Assumption: These instructions cover the primary under-hood starting battery in your Silverado.
⚠️ Safety & Precautions
- ⚠️ Turn the ignition off, remove the key, and keep it away from the truck.
- ⚠️ Wait at least two minutes before disconnecting the battery so the vehicle’s modules can shut down.
- ⚠️ Disconnect the negative terminal first and reconnect it last.
- ⚠️ Never let a tool touch the positive terminal and metal bodywork simultaneously.
- ⚠️ Wear gloves and safety glasses. Batteries contain corrosive acid and can release explosive gas.
- ⚠️ Keep sparks, cigarettes, and open flames away from the battery.
- ⚠️ The battery weighs roughly 45-55 pounds. Lift it upright with both hands.
- ⚠️ Don’t tip the battery, even if it’s a sealed AGM design.
🔧 Required Tools
You'll need the following tools for this repair:
- 10mm socket
- 13mm socket
- 3/8-inch-drive ratchet
- 3/8-inch-drive 10-inch extension
- 3/8-inch-drive torque wrench rated 5-50 Nm
- Battery terminal cleaning brush
- Plastic trim removal tool
- Battery lifting strap rated 75 pounds minimum
- Heavy-duty nitrile gloves
- ANSI Z87.1 safety glasses
🔩 Required Parts
HowToo sells all the parts you need for this repair:
- H7/94R 12-volt replacement battery - Qty: 1
- Battery terminal protector washers - Qty: 1 pair
I’d put the Deka Intimidator AGM battery on the counter first. It’s an H7/94R battery with 800 CCA and the correct right-positive terminal layout. A battery is no place to save twelve bucks and revisit the job next winter.
📋 Before You Begin
- Park your Silverado on level ground, select Park, apply the parking brake, and open the hood.
- Lower a window before disconnecting power so you can still reach the interior if the doors lock.
- Switch off the headlights, climate control, radio, and all accessories.
- Let the truck sit with the ignition off for at least two minutes.
- Take a phone photo of the battery orientation and cable routing before removing anything.
- No battery registration or programming is normally required after a straightforward battery replacement.
🔨 Step-by-Step Instructions
Follow these steps in order:
Step 1: Locate and expose the battery
- Find the starting battery at the passenger-side rear area of the engine compartment.
- Use the plastic trim removal tool to release any battery cover clips, then lift off the cover.
- If an upper brace blocks battery removal, use the appropriate listed socket and ratchet to remove its retaining fasteners. Keep the fasteners arranged by position.
Step 2: Disconnect the negative cable
- Identify the negative terminal by the minus symbol and black cable.
- Use the 10mm socket and 3/8-inch-drive ratchet to loosen the negative terminal clamp nut.
- Twist the clamp gently and lift it straight off the battery post.
- Move the cable aside where it cannot spring back onto the post.
- Don’t remove the clamp nut completely.
Step 3: Disconnect the positive cable
- Open the red positive-terminal cover.
- Identify the positive terminal by the plus symbol and red covering.
- Use the 10mm socket and 3/8-inch-drive ratchet to loosen the positive terminal clamp nut.
- Lift the positive clamp straight off and secure it away from the post.
- Avoid pulling or lifting the cable by its attached fuse-block wiring.
Step 4: Remove the battery hold-down
- Locate the retaining block at the bottom edge of the battery tray.
- Use the 13mm socket, 10-inch extension, and 3/8-inch-drive ratchet to remove the hold-down bolt.
- Remove the retaining block and place both pieces somewhere they won’t fall into the engine compartment.
Step 5: Remove the old battery
- Check that both cables and the hold-down are completely clear.
- Attach the 75-pound battery lifting strap securely to the battery.
- Lift the battery straight upward with both hands, keeping it level.
- Set it upright on cardboard or in a plastic container.
- Lift with your legs, not your back.
Step 6: Clean and inspect the tray
- Inspect the battery tray for cracks, corrosion, loose hardware, and trapped debris.
- Use the battery terminal cleaning brush to clean the inside surfaces of both cable clamps.
- Stop if a cable terminal is cracked, badly thinned, or loose on its cable. Replace the damaged cable or terminal before installing the battery.
Step 7: Install the new battery
- Confirm the new battery matches the old battery’s dimensions, terminal positions, and case orientation.
- Use the 75-pound battery lifting strap to lower it straight into the tray.
- Position the positive and negative posts exactly where the original posts sat.
- Make sure the battery sits flat and no cable is trapped underneath it.
Step 8: Reinstall the hold-down
- Position the lower retaining block firmly against the battery case.
- Start the bolt by hand to prevent cross-threading.
- Use the 13mm socket, extension, and torque wrench to tighten the hold-down bolt to 25 Nm (18 ft-lbs).
- Push the battery firmly by hand. It shouldn’t slide, rock, or lift.
Step 9: Connect the positive terminal
- Install the red terminal-protector washer over the positive post if used.
- Push the positive clamp fully down onto the positive post.
- Use the 10mm socket and torque wrench to tighten the terminal clamp nut to 6 Nm (53 in-lbs).
- Close the red protective cover completely.
- Don’t overtighten the clamp. A distorted battery post can cause a leak.
Step 10: Connect the negative terminal
- Install the dark terminal-protector washer over the negative post if used.
- Push the negative clamp fully down onto the negative post.
- Use the 10mm socket and torque wrench to tighten the terminal clamp nut to 6 Nm (53 in-lbs).
- Check both clamps by hand. Neither should rotate on its post.
Step 11: Reinstall the covers and brace
- Reinstall the battery cover and engage every clip by hand.
- If an upper brace was removed, return it to its original position and start all fasteners by hand before tightening.
- Check that no battery cable is pinched or rubbing against a sharp metal edge.
✅ After Repair
- Start the engine and confirm that it cranks normally.
- Check that the charging-system warning light turns off after the engine starts.
- Set the clock and restore any personalized settings that were lost.
- Turn the steering wheel slowly from center to full left, then full right, and return it to center if a steering-related message appears.
- Drive normally for several trips while the truck relearns idle and charging behavior.
- Recycle the old battery at an automotive-parts store or battery recycler. Don’t place it in household trash.
💰 DIY vs Shop Cost
Shop Cost: $275-$475 (parts + labor)
DIY Cost: $200-$425 (parts only)
You Save: $75-$150 by doing it yourself!
Shop labor rates vary but typically run $100-$150/hour. This repair takes a shop approximately 0.3-0.5 hours.
🎯 Ready to get started?
HowToo makes it easy: same-day/2-day shipping on every part, plus all the tools and specialty tools you need! Check out the parts and tools sections below to add everything to your cart.