







How to Replace the Battery in a 2000-2023 Toyota Tundra (Engine: V8 5.7L)
Step-by-step DIY instructions with tools, parts, torque specs, and safety tips for 2000, 2001, 2002, 2003, 2004, 2022, 2023
How to Replace the Battery in a 2000-2023 Toyota Tundra (Engine: V8 5.7L)
Step-by-step DIY instructions with tools, parts, torque specs, and safety tips for 2000, 2001, 2002, 2003, 2004, 2022, 2023


🔧 Tundra - 12-Volt Battery Replacement
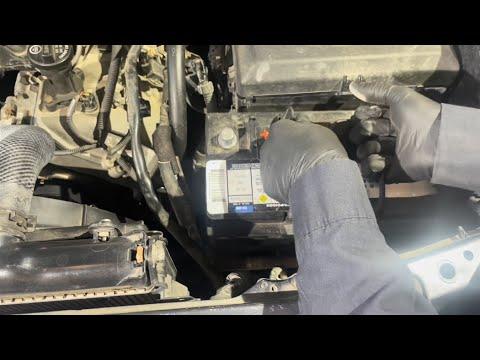
Replacing the battery requires disconnecting the cables, removing the hold-down bracket, and lifting the old battery from the engine compartment. Your Tundra does not require battery registration or programming after replacement.
Difficulty Level: Beginner | Estimated Time: 30-45 minutes
⚠️ Safety & Precautions
- 🧤 Wear gloves and safety glasses because battery acid can cause severe burns.
- 🔥 Keep sparks, cigarettes, and open flames away from the battery.
- ⚡ Disconnect the negative terminal first and reconnect it last to reduce short-circuit risk.
- 🔧 Never allow a tool to contact the positive terminal and vehicle metal simultaneously.
- 🏋️ The battery is heavy. Use its handle and lift with both hands.
- 🧪 If the battery is cracked, leaking, swollen, or frozen, do not handle or charge it.
🔧 Required Tools
You'll need the following tools for this repair:
- 10mm combination wrench
- 10mm socket
- 3/8-inch-drive ratchet
- 3/8-inch-drive torque wrench rated 3-30 Nm
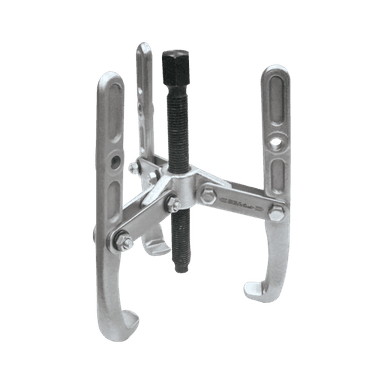
- Battery terminal puller (specialty)
- Battery terminal cleaning brush
- Plastic cleaning brush
- Shop towels
- Chemical-resistant gloves
- Safety glasses
🔩 Required Parts
HowToo sells all the parts you need for this repair:
- Group 27F 12-volt battery matched to original CCA rating - Qty: 1
- Battery terminal protectant - Qty: 1
- Battery corrosion cleaner - Qty: 1
📋 Before You Begin
- 🅿️ Park your Tundra on level ground, select Park, engage the parking brake, and switch off all electrical equipment.
- 🔑 Turn the ignition off and move the key or smart key away from the vehicle.
- ⏱️ Wait at least two minutes before disconnecting the battery so vehicle modules can shut down.
- 🪟 Lower the driver’s window before starting so you cannot accidentally lock yourself out.
- 📻 Save radio presets and note the clock setting if desired. A memory-saver device is not required.
- 🔋 Verify the replacement is a Group 27F battery with the positive and negative posts in the same positions as the original.
🔨 Step-by-Step Instructions
Follow these steps in order:
Step 1: Open the Hood and Locate the Battery
- Use the interior hood release, then release the secondary latch beneath the hood.
- Raise the hood fully and confirm it is securely supported.
- Locate the battery in the front corner of the engine compartment.
Step 2: Disconnect the Negative Terminal
- Identify the negative terminal by the minus symbol and black cable.
- Use a 10mm combination wrench to loosen the negative terminal clamp nut.
- Twist and lift the clamp from the battery post. If it is stuck, use the battery terminal puller; do not pry against the battery case.
- Position the cable where it cannot spring back onto the battery post.
- Negative always comes off first.
Step 3: Disconnect the Positive Terminal
- Open the red protective cover over the positive terminal.
- Use a 10mm combination wrench to loosen the positive terminal clamp nut.
- Lift the clamp straight off. Use the battery terminal puller if it cannot be removed by hand.
- Keep the positive clamp from touching metal parts.
Step 4: Remove the Battery Hold-Down
- The hold-down is the metal bracket that prevents the battery from moving.
- Use a 10mm socket and 3/8-inch-drive ratchet to loosen the hold-down fasteners.
- Remove the upper bracket and place its fasteners where they cannot fall into the engine compartment.
- Note the bracket and hook positions so they can be installed the same way.
Step 5: Remove the Old Battery
- Put on chemical-resistant gloves and safety glasses.
- Use the battery handle and lift the battery straight upward with both hands.
- Keep the battery upright. Do not tip it onto its side.
- Place it on a stable, acid-resistant surface.
Step 6: Clean and Inspect the Battery Area
- Use shop towels to remove loose dirt from the battery tray.
- If corrosion is present, apply battery corrosion cleaner and scrub it using the plastic cleaning brush.
- Use the battery terminal cleaning brush to clean the insides of both cable clamps.
- Inspect the tray, cables, and hold-down bracket for cracks, severe corrosion, or loose connections.
Step 7: Install the New Battery
- Confirm the positive and negative posts match the original battery orientation.
- Lift the new battery into the tray with both hands and seat it flat against the tray stops.
- Keep the terminal caps installed until the battery is positioned.
Step 8: Reinstall the Hold-Down Bracket
- Position the bracket over the battery and engage its hooks or fasteners in their original locations.
- Start the fasteners by hand to prevent crossed threads.
- Use the 10mm socket and 3/8-inch-drive torque wrench to tighten the hold-down fasteners evenly to 3.5 Nm (31 in-lbs).
- Confirm the battery cannot slide or rock, but do not overtighten and damage its case.
Step 9: Connect the Positive Terminal
- Remove the positive post cap and push the positive cable clamp fully down onto the post.
- Use the 10mm socket and 3/8-inch-drive torque wrench to tighten the terminal nut to 5.4 Nm (48 in-lbs).
- Apply a light coating of battery terminal protectant around the connected terminal.
- Close the red positive-terminal cover.
Step 10: Connect the Negative Terminal
- Remove the negative post cap and push the negative cable clamp fully down onto the post.
- Use the 10mm socket and 3/8-inch-drive torque wrench to tighten the terminal nut to 5.4 Nm (48 in-lbs).
- Apply a light coating of battery terminal protectant around the connected terminal.
- Gently twist both clamps by hand. Neither clamp should move.
✅ After Repair
- 🚗 Start the engine and confirm it cranks normally. Warning lights may briefly illuminate and should clear after startup or a short drive.
- 💡 Check the headlights, interior lights, radio, power locks, and climate controls.
- 🪟 If automatic window operation is lost, lower each affected window halfway. Then raise it fully and hold the switch up for approximately one second.
- 🕐 Reset the clock and restore radio presets if needed.
- 🛞 With the steering wheel centered, drive carefully for several minutes so steering and stability-control systems can relearn their reference values.
- 🔋 Recheck both terminal clamps and the hold-down after the first drive.
- ♻️ Return the old lead-acid battery to a battery retailer or authorized recycling facility. Do not place it in household waste.
💰 DIY vs Shop Cost
Shop Cost: ₹18,000-₹35,000 (battery + labor)
DIY Cost: ₹15,000-₹30,000 (battery only)
You Save: ₹500-₹5,000 by doing it yourself!
Battery pricing around Sonīpat varies considerably because Group 27F batteries may be imported. This repair takes a shop approximately 0.3-0.5 hour.
🎯 Ready to get started?
HowToo makes it easy: same-day/2-day shipping on every part, plus all the tools and specialty tools you need! Check out the parts and tools sections below to add everything to your cart.