

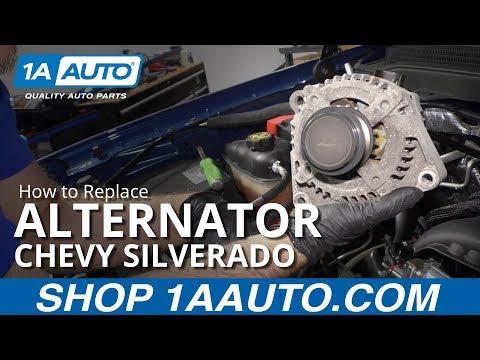




How to Replace the Alternator on a 2019 Chevrolet Silverado 1500 6.2L (Trim: High Country | Engine: V8 5.3L)
Step-by-step instructions with required tools, parts, torque specs, and safety tips for 2019
How to Replace the Alternator on a 2019 Chevrolet Silverado 1500 6.2L (Trim: High Country | Engine: V8 5.3L)
Step-by-step instructions with required tools, parts, torque specs, and safety tips for 2019


🔧 Silverado 1500 - Alternator Replacement
This is a manageable driveway repair if you’re comfortable removing the serpentine belt and handling a heavy electrical component. I’d use the listed 170-amp alternator only when the original unit’s label also says 170A. The catalog also shows a 150-amp configuration, and those versions shouldn’t be mixed.
Difficulty Level: Intermediate | Estimated Time: 1.5-2.5 hours
Assumption: These instructions cover the stock 6.2L charging-system layout. Compare connector shape, pulley, mounting ears, and amperage before installation.
⚠️ Safety & Precautions
- ⚡ Disconnect the negative battery cable before touching the alternator. Its output terminal can cause a severe short.
- 🧤 Let the engine cool completely before working around the belt, pulleys, and cooling system.
- 🔑 Keep the ignition off and the key away from the truck while the belt is removed.
- 🔋 Disconnect only the negative terminal unless battery removal becomes necessary.
- ⚠️ Never test an alternator by disconnecting the battery while the engine runs. That can damage control modules.
🔧 Required Tools
You’ll need the following tools for this repair:
- 10mm socket
- 13mm socket
- 15mm socket
- 8mm socket
- 3/8-inch drive ratchet
- 3/8-inch drive breaker bar
- 3/8-inch drive torque wrench
- 6-inch socket extension
- Flat-blade screwdriver
- Serpentine-belt tool (specialty)
- Digital multimeter
- Mechanic gloves
- Safety glasses
🔩 Required Parts
HowToo sells all the parts you need for this repair:
- 170-amp replacement alternator - Qty: 1, only when the original alternator is marked 170A
- Accessory drive belt - Qty: 1, if cracked, glazed, frayed, or contaminated
- Alternator terminal protective boot - Qty: 1, if the original is split or missing
- Alternator mounting bolts - Qty: As needed, only if damaged or badly corroded
The Quality-Built remanufactured alternator is my value pick for the 170-amp configuration. Check that amperage label before opening the box. Electrical parts have a special talent for looking correct right until the plug won’t fit.
📋 Before You Begin
- 🅿️ Park your Silverado on level ground, select Park, engage the parking brake, and open the hood.
- 📸 Photograph the belt routing before removing anything. Also locate the factory routing diagram under the hood.
- 🔍 Compare the replacement and original alternators for amperage, connector, pulley grooves, mounting ears, and output-terminal position.
- 🧠 No infotainment service mode, scan-tool command, or battery registration is normally required for alternator replacement.
- 🪟 With the engine off, leave the driver’s window open so an accidental lockout doesn’t slow the job.
🔨 Step-by-Step Instructions
Follow these steps in order:
Step 1: Disconnect the Battery
- Use a 10mm socket and ratchet to loosen the negative battery-terminal clamp.
- Lift the negative cable from the battery post and position it where it cannot spring back.
- Wait at least two minutes before disconnecting alternator wiring.
Step 2: Clear the Working Area
- Use an 8mm socket or flat-blade screwdriver to loosen the intake-duct clamps if the duct blocks access.
- Disconnect only the clips or hoses attached to that duct. Don’t pull on wiring.
- Remove the duct and cover the open intake tube with a clean cloth.
- Photograph every connector before unplugging it.
Step 3: Release the Serpentine Belt
- Confirm the belt-routing diagram or use your photograph before releasing tension.
- Fit a 15mm socket with a breaker bar or serpentine-belt tool onto the automatic tensioner.
- Rotate the tensioner slowly against spring pressure and slide the belt off the alternator pulley.
- Release the tensioner slowly. Don’t let it snap against its stop.
- Leave the belt routed around the remaining pulleys when possible.
Step 4: Disconnect the Alternator Wiring
- Release the small electrical connector’s lock and unplug it by holding the connector body, not the wires.
- Lift the protective boot from the large output terminal.
- Use a 13mm socket and ratchet to remove the output-cable retaining nut.
- Lift the cable from the stud and move it aside without sharply bending it.
Step 5: Remove the Original Alternator
- Support the alternator with one hand. It’s heavier than it looks.
- Use a 15mm socket, extension, and ratchet to remove the mounting bolts.
- Rock the alternator gently within its brackets and lift it from the engine.
- Don’t pry against plastic components, wiring, or coolant passages.
Step 6: Compare Both Alternators
- Place the original and replacement units side by side.
- Confirm the amperage marking, pulley diameter, groove count, mounting points, electrical connector, and terminal location match.
- Move any reusable bracket or protective cap only if the replacement instructions require it.
- Stop if the original is 150 amps and the replacement is 170 amps unless the replacement catalog explicitly approves that conversion.
Step 7: Install the Replacement Alternator
- Lower the alternator squarely into its mounting bracket.
- Start every mounting bolt by hand for several turns to prevent cross-threading.
- Use a 15mm socket and torque wrench to tighten the mounting bolts evenly.
- Torque the alternator mounting bolts to 50 Nm (37 ft-lbs).
Step 8: Reconnect the Alternator Wiring
- Place the output cable squarely over the threaded terminal.
- Start the retaining nut by hand, then tighten it using a 13mm socket and torque wrench.
- Torque the output-terminal nut to 15 Nm (11 ft-lbs).
- Do not overtighten it. Twisting the insulated terminal can ruin the new alternator.
- Cover the terminal completely with its protective boot.
- Push the small connector into place until its lock clicks.
Step 9: Reinstall the Serpentine Belt
- Inspect the belt for cracks, missing ribs, frayed edges, glazing, or oil contamination.
- Confirm the belt is correctly seated in every grooved pulley.
- Use the 15mm socket and serpentine-belt tool to rotate the tensioner.
- Slip the belt over the alternator pulley and release the tensioner slowly.
- Inspect every pulley again. One rib hanging off a pulley can quickly destroy the belt.
Step 10: Reassemble the Intake
- Remove the clean cloth from the intake opening.
- Reinstall the intake duct and reconnect every hose and clip.
- Use an 8mm socket or flat-blade screwdriver to tighten the clamps until secure without crushing the plastic duct.
Step 11: Reconnect the Battery
- Place the negative cable fully onto the battery post.
- Use a 10mm socket and torque wrench to tighten the terminal clamp.
- Torque the battery-terminal fastener to 5 Nm (44 in-lbs).
- Check that the clamp cannot rotate by hand. Don’t overtighten it.
✅ After Repair
- 👀 Before starting, verify that no tools remain near the belt or fan.
- 🚙 Start the engine and watch the belt from a safe distance. It should run centrally and smoothly.
- 💡 Confirm the charging-system warning light goes out.
- 🔌 Set a digital multimeter to DC volts and measure across the battery terminals. Charging voltage will vary because the Silverado uses computer-controlled charging, but it should respond when headlights and the blower are switched on.
- 👂 Shut the engine off immediately if the belt walks sideways, the alternator grinds, or wiring becomes hot.
- 🧾 Some remanufactured alternators require the original unit as a refundable core, so keep it and its packaging.
💰 DIY vs Shop Cost
Shop Cost: $550-$950 (parts + labor)
DIY Cost: $125-$350 (parts only)
You Save: $200-$600 by doing it yourself!
Local labor rates and imported-part pricing vary. This repair normally takes a shop approximately 1-2 hours.
🎯 Ready to get started?
HowToo makes it easy: same-day/2-day shipping on every part, plus all the tools and specialty tools you need! Check out the parts and tools sections below to add everything to your cart.