

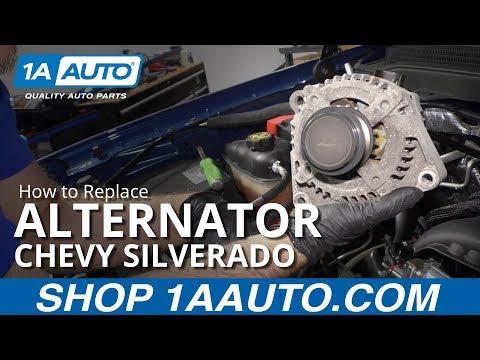




How to Replace the Alternator on a 2019 Chevrolet Silverado 1500 5.3L (Trim: LT | Engine: V8 5.3L)
Step-by-step 170-amp alternator installation with tools, torque specs, and safety tips for 2019
How to Replace the Alternator on a 2019 Chevrolet Silverado 1500 5.3L (Trim: LT | Engine: V8 5.3L)
Step-by-step 170-amp alternator installation with tools, torque specs, and safety tips for 2019


🔧 Silverado 1500 - Alternator Replacement
Replace the alternator if testing confirms low, unstable, or no charging output. The job is approachable from the top of the engine bay, but disconnecting the battery before touching the alternator cable is mandatory.
The listed replacement is for the 170-amp alternator. Match that rating to the original alternator label before installation. Electrical parts are fussy about details, and smoke is a terrible diagnostic tool.
Difficulty Level: Intermediate | Estimated Time: 1-2 hours
Assumption: The torque values below apply to the stock 5.3L alternator installation. Stop and verify if the original fasteners or wiring have been modified.
⚠️ Safety & Precautions
- ⚡ Disconnect the negative battery cable before touching the alternator or its wiring.
- 🧤 Let the engine cool completely before working near the belt and pulleys.
- 🔑 Keep the ignition off and remove the key from the work area.
- 👕 Keep sleeves, hair, tools, and fingers away from the belt whenever the engine is running.
- 🔌 Never allow a tool to bridge the alternator output terminal to metal.
- 🛑 Do not disconnect a battery cable with the engine running. That can damage electronic modules.
🔧 Required Tools
You'll need the following tools for this repair:
- 8mm socket
- 10mm socket
- 13mm socket
- 15mm socket
- 3/8-inch drive ratchet
- 3/8-inch drive torque wrench rated 10-80 ft-lbs
- 3/8-inch drive 6-inch extension
- 15mm serpentine-belt tool (specialty)
- Small flat-blade screwdriver
- Digital multimeter rated 20 volts DC
- Mechanic gloves
- Safety glasses
🔩 Required Parts
HowToo sells all the parts you need for this repair:
- Quality-Built remanufactured 170-amp alternator - Qty: 1
- Accessory drive belt - Qty: 1 if cracked, glazed, frayed, or contaminated
- Alternator mounting bolts - Qty: As needed if damaged or badly corroded
- Alternator terminal protective boot - Qty: 1 if torn or missing
📋 Before You Begin
- 🅿️ Park your Silverado on level ground, shift into Park, apply the parking brake, and open the hood.
- 🌡️ Allow the engine to cool before reaching between the radiator and engine.
- 📷 Photograph the accessory-belt routing before removing the belt.
- 🔋 Let the vehicle sit with the ignition off for at least two minutes before disconnecting the battery.
- ⚙️ No infotainment service mode, scan-tool command, battery registration, or alternator programming is normally required for a stock replacement.
🔨 Step-by-Step Instructions
Follow these steps in order:
Step 1: Disconnect the Battery
- Put on the mechanic gloves and safety glasses.
- Use a 10mm socket and 3/8-inch drive ratchet to loosen the negative battery-terminal clamp.
- Lift the negative cable from the battery post and position it where it cannot spring back into contact.
- Wait at least two minutes before disconnecting alternator wiring.
Step 2: Create Working Room
- Inspect the intake duct and engine cover around the alternator.
- If the intake duct blocks access, use an 8mm socket to loosen its clamps.
- Release any plastic retaining clips with a small flat-blade screwdriver, then move the duct aside.
- Do not unplug sensors unless access requires it. If disconnected, press the lock before pulling the connector.
Step 3: Record the Belt Routing
- Use your phone to photograph the belt around every pulley.
- Check the belt-routing diagram under the hood if one is present.
- Inspect the belt for exposed cords, missing ribs, deep cracks, shiny glazing, or oil contamination.
- A photo beats guessing during reassembly.
Step 4: Release the Accessory Belt
- Fit the 15mm serpentine-belt tool onto the automatic tensioner bolt.
- Rotate the tensioner slowly against spring pressure until the belt becomes loose.
- Slip the belt off the alternator pulley with your free hand.
- Slowly return the tensioner to its resting position. Do not let it snap back.
- Leave the belt routed around the lower pulleys if it will be reused.
Step 5: Disconnect the Alternator Wiring
- Press the locking tab and unplug the small alternator control connector by holding its plastic body.
- Do not pull on the wires.
- Lift the protective rubber boot from the large output terminal.
- Use a 13mm socket and 3/8-inch drive ratchet to remove the output-terminal nut.
- Lift the cable eyelet from the terminal and position it away from the alternator.
Step 6: Remove the Alternator
- Support the alternator with one hand.
- Use a 15mm socket, 6-inch extension, and 3/8-inch drive ratchet to remove the alternator mounting bolts.
- Keep the bolts arranged by position if their lengths differ.
- Rock the alternator gently to release it from the mounting bracket.
- Lift it straight out without striking the radiator, wiring, or coolant hoses.
Step 7: Compare the Alternators
- Place the old and replacement alternators side by side.
- Confirm the mounting ears, electrical connector, output stud, pulley grooves, and pulley offset match.
- Confirm the replacement is rated for the Silverado's 170-amp charging system.
- Turn the replacement pulley by hand. It should rotate smoothly without grinding or wobbling.
- Transfer only brackets or shields designed to be reused. Do not swap pulleys.
Step 8: Install the Replacement Alternator
- Lower the replacement alternator squarely into its mounting bracket.
- Start every mounting bolt by hand for several turns to prevent cross-threading.
- Use a 15mm socket and 3/8-inch drive ratchet to seat the bolts evenly.
- Use the 3/8-inch drive torque wrench to tighten the alternator mounting bolts to 50 Nm (37 ft-lbs).
Step 9: Reconnect the Alternator Wiring
- Place the output-cable eyelet flat against the alternator output terminal.
- Install the terminal nut by hand.
- Use a 13mm socket and 3/8-inch drive torque wrench to tighten the output-terminal nut to 9 Nm (80 in-lbs).
- Do not overtighten the nut. The insulated terminal can crack or rotate inside the alternator.
- Cover the terminal completely with the protective rubber boot.
- Push the control connector into place until its lock clicks.
Step 10: Reinstall the Accessory Belt
- Route the belt according to your photograph or the underhood diagram.
- Make sure every rib sits inside the matching pulley grooves.
- Use the 15mm serpentine-belt tool to rotate the tensioner.
- Slip the belt over the alternator pulley, then release the tensioner slowly.
- Inspect every pulley again. A belt sitting one groove off can be destroyed within minutes.
Step 11: Reinstall Removed Components
- Reinstall the intake duct and any engine cover removed for access.
- Use the 8mm socket and 3/8-inch drive ratchet to snug the intake clamps securely.
- Reconnect any sensor connector removed earlier and confirm its lock engages.
- Remove all tools and loose hardware from the engine compartment.
Step 12: Reconnect the Battery
- Place the negative cable clamp fully onto the battery post.
- Use a 10mm socket and 3/8-inch drive ratchet to tighten the clamp until secure.
- Do not overtighten or distort the battery terminal.
- Confirm the cable cannot rotate by hand.
✅ After Repair
- 👀 Before starting, inspect the belt one final time and verify the alternator cable boot covers the live terminal.
- 🚙 Start the engine and watch the belt from a safe distance. It should track smoothly without flapping or walking sideways.
- 🔊 Shut the engine off immediately if you hear grinding, squealing, or repeated knocking.
- ⚡ Set the digital multimeter to DC volts and measure across the battery terminals with the engine running.
- 📈 A typical charging reading is approximately 13.5-14.8 volts, although battery condition, temperature, and computer-controlled charging can change the reading.
- 💡 Confirm the battery or charging-system warning stays off.
- 🔍 Switch on the headlights and blower motor, then verify the voltage remains stable and the belt stays quiet.
- 🧾 Return the old alternator if the replacement purchase includes a refundable core charge.
💰 DIY vs Shop Cost
Shop Cost: $450-$800 (parts + labor)
DIY Cost: $125-$300 (parts only)
You Save: $250-$500 by doing it yourself!
Shop labor rates vary but typically run $100-$150/hour. This repair takes a shop approximately 1-1.5 hours.
🎯 Ready to get started?
HowToo makes it easy: same-day/2-day shipping on every part, plus all the tools and specialty tools you need! Check out the parts and tools sections below to add everything to your cart.