

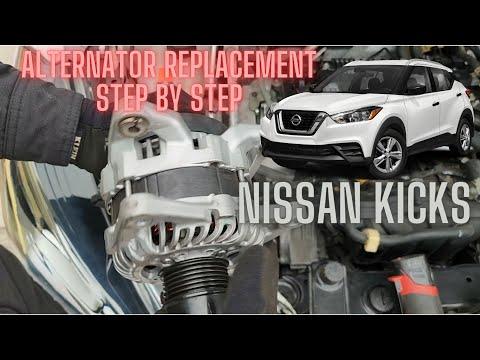



How to Replace the Alternator on a 2018-2023 Nissan Kicks (Engine: Inline 4 1.6L)
Step-by-step DIY guide with tools, parts, torque specs, safety tips, and charging voltage checks for 2018, 2019, 2020, 2021, 2022, 2023
How to Replace the Alternator on a 2018-2023 Nissan Kicks (Engine: Inline 4 1.6L)
Step-by-step DIY guide with tools, parts, torque specs, safety tips, and charging voltage checks for 2018, 2019, 2020, 2021, 2022, 2023


🔧 Kicks - Alternator Replacement
Replacing the alternator on your Kicks restores proper battery charging and prevents stalling, dim lights, and repeated dead-battery problems. The alternator is driven by the serpentine belt, so you will remove belt tension, disconnect the electrical wiring, unbolt the alternator, and install the new unit.
Difficulty Level: Intermediate | Estimated Time: 2-3 hours
⚠️ Safety & Precautions
- ⚠️ Disconnect the negative battery cable before touching the alternator wiring to prevent sparks or short circuits.
- ⚠️ Let the engine cool fully before working near the exhaust side and belt area.
- ⚠️ Keep fingers, sleeves, and tools away from the belt and pulleys.
- ⚠️ Support the Kicks securely on jack stands if you raise the front end. Never rely on a floor jack alone.
- ⚠️ The alternator output wire is a high-current cable. Do not let it touch metal while connected to the battery.
🔧 Required Tools
You'll need the following tools for this repair:
- 10mm socket
- 12mm socket
- 13mm socket
- 14mm socket
- 17mm socket
- 3/8-inch drive ratchet
- 3/8-inch drive breaker bar
- 3/8-inch drive extension set
- Serpentine belt tool (specialty)
- Flat-blade screwdriver
- Trim clip removal tool
- Torque wrench, 5-80 Nm range
- Floor jack (rated 2-ton minimum)
- Jack stands (rated 2-ton minimum)
- Wheel chocks
- Battery terminal brush
- Digital multimeter
- Mechanic gloves
- Safety glasses
🔩 Required Parts
HowToo sells all the parts you need for this repair:
- Alternator - Qty: 1
- Serpentine drive belt - Qty: 1
- Alternator output terminal nut - Qty: 1
- Battery terminal protectant - Qty: 1
📋 Before You Begin
- Park your Kicks on level ground, shift to Park, and set the parking brake.
- Open the hood and let the engine cool completely.
- Use wheel chocks behind the rear wheels before raising the front.
- Use a 10mm socket to disconnect the negative battery cable first. Move it aside so it cannot spring back onto the battery post.
- A serpentine belt tool is a long, thin wrench used to move the belt tensioner where a normal ratchet has limited space.
- Take a photo of the belt routing before removing the belt. This helps you reinstall it correctly.
🔨 Step-by-Step Instructions
Follow these steps in order:
Step 1: Disconnect Battery Power
- Put on safety glasses and mechanic gloves.
- Use a 10mm socket to loosen the negative battery terminal clamp.
- Lift the negative cable off the battery post and tuck it away from the battery.
- If the terminal is dirty, clean it with a battery terminal brush.
- When reinstalling later, tighten the battery terminal nut to 5.4 Nm (48 in-lbs).
Step 2: Raise and Secure the Front
- Use a floor jack to raise the front of your Kicks at the front center jacking point.
- Place jack stands under the proper front support points.
- Lower the vehicle gently onto the jack stands.
- Shake the vehicle lightly by hand to confirm it is stable before working underneath.
Step 3: Remove the Lower Splash Shield
- Use a trim clip removal tool to remove the plastic push clips from the lower engine splash shield.
- Use a 10mm socket to remove any splash shield bolts.
- Set the shield and clips aside in order.
- Tip: Use a small tray for clips.
Step 4: Relieve Serpentine Belt Tension
- Locate the automatic belt tensioner near the front of the engine.
- The belt tensioner is a spring-loaded pulley that keeps the drive belt tight.
- Use a serpentine belt tool or 3/8-inch drive breaker bar on the tensioner fitting.
- Rotate the tensioner slowly to release belt tension.
- Slide the belt off the alternator pulley with your free hand.
- Slowly release the tensioner back to its resting position.
Step 5: Remove the Serpentine Belt
- Use your hand to remove the belt from the remaining pulleys.
- Compare the old belt to the new belt for length and rib count before installation.
- If reusing the old belt temporarily, mark the rotation direction with a marker before removal.
- Tip: Replace the belt while access is open.
Step 6: Disconnect Alternator Wiring
- From the alternator, press the locking tab on the small electrical connector and unplug it by hand.
- Use a flat-blade screwdriver gently only if the connector tab is stuck. Do not pry on the wires.
- Pull back the rubber cover from the large alternator output terminal.
- Use a 12mm or 13mm socket to remove the output terminal nut, depending on the replacement alternator terminal hardware.
- Move the cable away from the alternator and keep it from touching metal.
- During reassembly, tighten the alternator output terminal nut to 8-10 Nm (71-89 in-lbs).
Step 7: Remove Alternator Mounting Bolts
- Support the alternator with one hand so it does not drop when the last bolt comes out.
- Use a 14mm socket, extension, and ratchet to loosen the upper alternator mounting bolt.
- Use a 14mm socket and ratchet to loosen the lower alternator mounting bolt.
- Remove both bolts completely and keep them organized.
- During reassembly, tighten the alternator mounting bolts to 44 Nm (32 ft-lbs).
Step 8: Remove the Alternator
- Wiggle the alternator by hand to free it from the mounting bracket.
- If it is stuck, use a flat-blade screwdriver carefully between the bracket and alternator ear.
- Do not pry against plastic housings or wiring.
- Lift the alternator out through the easiest opening from above or below, depending on clearance.
Step 9: Compare the Old and New Alternator
- Place both alternators side by side on a clean surface.
- Confirm the pulley style, mounting ears, electrical connector, and output terminal location match.
- Use a 17mm socket only if a pulley transfer is required by the replacement unit.
- If the pulley does not match, do not install it until the correct alternator is obtained.
Step 10: Install the New Alternator
- Position the new alternator into the mounting bracket by hand.
- Start the upper and lower mounting bolts by hand first to avoid cross-threading.
- Use a 14mm socket and ratchet to snug both bolts evenly.
- Use a torque wrench and 14mm socket to tighten the mounting bolts to 44 Nm (32 ft-lbs).
Step 11: Reconnect Alternator Wiring
- Push the small electrical connector into the alternator until it clicks.
- Install the large output cable onto the alternator stud by hand.
- Use a 12mm or 13mm socket and torque wrench to tighten the output terminal nut to 8-10 Nm (71-89 in-lbs).
- Reinstall the rubber protective cover fully over the terminal.
Step 12: Install the Serpentine Belt
- Route the belt around the crankshaft pulley and other pulleys using your photo as a guide.
- Leave the alternator pulley for last because it is easy to reach.
- Use the serpentine belt tool or 3/8-inch drive breaker bar to rotate the tensioner.
- Slide the belt over the alternator pulley by hand.
- Slowly release the tensioner.
- Check that the belt ribs sit fully in every pulley groove.
- Tip: One missed rib can shred a belt.
Step 13: Reinstall the Splash Shield
- Lift the lower splash shield into position by hand.
- Use a trim clip removal tool or your fingers to reinstall the plastic push clips.
- Use a 10mm socket to reinstall the splash shield bolts.
- Tighten the small splash shield bolts snugly to 5-7 Nm (44-62 in-lbs).
Step 14: Lower the Vehicle and Reconnect the Battery
- Use the floor jack to raise the front slightly off the jack stands.
- Remove the jack stands.
- Lower your Kicks fully to the ground.
- Reconnect the negative battery cable.
- Use a 10mm socket and torque wrench to tighten the terminal nut to 5.4 Nm (48 in-lbs).
Step 15: Verify Charging Voltage
- Set a digital multimeter to DC volts.
- Touch the red probe to the positive battery post and the black probe to the negative battery post.
- With the engine off, a charged battery should read about 12.4-12.7 volts.
- Start the engine and check again with the digital multimeter.
- With the engine running, normal charging voltage should be about 13.5-14.8 volts.
✅ After Repair
- Start the engine and listen for belt squeal, grinding, or clicking.
- Turn on headlights, blower fan, and rear defogger, then confirm the engine continues to idle normally.
- Check that the battery warning light turns off after startup.
- Inspect the belt again while the engine is off to confirm it is centered on all pulleys.
- Reset the clock, radio presets, and one-touch window function if needed after battery disconnect.
- If the battery warning light stays on, stop and recheck the alternator connector, output cable, belt routing, and battery terminal tightness.
💰 DIY vs Shop Cost
Shop Cost: $550-$850 (parts + labor)
DIY Cost: $220-$450 (parts only)
You Save: $300-$500 by doing it yourself!
Shop labor rates vary but typically run $100-$150/hour. This repair takes a shop approximately 1.5-2.5 hours.
🎯 Ready to get started?
HowToo makes it easy: same-day/2-day shipping on every part, plus all the tools and specialty tools you need! Check out the parts and tools sections below to add everything to your cart.