

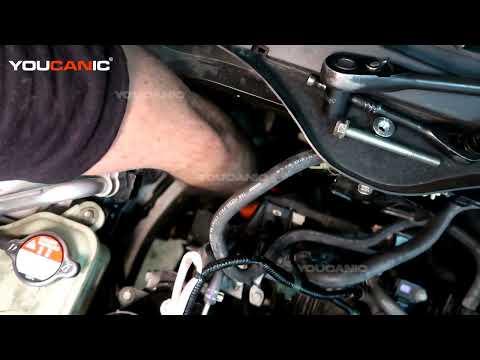



How to Replace the Alternator on a 2017-2023 Honda Civic 1.5L Turbo (Trim: Si | Engine: Inline 4 1.5L | Body: Sedan)
Advanced step-by-step DIY guide with required tools, parts, torque specs, and safety tips for 2017, 2018, 2019, 2020, 2021
How to Replace the Alternator on a 2017-2023 Honda Civic 1.5L Turbo (Trim: Si | Engine: Inline 4 1.5L | Body: Sedan)
Advanced step-by-step DIY guide with required tools, parts, torque specs, and safety tips for 2017, 2018, 2019, 2020, 2021


🔧 Civic - Alternator Replacement
This is an advanced DIY job on your Civic. Honda’s procedure requires removing the engine undercover, accessory belt, front exhaust pipe, and lower torque rod, then lowering the alternator between the subframe and intermediate shaft. This one isn’t a simple top-of-engine swap. civicx.com
Difficulty Level: Advanced | Estimated Time: 4-6 hours
Assumption: These instructions follow the factory-style 1.5L turbo access route. Exhaust and torque-rod hardware can vary, so verify their illustrated torque values before final tightening.
⚠️ Safety & Precautions
- ⚠️ Disconnect the negative battery terminal before touching the alternator cable. That cable remains live otherwise.
- ⚠️ Let the engine and exhaust cool completely before starting.
- ⚠️ Support your Civic only at approved lift points with jack stands. Never work under a hydraulic jack alone.
- ⚠️ Wear safety glasses. Rust and dirt will fall while the exhaust and undercover are removed.
- ⚠️ Support the exhaust before removing its fasteners.
- ⚠️ Do not force the hydraulic belt tensioner. Move it slowly for at least three seconds. civicx.com
🔧 Required Tools
You'll need the following tools for this repair:
- 10mm socket
- 12mm socket
- 14mm socket
- 17mm socket
- 19mm socket
- 3/8-inch drive ratchet
- 1/2-inch drive breaker bar
- Metric combination wrench set, 10-19mm
- Metric deep socket set, 10-19mm
- 6-inch and 12-inch socket extensions
- Serpentine belt tool, long-reach (specialty)
- 6 x 45mm steel locking pin
- 5-75 ft-lb torque wrench
- 20-150 ft-lb torque wrench
- Trim-clip removal tool
- Oxygen-sensor socket, 22mm
- Penetrating oil
- Floor jack, rated 2-ton minimum
- Jack stands, rated 2-ton minimum
- Wheel chocks
- Exhaust support stand
- Digital multimeter
- Mechanic gloves
- Safety glasses
🔩 Required Parts
HowToo sells all the parts you need for this repair:
- Replacement alternator - Qty: 1
- Accessory drive belt - Qty: 1 if cracked, glazed, contaminated, or worn
- Front exhaust-pipe gasket set - Qty: 1
- Self-locking exhaust nuts - Qty: As removed
I’d favor a new alternator over the cheapest remanufactured unit when the budget allows. Repeating this much labor because a bargain rebuild failed is nobody’s idea of character building.
📋 Before You Begin
- Park on level concrete, select first gear, apply the parking brake, and chock both rear wheels.
- Switch the ignition off and keep the key away from the car.
- Allow the engine and exhaust to become completely cold.
- Photograph the accessory-belt routing before removing it.
- Spray penetrating oil on the cold exhaust fasteners and allow it to soak.
- Confirm the replacement alternator has matching mounting ears, connector, terminal position, and pulley grooves.
- No battery registration or alternator programming is normally required after replacement.
🔨 Step-by-Step Instructions
Follow these steps in order:
Step 1: Disconnect the battery
- Open the hood and use a 10mm socket to loosen the negative battery-terminal clamp.
- Lift the negative cable off and isolate it so it cannot spring back onto the battery post.
- Wait at least three minutes before handling charging-system wiring.
Step 2: Raise and support the vehicle
- Use the floor jack at an approved lifting point and place the Civic securely on jack stands.
- Give the vehicle a controlled stability check before going underneath.
- Use the appropriate socket and breaker bar to remove the right-front wheel if additional belt access is needed.
- When reinstalling the wheel, torque the wheel nuts to 108 Nm (80 ft-lbs).
Step 3: Remove the engine undercover
- Use the trim-clip removal tool and appropriate socket to remove the plastic clips and bolts.
- Keep different clips and bolts separated so they return to their original holes.
- Lower the undercover and place it out of the work area.
Step 4: Remove the accessory drive belt
- Check your routing photograph before moving anything.
- Use the long-reach serpentine belt tool on the automatic tensioner.
- Move the hydraulic tensioner slowly over at least three seconds. Align its locking holes and insert the 6 x 45mm steel pin. civicx.com
- Slip the belt off one smooth pulley, then remove it from the remaining pulleys.
- Inspect every rib for cracks, missing rubber, fraying, glazing, and oil contamination.
- Photograph the routing twice. Belts enjoy practical jokes.
Step 5: Remove the front exhaust pipe
- Support the pipe with the exhaust support stand.
- Disconnect any oxygen-sensor connector that prevents the pipe from lowering. Use the 22mm oxygen-sensor socket only if sensor removal is necessary.
- Use the correct metric socket, extensions, and breaker bar to remove the front-pipe fasteners.
- Lower the pipe carefully without pulling on sensor wiring or flex sections.
- Discard compressed exhaust gaskets and one-time-use self-locking nuts.
- Do not guess the exhaust-fastener torque. Confirm the values supplied with the gasket or current Honda service information before final assembly.
Step 6: Remove the lower torque rod
- Use the floor jack with a broad wood block to lightly support the powertrain. Do not lift the engine by the oil pan.
- Use the appropriate metric socket and breaker bar to remove the lower torque-rod bolts.
- Mark the rod’s direction before removing it.
- Store its bolts separately because different positions may use different lengths.
Step 7: Disconnect the alternator wiring
- Remove the protective rubber cap from the alternator output terminal.
- Use the appropriate socket to remove the output-cable nut, then lift the cable straight off the stud.
- Press the release tab and unplug the alternator control connector. Pull on the connector body, not its wires.
- Move the wiring aside without sharply bending the heavy output cable.
Step 8: Remove the alternator
- Support the alternator with one hand while using the appropriate sockets and extensions to remove its mounting bolts.
- Note each bolt’s location and length during removal.
- Work the alternator downward through the opening between the front subframe and intermediate shaft, as specified by the factory procedure. civicx.com
- Do not pry against the axle boot, wiring, or aluminum engine castings.
Step 9: Compare the replacement unit
- Place both alternators side by side.
- Confirm the mounting ears, electrical connector, output stud, pulley diameter, pulley offset, and rib count match.
- Turn the replacement pulley by hand. It should rotate smoothly without scraping or excessive play.
- Transfer only external wiring retainers specifically required by the replacement unit.
Step 10: Install and tighten the alternator
- Guide the replacement alternator upward through the same subframe opening.
- Start every mounting bolt by hand before tightening any bolt fully.
- Use the torque wrench to tighten the two upper alternator bolts to 24 Nm (18 ft-lbs).
- Tighten the lower alternator bolt to 37 Nm (27 ft-lbs). civicx.com
- Install the alternator cable and cable support. Tighten the illustrated cable-support fastener to 12 Nm (9 ft-lbs). civicx.com
- Reconnect the control connector until its lock clicks, then reinstall the output-terminal protective cap.
Step 11: Reinstall the torque rod and exhaust
- Install the torque rod in its original direction and start all bolts by hand.
- Tighten the torque-rod fasteners only to the current Honda values for their exact positions.
- Fit new exhaust gaskets and new self-locking nuts.
- Raise the exhaust with the exhaust support stand, start every fastener by hand, and align the system without forcing it sideways.
- Tighten the exhaust fasteners evenly to their application-specific specifications.
- Reconnect every oxygen-sensor connector and confirm its wiring cannot touch the exhaust.
Step 12: Reinstall the drive belt
- Route the belt around every pulley using your photograph, leaving one smooth pulley until last.
- Use the serpentine belt tool to move the tensioner slowly, remove the locking pin, and release the tensioner gently.
- Check every grooved pulley. Every belt rib must sit fully inside a matching pulley groove.
- Confirm the belt is centered before starting the engine.
Step 13: Reassemble and reconnect the battery
- Reinstall the engine undercover using the trim-clip removal tool and appropriate socket.
- Reinstall the wheel if removed and tighten the nuts in a crisscross pattern to 108 Nm (80 ft-lbs).
- Lower the Civic completely.
- Reconnect the negative battery terminal with the 10mm socket. Tighten it securely without crushing the clamp.
✅ After Repair
- Inspect the engine bay and underneath the Civic for tools, loose wiring, and unused fasteners before starting.
- Start the engine and watch the belt for one minute. Shut it off immediately if the belt walks sideways, squeals continuously, or appears misaligned.
- Listen for an exhaust leak near every disturbed joint.
- Use the digital multimeter across the battery terminals. Check charging voltage with the engine running, then repeat with headlights and blower switched on.
- Do not condemn the new alternator from one voltage number alone. Honda’s computer-controlled charging output varies with battery condition and electrical demand.
- Reset the clock and window auto-up function if either lost its memory.
- After a short drive, recheck for exhaust leaks, warning lights, abnormal belt noise, and loose undercover hardware.
💰 DIY vs Shop Cost
Shop Cost: Approximately ₹40,000-₹75,000, depending on alternator brand and local labor
DIY Cost: Approximately ₹20,000-₹40,000 for the alternator, belt, gaskets, and hardware
You Save: Approximately ₹15,000-₹35,000 by doing it yourself!
Labor varies by region. This repair commonly takes a properly equipped shop approximately 3-5 hours.
🎯 Ready to get started?
HowToo makes it easy: same-day/2-day shipping on every part, plus all the tools and specialty tools you need! Check out the parts and tools sections below to add everything to your cart.