

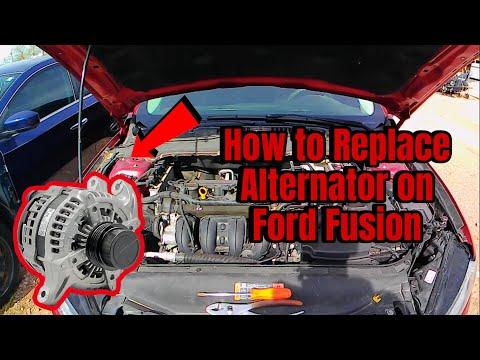




How to Replace the Alternator on a 2017-2020 Ford Fusion (Engine: Inline 4 2.0L)
Step-by-step DIY guide with tools, parts, torque specs, safety tips, and charging test for 2017, 2018, 2019, 2020
How to Replace the Alternator on a 2017-2020 Ford Fusion (Engine: Inline 4 2.0L)
Step-by-step DIY guide with tools, parts, torque specs, safety tips, and charging test for 2017, 2018, 2019, 2020


🔧 Fusion - Alternator Replacement
Replacing the alternator on your Fusion means removing the drive belt, disconnecting the electrical connections, unbolting the alternator, and installing the new unit. The alternator charges the battery and powers the vehicle’s electrical system while the engine is running.
Difficulty Level: Intermediate | Estimated Time: 2-3 hours
⚠️ Safety & Precautions
- ⚠️ Disconnect the negative battery cable before touching the alternator wiring.
- ⚠️ The alternator main cable is always connected to battery power, so never work on it with the battery connected.
- ⚠️ Let the engine cool completely before working near the turbocharger, exhaust, or radiator area.
- ⚠️ Support the Fusion securely with jack stands if you raise the front of the vehicle. Never rely on a floor jack alone.
- ⚠️ Keep fingers clear of the belt tensioner. It is spring-loaded and can snap back quickly.
🔧 Required Tools
You'll need the following tools for this repair:
- 8mm socket
- 10mm socket
- 13mm socket
- 15mm socket
- 3/8-inch drive ratchet
- 1/2-inch drive ratchet
- Serpentine belt tool (specialty)
- Torque wrench 5-80 ft-lb
- Flat-blade screwdriver
- Trim clip removal tool
- Needle-nose pliers
- Floor jack rated 2-ton minimum
- Jack stands rated 2-ton minimum
- Wheel chocks
- Battery terminal brush
- Digital multimeter
- Safety glasses
- Mechanic gloves
🔩 Required Parts
HowToo sells all the parts you need for this repair:
- Alternator - Qty: 1
- Serpentine belt - Qty: 1
- Alternator main terminal nut - Qty: 1
- Battery terminal protectant - Qty: 1
📋 Before You Begin
- 🚗 Park your Fusion on level ground and set the parking brake.
- 🧊 Let the engine cool for at least 30-45 minutes.
- 🔋 Turn the ignition off and remove the key or keep the smart key away from the vehicle.
- 🧠 A belt tensioner is a spring-loaded pulley that keeps the serpentine belt tight. You will rotate it to loosen the belt.
- 📸 Take a photo of the belt routing before removing it. This helps you reinstall the belt correctly.
- ⚠️ Battery registration is not required for alternator replacement on your Fusion, but charging voltage should be tested afterward.
🔨 Step-by-Step Instructions
Follow these steps in order:
Step 1: Disconnect the Battery
- Use a 10mm socket to loosen the negative battery terminal clamp.
- Lift the negative cable off the battery post and tuck it aside so it cannot spring back.
- Use a battery terminal brush to clean the terminal if corrosion is present.
- Always disconnect negative first.
Step 2: Raise and Support the Front
- Place wheel chocks behind the rear wheels.
- Use a floor jack rated 2-ton minimum to raise the front of the Fusion at the front center jacking point.
- Place jack stands rated 2-ton minimum under the front pinch welds or approved support points.
- Gently lower the vehicle onto the jack stands and shake the vehicle lightly to verify it is stable.
Step 3: Remove the Lower Splash Shield
- Use an 8mm socket to remove the lower splash shield screws.
- Use a trim clip removal tool to remove any plastic push clips.
- Set the shield and fasteners aside in order.
- Keep clips grouped by location.
Step 4: Remove the Serpentine Belt
- Locate the belt tensioner on the front of the engine.
- Use a serpentine belt tool or 1/2-inch drive ratchet on the tensioner.
- Rotate the tensioner to release belt tension.
- Slide the belt off the alternator pulley first, then slowly release the tensioner.
- Remove the belt from the remaining pulleys.
- Inspect the belt. If it has cracks, glazing, frayed ribs, or oil contamination, replace it.
Step 5: Disconnect the Alternator Electrical Connectors
- Use a flat-blade screwdriver or needle-nose pliers to carefully release the small alternator electrical connector lock.
- Unplug the small connector by pulling on the connector body, not the wires.
- Lift the protective rubber boot from the alternator main battery cable stud.
- Use a 13mm socket to remove the alternator main terminal nut.
- Remove the battery cable from the alternator stud and move it aside.
Step 6: Remove the Alternator Mounting Bolts
- Support the alternator with one hand so it does not drop when the last bolt comes out.
- Use a 13mm socket or 15mm socket to remove the alternator mounting bolts, depending on bolt position.
- Work slowly around nearby hoses and wiring.
- Lift the alternator out through the available opening.
- If it feels stuck, gently wiggle it by hand. Do not pry against plastic parts or coolant hoses.
Step 7: Compare the Old and New Alternator
- Set both alternators side by side on a clean surface.
- Check that the pulley, mounting ears, electrical connector, and battery cable stud are in the same positions.
- Use a 10mm socket only if a small bracket or wire guide must be transferred from the old alternator to the new one.
- Match before installing.
Step 8: Install the New Alternator
- Place the new alternator into position by hand.
- Start all mounting bolts by hand first to avoid cross-threading.
- Use a 13mm socket or 15mm socket to snug the mounting bolts evenly.
- Use a torque wrench 5-80 ft-lb to tighten the alternator mounting bolts to Torque to 48 Nm (35 ft-lbs).
Step 9: Reconnect the Alternator Wiring
- Install the main battery cable onto the alternator output stud.
- Use a 13mm socket and torque wrench 5-80 ft-lb to tighten the terminal nut to Torque to 12 Nm (106 in-lbs).
- Push the rubber protective boot fully back over the terminal.
- Plug in the small alternator connector until it clicks.
- Gently tug the connector to confirm it is locked.
Step 10: Reinstall the Serpentine Belt
- Route the serpentine belt around all pulleys except the alternator pulley.
- Use the photo you took earlier to confirm the belt path.
- Use a serpentine belt tool or 1/2-inch drive ratchet to rotate the belt tensioner.
- Slide the belt over the alternator pulley.
- Slowly release the tensioner.
- Check that the belt ribs sit fully in every pulley groove.
- One missed groove can shred the belt.
Step 11: Reinstall the Lower Splash Shield
- Raise the splash shield into position.
- Use a trim clip removal tool to reinstall the plastic push clips by hand.
- Use an 8mm socket to reinstall the splash shield screws.
- Tighten the small splash shield screws snug only. Do not overtighten them into the plastic panel.
Step 12: Lower the Vehicle
- Use the floor jack rated 2-ton minimum to lift the front slightly off the jack stands.
- Remove the jack stands rated 2-ton minimum.
- Lower the Fusion slowly to the ground.
Step 13: Reconnect the Battery
- Place the negative battery cable back onto the battery post.
- Use a 10mm socket to tighten the terminal clamp.
- Use battery terminal protectant on the terminal after tightening.
- Do not overtighten the clamp. It only needs to be secure and unable to twist by hand.
Step 14: Test Charging Voltage
- Set a digital multimeter to DC volts.
- Touch the red meter lead to the battery positive terminal and the black meter lead to the battery negative terminal.
- With the engine off, a healthy battery should usually read about 12.4-12.7 volts.
- Start the engine and check voltage again.
- With the engine running, charging voltage should usually read about 13.5-14.8 volts.
- Turn on headlights, rear defroster, and blower motor, then confirm voltage stays stable above about 13 volts.
✅ After Repair
- ✅ Listen for belt squeal, scraping, or chirping after startup.
- ✅ Watch the battery warning light. It should turn off after the engine starts.
- ✅ Recheck the belt alignment with the engine off after the first test run.
- ✅ If the battery was weak or discharged, fully charge it with a battery charger. A new alternator should not be used to recover a dead battery.
- ✅ Some idle behavior may feel slightly different for a short time after battery disconnect while the Fusion relearns idle strategy.
- ✅ Reset clock, radio presets, and one-touch window operation if needed.
💰 DIY vs Shop Cost
Shop Cost: $550-$900 USD equivalent (parts + labor)
DIY Cost: $250-$500 USD equivalent (parts only)
You Save: $300-$400 USD equivalent by doing it yourself!
Shop labor rates vary but typically run $100-$150/hour. This repair takes a shop approximately 1.5-2.5 hours.
🎯 Ready to get started?
HowToo makes it easy: same-day/2-day shipping on every part, plus all the tools and specialty tools you need! Check out the parts and tools sections below to add everything to your cart.