


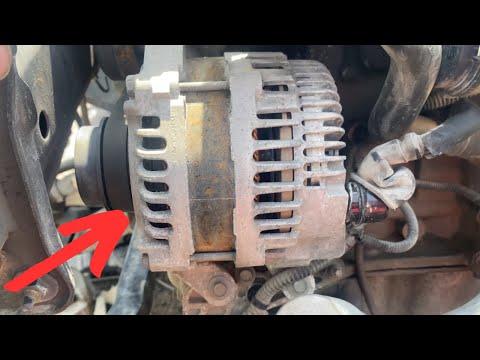




How to Replace the Alternator on a 2017-2019 Ford Escape (Trim: SE | Engine: Inline 4 2.0L)
Step-by-step DIY instructions with tools, parts, fitment checks, safety tips, and testing for 2017, 2018, 2019
How to Replace the Alternator on a 2017-2019 Ford Escape (Trim: SE | Engine: Inline 4 2.0L)
Step-by-step DIY instructions with tools, parts, fitment checks, safety tips, and testing for 2017, 2018, 2019


🔧 Escape - Alternator Replacement
This is an intermediate repair with tight access. You’ll disconnect the battery, remove the passenger-front wheel and splash shield, release the accessory belt, disconnect the alternator, then work it out of the engine compartment.
Difficulty Level: Intermediate | Estimated Time: 3-5 hours
Fitment note: Your Escape may use a 150-amp or 175-amp alternator depending on its electrical equipment. Match the amperage, pulley, connector, and mounting points to the original unit before installation. The wrong amperage is an expensive way to practice this job twice. go-parts.com
⚠️ Safety & Precautions
- 🔋 Disconnect the negative battery cable before touching the alternator.
- ⚡ The large alternator output terminal can short directly to ground if the battery remains connected.
- 🧊 Let the engine and turbocharger area cool completely.
- 🛞 Support your Escape with properly positioned jack stands. Never work under a vehicle supported only by a jack.
- 👓 Wear safety glasses while working through the wheel well.
- 🔌 Don’t allow the alternator output cable to touch metal during removal.
- 📱 Keep the key away from the vehicle so nobody can start it.
🔧 Required Tools
You'll need the following tools for this repair:
- 8mm socket
- 10mm socket
- 13mm socket
- 15mm socket
- 19mm deep socket
- Torx T25 screwdriver
- 3/8-inch drive ratchet
- 1/2-inch drive breaker bar
- 6-inch socket extension
- 12-inch socket extension
- Accessory belt tensioner tool (specialty)
- Plastic trim clip removal tool (specialty)
- Small flat-blade screwdriver
- Needle-nose pliers
- 3/8-inch drive torque wrench rated 10-80 ft-lbs
- 1/2-inch drive torque wrench rated 30-150 ft-lbs
- Digital multimeter rated 20 volts DC
- Floor jack rated 2 tons minimum
- Jack stands rated 2 tons minimum
- Wheel chocks
- LED work light
- Mechanic's gloves
- Safety glasses
🔩 Required Parts
HowToo sells all the parts you need for this repair:
- Alternator matching the original 150-amp or 175-amp rating - Qty: 1
- Accessory drive belt - Qty: 1 if cracked, glazed, frayed, or contaminated
- Alternator connector pigtail - Qty: 1 only if the original connector is melted or damaged
- Replacement splash-shield clips - Qty: As needed
📋 Before You Begin
- 🅿️ Park on level, solid ground. Select Park and apply the parking brake.
- 🧱 Place wheel chocks securely behind both rear tires.
- 📷 Photograph the belt routing before removing it.
- 🔎 Compare the replacement alternator with the original. Confirm the amperage label, pulley grooves, electrical connector, output stud, and mounting ears.
- 📏 Record the original alternator’s amperage before disconnecting it. Don’t select a replacement by appearance alone.
- ℹ️ The belt tensioner is a spring-loaded arm that keeps the accessory belt tight.
🔨 Step-by-Step Instructions
Follow these steps in order:
Step 1: Disconnect the battery
- Open the hood and wait at least two minutes after switching everything off.
- Use the 10mm socket and 3/8-inch drive ratchet to loosen the negative battery-terminal clamp.
- Lift the negative cable from the battery post and secure it where it cannot spring back.
- Do not disconnect the positive cable for this repair.
Step 2: Loosen the passenger-front wheel
- Use the 19mm deep socket and 1/2-inch drive breaker bar to loosen each lug nut approximately one-quarter turn.
- Keep the wheel on the ground while initially loosening the nuts.
Step 3: Raise and support your Escape
- Use the floor jack at an approved front lifting point.
- Position the jack stands beneath the reinforced support points.
- Lower the vehicle onto the stands and give it a careful stability check.
- Use the 19mm deep socket to remove the passenger-front wheel.
Step 4: Remove the wheel-well splash shield
- Use the Torx T25 screwdriver to remove the retaining screws.
- Use the plastic trim clip removal tool to release the plastic push clips without tearing the liner.
- Move the liner aside to expose the accessory belt and tensioner.
- Keep clips arranged in removal order.
Step 5: Open the upper working area
- Pull the engine cover straight upward by hand if it blocks access.
- Use the 8mm socket and 3/8-inch drive ratchet to loosen the air-intake duct clamps when additional room is required.
- Release attached clips carefully with the small flat-blade screwdriver.
- Move the duct aside without pulling hard on connected hoses or wiring.
Step 6: Release the accessory drive belt
- Photograph the complete belt routing with your phone.
- Fit the accessory belt tensioner tool onto the tensioner.
- Rotate the tensioner only far enough to unload the belt. Keep your fingers away from pulley pinch points.
- Slip the belt from the alternator pulley, then slowly return the tensioner to its resting position.
- Remove the belt completely only if it’s being replaced.
Step 7: Disconnect the alternator wiring
- Confirm the negative battery cable remains isolated.
- Press the locking tab and unplug the small alternator control connector by hand. Use the small flat-blade screwdriver only to gently lift a stubborn lock.
- Pull back the protective rubber cap covering the large output terminal.
- Use the correctly fitting 10mm socket or 13mm socket with the 3/8-inch drive ratchet to remove the output-cable nut.
- Lift the cable from the stud and position it away from metal.
- Do not twist or lever against the insulated output stud.
Step 8: Remove obstructing brackets
- Use the 13mm socket, 15mm socket, and appropriate socket extension to remove any harness or support bracket blocking the alternator.
- Photograph the brackets and wire routing before moving them.
- Keep each fastener with its bracket.
Step 9: Remove the alternator mounting bolts
- Support the alternator with one hand.
- Use the 15mm socket, 3/8-inch drive ratchet, and whichever socket extension provides straight access to loosen the mounting bolts.
- Remove the easiest bolt first and the bolt supporting most of the alternator’s weight last.
- Don’t force a socket onto a fastener. Verify its size if the fit is loose.
Step 10: Extract the alternator
- Rock the alternator gently to free its mounting ears from the bracket.
- Use the small flat-blade screwdriver only as a light pry tool against a sturdy mounting ear.
- Rotate and guide the alternator through the available opening. Don’t pull against the radiator, hoses, wiring, or air-conditioning lines.
- Small angle changes beat brute force.
Step 11: Compare the replacement alternator
- Place both alternators side by side.
- Confirm matching amperage, pulley diameter, pulley grooves, mounting points, connector shape, output-stud position, and case orientation.
- Spin the new pulley by hand. It should turn smoothly without scraping or excessive looseness.
- Stop if any feature differs.
Step 12: Install the replacement alternator
- Guide the new alternator into its bracket using the reverse of the removal path.
- Start every mounting bolt by hand for several turns before using tools.
- Use the 15mm socket and 3/8-inch drive ratchet to seat the alternator evenly.
- Use the 3/8-inch drive torque wrench for final tightening.
- Torque caution: Ford mounting-bolt torque varies by exact bolt position and bracket configuration. Don’t substitute a generic value. Use the current Ford workshop specification associated with the replacement unit’s installation data.
Step 13: Reconnect the alternator wiring
- Place the output cable squarely over the output stud.
- Start its nut by hand, then tighten it with the correctly fitting 10mm socket or 13mm socket.
- Use the 3/8-inch drive torque wrench for final tightening according to the alternator supplier or Ford workshop specification. Overtightening can rotate and destroy the insulated stud.
- Refit the protective rubber cap completely.
- Push the control connector in until its lock clicks.
Step 14: Reinstall brackets and route the harness
- Use the 13mm socket or 15mm socket to reinstall every bracket in its original position.
- Restore all wiring retainers so the harness cannot contact the belt or pulley.
- Tighten bracket fasteners with the 3/8-inch drive torque wrench to their position-specific Ford specifications.
Step 15: Reinstall the accessory belt
- Route the belt according to your photograph, leaving the alternator pulley until last.
- Use the accessory belt tensioner tool to rotate the tensioner.
- Slip the belt over the alternator pulley and release the tensioner slowly.
- Inspect every pulley. Each belt rib must sit inside its matching groove.
- Rotate the crankshaft by hand only if you have the correct crankshaft socket and verified engine-rotation direction. Otherwise, inspect the belt closely from above and below.
Step 16: Reinstall the splash shield and wheel
- Use the plastic trim clip removal tool by hand to reinstall reusable clips.
- Use the Torx T25 screwdriver to reinstall the liner screws.
- Fit the wheel and start all lug nuts by hand.
- Raise the vehicle slightly with the floor jack, remove the jack stands, and lower the tire onto the ground.
- Use the 19mm deep socket and 1/2-inch drive torque wrench to tighten the lug nuts in a star pattern to 135 Nm (100 ft-lbs).
Step 17: Reconnect the battery
- Install the negative battery clamp onto the post.
- Use the 10mm socket and 3/8-inch drive ratchet to tighten it only until the clamp cannot rotate by hand.
- Don’t overtighten the battery clamp.
Step 18: Test the charging system
- Before starting, inspect the engine bay for loose tools and disconnected wiring.
- Start the engine and watch the belt from a safe distance. Shut the engine off immediately if the belt walks sideways, squeals continuously, or contacts anything.
- Set the digital multimeter to DC volts and measure across the battery posts.
- Because Ford uses computer-controlled charging, voltage can vary with battery condition and electrical demand. Confirm it rises appropriately under load and that the battery warning light remains off.
- Switch on the headlights and blower motor, then check for stable operation.
✅ After Repair
- ✅ Confirm the battery warning light goes out after starting.
- 🔎 Check that the belt remains centered on every pulley.
- 👂 Listen for grinding, chirping, rattling, or belt squeal.
- ⚡ Check charging voltage and scan for charging-system trouble codes if the warning light remains illuminated.
- 🔋 Fully charge and test the battery if it was repeatedly discharged by the failed alternator.
- 🧰 Recheck the alternator connections and belt alignment after a short test drive.
💰 DIY vs Shop Cost
Shop Cost: $600-$1,050 equivalent, depending on local labor and alternator type
DIY Cost: $230-$350 equivalent for the alternator and optional belt
You Save: Approximately $300-$700 by doing it yourself!
Labor pricing varies considerably by region. This repair commonly takes a shop approximately 2-3 hours.
🎯 Ready to get started?
HowToo has opened the matching alternator, connector, pulley, and accessory-belt aisles for your Escape. Match the replacement to the original amperage label before adding it to your cart, then gather every tool before lifting the vehicle.
