

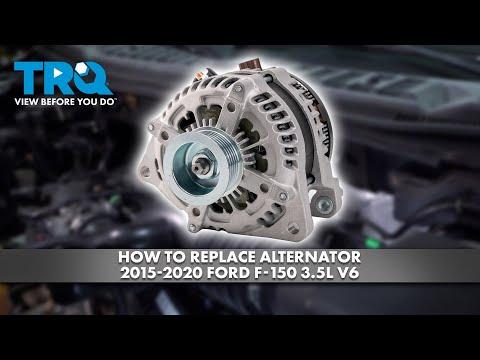



How to Replace the Alternator on a 2015-2020 Ford F-150 3.5L EcoBoost (Trim: Limited | Engine: V6 3.5L)
Step-by-step instructions with required tools, parts, torque specs, and safety tips for 2015, 2016, 2017, 2018, 2019, 2020
How to Replace the Alternator on a 2015-2020 Ford F-150 3.5L EcoBoost (Trim: Limited | Engine: V6 3.5L)
Step-by-step instructions with required tools, parts, torque specs, and safety tips for 2015, 2016, 2017, 2018, 2019, 2020


🔧 F-150 - Alternator Replacement
This is a manageable intermediate repair, but disconnecting the battery is non-negotiable. The alternator sits at the front of your F-150’s 3.5L EcoBoost and comes out after removing the intake duct, releasing the serpentine belt, disconnecting two electrical connections, and removing the mounting fasteners. howtoo.com)
Difficulty Level: Intermediate | Estimated Time: 1.5-2.5 hours
Important fitment note: Several charging-output versions are listed for your F-150. Match the replacement unit to the amperage label, electrical connector, pulley, and mounting points on the original alternator before installation.
⚠️ Safety & Precautions
- ⚡ Disconnect the negative battery cable before touching the alternator wiring. The large output cable remains battery-powered otherwise.
- 🧤 Let the engine cool completely before working around the belt and turbocharger plumbing.
- 🔑 Keep the ignition off and the key away from the truck while your hands are near the belt drive.
- 🌀 Keep fingers clear of the spring-loaded belt tensioner. Release it slowly and under control.
- 🔌 Never allow the alternator output cable to touch metal while connected to the battery.
- 🛑 Do not use a powered impact tool on the alternator output-terminal nut. The insulated stud can break.
🔧 Required Tools
You’ll need the following tools for this repair:
- 7mm socket
- 8mm socket
- 10mm socket
- 13mm socket
- 15mm socket
- 3/8-inch drive ratchet
- 3/8-inch drive extension set
- 3/8-inch drive serpentine belt tool (specialty)
- 10-80 ft-lb torque wrench
- 20-200 in-lb torque wrench
- Flat-blade screwdriver
- Plastic trim clip removal tool
- Digital multimeter
- Battery terminal brush
- Fender cover
- Mechanic gloves
- Safety glasses
🔩 Required Parts
HowToo sells all the parts you need for this repair:
- Correct-output alternator - Qty: 1
- Accessory drive belt - Qty: 1 if cracked, glazed, frayed, or contaminated
- Alternator connector pigtail - Qty: 1 only if the original connector is melted or damaged
- Battery terminal protectant - Qty: 1
The alternator, connector, pulley, and accessory-belt aisles are now open in the parts sidebar. The belt is optional if the existing one is clean, flexible, and undamaged. A new alternator deserves a healthy belt. Nobody enjoys doing the same job twice.
📋 Before You Begin
- 🅿️ Park your F-150 on level ground, shift into Park, set the parking brake, and open the hood.
- 🧊 Wait until the engine and turbocharger plumbing are cool to the touch.
- 📷 Photograph the serpentine-belt routing before moving it. The serpentine belt is the long ribbed belt that drives the alternator and other accessories.
- 🔍 Compare the new and old alternators. Confirm the pulley grooves, mounting ears, connector position, output stud, and amperage rating match.
- 💾 Expect some saved settings to reset after battery disconnection. A memory saver is optional, but don’t use one unless you understand that parts of the electrical system may remain energized.
🔨 Step-by-Step Instructions
Follow these steps in order:
Step 1: Disconnect the Battery
- Use the 10mm socket and 3/8-inch drive ratchet to loosen the negative battery-terminal clamp.
- Lift the negative cable from the battery post and position it where it cannot spring back.
- Use the battery terminal brush if corrosion is present.
- Negative cable comes off first.
Step 2: Remove the Intake Duct
- Use the 7mm or 8mm socket, depending on the installed clamps, to loosen the air-intake duct clamps.
- Release attached clips with the plastic trim clip removal tool.
- Disconnect only the hoses or connectors preventing duct removal. Press connector locks rather than pulling the wires.
- Lift out the intake duct to create working space above the alternator. The 3.5L procedure requires moving the applicable air-cleaner and charge-air plumbing for access. howtoo.com)
Step 3: Record the Belt Routing
- Locate the factory belt-routing decal or use your phone to photograph the complete belt path.
- Check that the photo clearly shows which pulleys use the belt’s ribbed side and which use its smooth side.
- Inspect the belt for cracks, shiny glazing, missing ribs, frayed edges, or oil contamination.
Step 4: Release Belt Tension
- Fit the 3/8-inch drive serpentine belt tool or the appropriate 15mm socket onto the tensioner. The tensioner is the spring-loaded arm that keeps the belt tight.
- Rotate the tensioner only far enough to unload the belt. On this 3.5L procedure, the tensioner is moved clockwise when viewed from the working position. howtoo.com
- Slip the belt off the alternator pulley with your free hand.
- Slowly return the tensioner to its stop. Never let it snap back.
- Leave the belt routed around the lower pulleys if it’s being reused.
Step 5: Disconnect the Alternator Wiring
- Press the lock and unplug the small voltage-regulator connector by pulling its plastic body.
- Pull back the protective rubber boot covering the large alternator output terminal.
- Use the 10mm or 13mm socket, as fitted, to remove the output-terminal nut.
- Lift the large cable eyelet from the stud and secure the cable away from the alternator.
- Inspect the connector, cable eyelet, insulation, and boot for heat damage or corrosion.
Step 6: Remove the Alternator
- Support the alternator with one hand. It’s heavier than it looks.
- Use the 13mm or 15mm socket, matching the installed fasteners, with the 3/8-inch drive ratchet and extension set to remove the alternator mounting fasteners.
- Keep track of each fastener’s original location.
- Rock the alternator gently to release it from the bracket. Don’t pry against plastic hoses, wiring, or the pulley.
- Lift the alternator from the engine compartment.
Step 7: Compare the Alternators
- Place the old and new alternators side by side.
- Verify identical mounting points, pulley diameter and grooves, connector shape, output-stud position, and labeled amperage.
- Turn the new pulley by hand. It should rotate smoothly without scraping or excessive looseness.
- Do not continue if the physical arrangement or amperage rating differs.
Step 8: Install the Replacement Alternator
- Lower the replacement alternator squarely into its mounting bracket.
- Start every mounting fastener several turns by hand to prevent cross-threading.
- Use the 10-80 ft-lb torque wrench and appropriate socket to tighten the mounting fasteners evenly.
- Torque the alternator mounting fasteners to 47 Nm (35 ft-lbs). howtoo.com
Step 9: Reconnect the Alternator Wiring
- Place the large output-cable eyelet fully onto the alternator stud.
- Install the terminal nut by hand before using a tool.
- Use the 20-200 in-lb torque wrench and correct socket to tighten the output-terminal nut.
- Torque the output-terminal nut to 10 Nm (89 in-lbs). Do not confuse inch-pounds with foot-pounds. howtoo.com
- Refit the protective rubber boot.
- Push the small regulator connector into place until its lock clicks.
Step 10: Reinstall the Serpentine Belt
- Check the belt against your routing photograph.
- Use the 3/8-inch drive serpentine belt tool or 15mm socket to rotate the tensioner.
- Slip the belt over the alternator pulley and slowly release the tensioner.
- Use a light and your fingers to confirm every belt rib sits inside every grooved pulley.
- Check the lowest pulleys carefully. A belt can look correct from above while sitting one rib off underneath.
Step 11: Reinstall the Intake Duct
- Position the intake duct without pinching wiring or hoses.
- Reconnect every hose, sensor connector, and retaining clip removed earlier.
- Use the 7mm or 8mm socket to tighten the intake clamps until secure. Do not crush the plastic duct.
Step 12: Reconnect the Battery
- Place the negative cable fully over the battery post.
- Use the 20-200 in-lb torque wrench and 10mm socket to tighten the clamp.
- Torque the battery-terminal clamp to 7 Nm (62 in-lbs). howtoo.com
- Apply a light coating of battery terminal protectant after the connection is tight.
✅ After Repair
- 👀 Before starting, inspect the engine bay for loose tools, disconnected hoses, and wiring near the belt.
- ▶️ Start the engine and watch the belt from a safe distance. Shut the engine off immediately if the belt walks sideways, flaps, or makes a severe squeal.
- 💡 Confirm the battery or charging-system warning goes out.
- 📏 Set the digital multimeter to DC volts and measure across the battery terminals. Ford’s smart charging system varies voltage with battery condition and electrical demand, so don’t condemn the new alternator from one momentary reading alone.
- 🔌 Turn on the headlights and blower, then confirm the charging warning remains off and the truck runs normally.
- 🧪 Fully charge and test the battery if the failed alternator left it discharged. The alternator maintains a battery; it isn’t meant to recover a deeply discharged one.
- 🔍 Recheck the belt and electrical connections after the first short drive.
💰 DIY vs Shop Cost
Shop Cost: Approximately $650-$1,050, depending on alternator output and local labor
DIY Cost: Approximately $228-$680 for the alternator, plus an optional belt
You Save: Approximately $200-$450 by doing it yourself!
Labor rates and parts pricing vary by market. This repair usually takes a professional approximately 0.6-1.0 labor hour, while a first-time DIYer should reserve 1.5-2.5 hours.
🎯 Ready to get started?
HowToo makes it easy: same-day/2-day shipping on every part, plus all the tools and specialty tools you need! Check out the parts and tools sections below to add everything to your cart.