

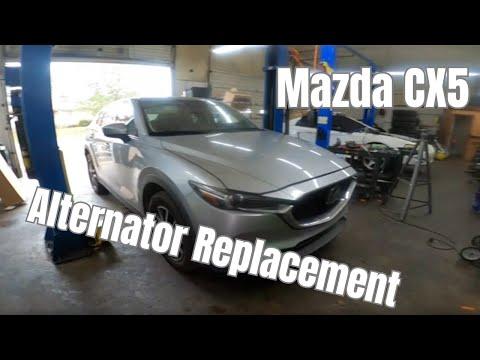




How to Replace the Alternator on a 2014-2019 Mazda CX-5 2.5L (Engine: Inline 4 2.5L)
Step-by-step instructions with required tools, parts, torque specs, safety tips, and charging tests for 2014, 2015, 2016, 2017, 2018, 2019
How to Replace the Alternator on a 2014-2019 Mazda CX-5 2.5L (Engine: Inline 4 2.5L)
Step-by-step instructions with required tools, parts, torque specs, safety tips, and charging tests for 2014, 2015, 2016, 2017, 2018, 2019


🔧 CX-5 - Alternator Replacement
This is an intermediate repair, but a careful beginner can handle it. The alternator comes out from above after disconnecting the battery, releasing the accessory belt, removing the electrical connections, and undoing the two mounting bolts.
Difficulty Level: Intermediate | Estimated Time: 2-3 hours
Assumption: These instructions apply to your naturally aspirated 2.5L engine without the turbocharger.
⚠️ Safety & Precautions
- ⚠️ Disconnect the negative battery terminal before touching the alternator. Its main output cable remains electrically live otherwise.
- ⚠️ Let the engine cool completely. Your hands will be working near the exhaust and belt drive.
- ⚠️ Remove rings, watches, and bracelets before working around the battery cable.
- ⚠️ Never place a tool between the alternator output stud and engine metal.
- ⚠️ Release the spring-loaded belt tensioner slowly. Don’t let it snap against its stop.
- ⚠️ Keep fingers away from the belt and pulleys whenever the engine is running.
🔧 Required Tools
You'll need the following tools for this repair:
- 8mm socket
- 10mm socket
- 12mm socket
- 14mm socket
- 17mm combination wrench
- 3/8-inch drive ratchet
- 3/8-inch extension set
- 3/8-inch drive torque wrench rated 5-80 Nm
- Serpentine belt tool (specialty)
- Flat-blade screwdriver
- Plastic trim-clip remover
- Slip-joint pliers
- Digital multimeter rated 20 volts DC
- Mechanic gloves
- Safety glasses
- Work light
🔩 Required Parts
HowToo sells all the parts you need for this repair:
- 100-amp replacement alternator - Qty: 1
- Accessory drive belt - Qty: 1 if cracked, glazed, contaminated, or noisy
- Battery-terminal protectant - Qty: 1
The alternator options currently shown start around $192. Matching accessory belts start around $14. I’d replace the belt now if it’s questionable. Paying for the same labor twice never improves the flavor.
📋 Before You Begin
- 📋 Park your CX-5 on level ground, shift into Park, apply the parking brake, and switch the ignition completely off.
- 📋 Open the hood and wait at least five minutes before disconnecting the battery.
- 📋 Photograph the accessory-belt routing before removal.
- 📋 Disconnect the negative battery terminal using a 10mm socket. Isolate the cable so it cannot spring back onto the post.
- 📋 No infotainment service mode, battery registration, or scan-tool command is normally required for this repair.
- 📋 Battery disconnection may reset the clock, automatic-window function, and learned idle settings.
🔨 Step-by-Step Instructions
Follow these steps in order:
Step 1: Disconnect the battery
- Use a 10mm socket and 3/8-inch ratchet to loosen the negative battery-terminal clamp.
- Lift the clamp from the post and position it where it cannot make contact.
- Wait at least one minute before touching the alternator wiring.
Step 2: Clear the upper working area
- Use an 8mm socket or flat-blade screwdriver to loosen the air-intake hose clamp.
- Use a plastic trim-clip remover to release any retaining clips around the intake duct.
- Remove only the intake ducting needed to reach the alternator and belt tensioner.
- Keep open intake passages covered with a clean cloth.
Step 3: Record the belt routing
- Use a work light to inspect the routing around every pulley.
- Take a clear photograph before releasing the belt.
- Check the belt for cracking, missing ribs, shiny glazing, frayed edges, and oil contamination.
- Haryana heat and dust are tough on drive belts, so replace a marginal one now.
Step 4: Release the accessory drive belt
- The automatic tensioner is the spring-loaded pulley assembly that keeps the belt tight.
- Fit a 17mm combination wrench or serpentine belt tool onto the tensioner operating point.
- Rotate the tensioner only far enough to create belt slack. Do not force it beyond its stop.
- Slip the belt off the alternator pulley while holding the tensioner.
- Slowly return the tensioner to its resting position.
- If reusing the belt, mark its direction of rotation with a pen.
Step 5: Disconnect the alternator wiring
- Press the locking tab and unplug the small alternator control connector by pulling on its housing.
- Pull back the rubber protective boot covering the large output terminal.
- Use a 12mm socket and 3/8-inch ratchet to remove the output-terminal nut.
- Lift the cable terminal from the stud and position it away from metal surfaces.
- Inspect the cable eyelet and connector for heat damage, looseness, or green corrosion.
Step 6: Remove the alternator mounting bolts
- Use a 14mm socket, 3/8-inch ratchet, and extension to fully loosen the lower mounting bolt.
- Pull the lower bolt outward until it approaches the body structure. It may remain captured in the alternator during removal.
- Support the alternator with one hand.
- Use the 14mm socket and extension to remove the upper mounting bolt.
- Rock the alternator gently to free it from its mounting bracket.
- Lift the alternator and captured lower bolt from the top of the engine compartment.
- Do not pry against plastic housings, wiring, or coolant pipes.
Step 7: Compare the replacement alternator
- Place the old and replacement alternators beside each other.
- Confirm the electrical connector, output stud, mounting ears, pulley diameter, pulley grooves, and pulley offset match.
- Rotate the replacement pulley by hand. It should turn smoothly without grinding or excessive play.
- Transfer any reusable wiring retainers only when their mounting positions match exactly.
Step 8: Prepare the mounting spacer
- Inspect the sliding metal spacer inside the alternator mounting ear.
- If the alternator won’t fit over the bracket, use slip-joint pliers to press the spacer slightly toward the nut side.
- Move it only enough to create installation clearance.
- Start every bolt by hand first.
Step 9: Install the replacement alternator
- Lower the alternator into position with the lower mounting bolt retained in its mounting ear.
- Start the lower bolt several turns by hand using the 14mm socket without the ratchet.
- Align the upper mounting hole and start the upper bolt by hand.
- Use the 14mm socket and ratchet to seat both bolts evenly.
- Use the 3/8-inch torque wrench and 14mm socket to tighten the mounting bolts to 38-52 Nm (29-38 ft-lbs). charm.li)
Step 10: Reconnect the alternator wiring
- Place the large output-cable eyelet squarely over the alternator stud.
- Install its nut with the 12mm socket.
- Use the torque wrench and 12mm socket to tighten the output-terminal nut to 9-12 Nm (80-106 in-lbs).
- Do not overtighten this nut. The insulated stud can be damaged.
- Cover the terminal completely with its rubber boot.
- Push the control connector into the alternator until its lock clicks.
- Lightly pull the connector housing to confirm it’s latched.
Step 11: Reinstall the accessory drive belt
- Route the belt according to your photograph, leaving the alternator pulley until last.
- Use the 17mm combination wrench or serpentine belt tool to rotate the tensioner.
- Slip the belt over the alternator pulley and slowly release the tensioner.
- Use the work light to inspect every grooved pulley.
- Confirm each belt rib sits inside a matching pulley groove and no belt edge hangs over a pulley.
- Check the smooth side of the belt rests only against smooth pulleys.
Step 12: Reinstall the intake components
- Remove the clean cloth covering the intake opening.
- Reposition the intake duct and engage all locating tabs.
- Use the plastic trim-clip remover by hand to reinstall the retaining clips.
- Use the 8mm socket or flat-blade screwdriver to snug the intake clamp.
- Do not crush the plastic intake neck by overtightening the clamp.
Step 13: Reconnect the battery
- Place the negative terminal clamp fully onto the battery post.
- Use the 10mm socket and ratchet to tighten it until the clamp cannot rotate by hand.
- Apply a light coating of battery-terminal protectant after the connection is secure.
✅ After Repair
- ✅ Look through the engine bay and remove every tool before starting the engine.
- ✅ Start the engine and watch the belt from a safe distance. Shut the engine off immediately if the belt walks sideways, squeals continuously, or a pulley wobbles.
- ✅ Confirm the battery warning light switches off.
- ✅ Set the digital multimeter to 20 volts DC and measure across the battery terminals.
- ✅ Expect the reading to change because your CX-5 uses computer-controlled charging. A single low-looking reading doesn’t automatically condemn the new alternator.
- ✅ Switch on the headlights and cabin blower, then verify voltage remains stable and the battery warning light stays off.
- ✅ Restore the clock and initialize each automatic window by fully lowering it, then fully raising it and holding the switch briefly.
- ✅ After a short drive, recheck for warning lights, belt noise, and loose intake ducting.
💰 DIY vs Shop Cost
Shop Cost: $450-$850 (parts + labor)
DIY Cost: $192-$250 (alternator and optional belt)
You Save: $200-$600 by doing it yourself!
Labor pricing varies significantly by region. This repair normally takes a shop approximately 1.5-2.5 hours.
🎯 Ready to get started?
HowToo offers fast shipping on the matching alternator, accessory belt, and specialty belt tool. Check the parts and tools sections below to put the complete job together.