


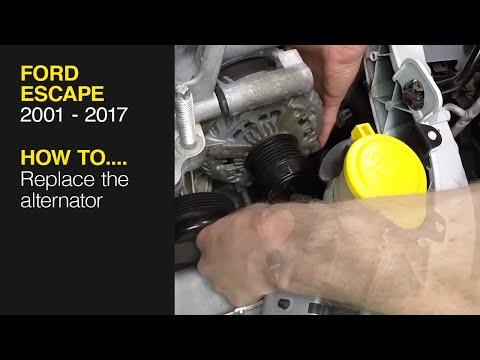



How to Replace the Alternator on a 2014-2017 Ford Escape 2.5L (Trim: S | Engine: Inline 4 2.5L)
Step-by-step 150-amp alternator replacement with tools, torque specs, and safety tips for 2014, 2015, 2016
How to Replace the Alternator on a 2014-2017 Ford Escape 2.5L (Trim: S | Engine: Inline 4 2.5L)
Step-by-step 150-amp alternator replacement with tools, torque specs, and safety tips for 2014, 2015, 2016


🔧 Escape - Alternator Replacement
This is an intermediate repair, but it’s manageable if you work slowly. The alternator sits low on the passenger side, so you’ll remove the right-front wheel and splash shield, release the accessory belt, and work from above and below.
Difficulty Level: Intermediate | Estimated Time: 2.5-4 hours
Fitment note: Your 2.5L application uses a 150-amp alternator. Don’t substitute a 175-amp listing unless its fitment is specifically confirmed for your Escape. fordpartsgiant.com
⚠️ Safety & Precautions
- ⚠️ Disconnect the negative battery terminal before touching the alternator.
- ⚠️ The large alternator cable is connected directly to battery power and can cause a severe short circuit.
- ⚠️ Work only on a cold engine because the exhaust and cooling components are close to the work area.
- ⚠️ Support your Escape with jack stands. Never work beneath a vehicle supported only by a jack.
- ⚠️ Do not disconnect the air-conditioning refrigerant lines if the compressor needs to be shifted for clearance.
- ⚠️ Keep metal tools away from the alternator’s exposed electrical terminal and cooling fins.
🔧 Required Tools
You'll need the following tools for this repair:
- 10mm socket
- 13mm socket
- 15mm socket
- 18mm socket
- 7mm socket
- 8mm socket
- 3/8-inch drive ratchet
- 1/2-inch drive breaker bar
- 3/8-inch drive extension set
- 3/8-inch drive universal joint
- 3/8-inch drive torque wrench rated 10-80 Nm
- 1/4-inch drive torque wrench rated 3-20 Nm
- Serpentine belt tool with 15mm adapter (specialty)
- Trim-clip removal tool
- Flat-blade screwdriver
- Digital multimeter rated 20 volts DC
- Floor jack rated 2-ton minimum
- Jack stands rated 2-ton minimum
- Wheel chocks
- Safety glasses
- Mechanic gloves
🔩 Required Parts
HowToo sells all the parts you need for this repair:
- 150-amp alternator - Qty: 1
- Accessory drive belt - Qty: 1 if cracked, glazed, frayed, or oil-soaked
- Alternator electrical connector - Qty: 1 only if melted, loose, or brittle
- Replacement splash-shield clips - Qty: As needed
The alternator, connector, belt, and pulley aisles are open in the parts sidebar. Match the alternator’s plug, pulley, mounting ears, and amperage before installation.
📋 Before You Begin
- 📋 Park on level pavement, shift into Park, engage the parking brake, and switch off every electrical accessory.
- 📋 Let the engine cool completely.
- 📋 Save the belt-routing diagram under the hood or take a clear photograph before releasing the belt.
- 📋 Open the hood before disconnecting the battery because the power locks will be disabled.
- 📋 No infotainment service mode or scan-tool command is required for this repair.
- 📋 The windows may lose one-touch operation after battery disconnection and may need initialization afterward.
🔨 Step-by-Step Instructions
Follow these steps in order:
Step 1: Disconnect the battery
- Use a 10mm socket and ratchet to loosen the negative battery-terminal clamp.
- Lift the negative cable from the battery and position it where it cannot spring back onto the terminal.
- Wait several minutes before working on the charging circuit.
Step 2: Raise and support the passenger side
- Place the wheel chocks behind the rear wheels.
- Use the 18mm socket and breaker bar to loosen the right-front lug nuts slightly.
- Raise the designated front jacking point with the floor jack.
- Lower your Escape securely onto a jack stand.
- Remove the lug nuts with the 18mm socket, then remove the wheel.
Step 3: Remove the right splash shield
- Use the 7mm socket, 8mm socket, and trim-clip removal tool as required to remove the right-front splash-shield fasteners.
- Keep the different screws and clips separated so they return to their original positions.
- Remove the shield and expose the belt drive and lower alternator area.
- During installation, tighten threaded splash-shield fasteners gently to approximately 8-9 Nm (71-80 lb-in). charm.li)
Step 4: Record the belt routing
- Use a phone or draw the routing around every pulley before removing the belt.
- Inspect the belt for missing ribs, shiny glazing, edge damage, and cracking.
- A routing photo saves considerable vocabulary later.
Step 5: Release the accessory drive belt
- Fit the serpentine belt tool with 15mm adapter onto the automatic tensioner.
- The tensioner is the spring-loaded pulley that keeps the belt tight.
- Rotate the tensioner slowly to relieve belt pressure.
- Slip the belt off the alternator pulley, then gently return the tensioner to its resting position.
- Do not let the tensioner snap back.
Step 6: Disconnect the alternator wiring
- Remove any harness retainer attached to the alternator stud using the trim-clip removal tool.
- Move the protective rubber cap away from the large B+ charging terminal.
- Use the 13mm socket to remove the B+ terminal nut, then lift the cable from the stud.
- Press the locking tab by hand and disconnect the smaller alternator control plug.
- Inspect both connections for heat damage, green corrosion, or loose terminals.
Step 7: Remove the alternator fasteners
- Support the alternator while using the 13mm or 15mm socket, extensions, and universal joint to remove its mounting bolt and nuts.
- Note the position of every stud, nut, bracket, and wiring locator.
- Leave the easiest fastener installed loosely until you’re ready to support and remove the alternator.
Step 8: Create removal clearance
- Move loose wiring carefully away from the alternator.
- Work the alternator toward the right wheel-well opening while checking that no hoses or wires remain attached.
- If the housing cannot pass through, use the appropriate listed socket to unbolt the air-conditioning compressor and shift it only enough to gain clearance.
- Do not disconnect, bend sharply, or place weight on the refrigerant lines.
- Remove the alternator through the wheel-well opening.
Step 9: Compare the replacement alternator
- Place both alternators side by side.
- Confirm that the pulley diameter and rib count match.
- Confirm that the electrical plug, B+ terminal, mounting ears, and air ducts are in identical positions.
- Transfer any required air duct or bracket using the correct listed socket or screwdriver.
- Do not install the replacement if any mounting or electrical feature differs.
Step 10: Install the alternator
- Guide the replacement through the wheel-well opening without striking its pulley or electrical terminals.
- Start every alternator fastener by hand to prevent cross-threading.
- Use the 3/8-inch drive torque wrench to tighten the main alternator mounting fasteners evenly to 47-48 Nm (35 ft-lbs). Ford service information for this engine family specifies approximately 35 ft-lbs. performanceparts.ford.com
- If the air-conditioning compressor was shifted, reinstall its original fasteners before fitting the belt. Use the manufacturer procedure supplied with your repair information because compressor fastener arrangement can vary.
Step 11: Reconnect the alternator wiring
- Push the control connector into the alternator until its lock clicks.
- Place the B+ cable squarely over the output stud.
- Use the 1/4-inch drive torque wrench to tighten the B+ terminal nut to 17 Nm (150 lb-in). charm.li
- Reinstall the protective terminal cap and harness retainers.
- Make certain the B+ cable cannot rub against the pulley or belt.
Step 12: Reinstall the accessory drive belt
- Route the belt around every pulley according to your photograph, leaving the easiest upper pulley until last.
- Use the serpentine belt tool with 15mm adapter to rotate the tensioner.
- Slip the belt over the final pulley and slowly release the tensioner.
- Check every pulley by sight and touch. Each belt rib must sit fully inside a pulley groove.
- Use the 1/2-inch drive breaker bar on the crankshaft pulley only if necessary to rotate the engine slightly and verify belt tracking. Rotate in the normal operating direction.
Step 13: Reassemble the wheel well
- Install the splash shield using the 7mm socket, 8mm socket, and trim-clip removal tool.
- Install the right-front wheel and tighten the lug nuts snugly in a star pattern with the 18mm socket.
- Raise your Escape slightly with the floor jack, remove the jack stand, and lower the vehicle.
- Use the torque wrench and 18mm socket to tighten the wheel nuts in a star pattern to 135 Nm (100 ft-lbs).
Step 14: Reconnect the battery
- Install the negative battery cable.
- Use the 10mm socket to tighten the clamp until secure.
- Do not overtighten the clamp or twist the battery terminal.
✅ After Repair
- ✅ Before starting the engine, inspect the entire belt path one final time.
- ✅ Start the engine while standing clear of the belt and pulleys.
- ✅ Shut the engine off immediately if the belt walks sideways, squeals continuously, or appears loose.
- ✅ Set the digital multimeter to DC volts and measure across the battery terminals.
- ✅ Expect charging voltage to vary because Ford uses computer-controlled charging. A running reading commonly falls near 13.5-14.8 volts, depending on battery condition and electrical demand.
- ✅ Switch on the headlights and blower motor. Verify that the battery warning light remains off.
- ✅ Recheck the B+ cable, control connector, and belt after a short test drive.
- ✅ If one-touch windows stopped working, fully lower each affected window, then fully raise it and hold the switch briefly.
- ✅ If the battery warning remains illuminated, scan the charging system instead of assuming the replacement alternator is defective.
💰 DIY vs Shop Cost
Shop Cost: $500-$850 (parts + labor)
DIY Cost: $230-$320 (parts only)
You Save: $270-$530 by doing it yourself!
Local labor pricing around Sonīpat may differ considerably from U.S. estimates. This repair normally takes a shop approximately 1.5-2.5 hours.
🎯 Ready to get started?
HowToo makes it easy: same-day/2-day shipping on every part, plus all the tools and specialty tools you need! Check out the parts and tools sections below to add everything to your cart.
