

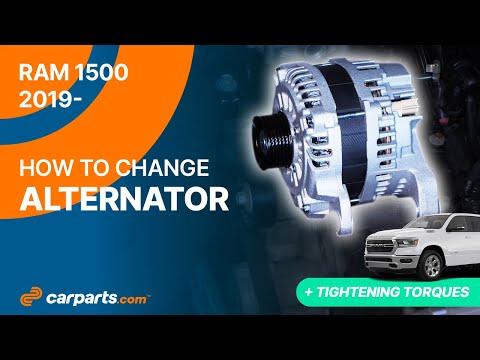





How to Replace the Alternator on a 2013-2024 Ram 1500 (Engine: V8 5.7L)
Step-by-step DIY guide with tools, parts, torque specs, safety tips, and charging test for 2013, 2014, 2016, 2017, 2018, 2019, 2020, 2021, 2022, 2023, 2024
How to Replace the Alternator on a 2013-2024 Ram 1500 (Engine: V8 5.7L)
Step-by-step DIY guide with tools, parts, torque specs, safety tips, and charging test for 2013, 2014, 2016, 2017, 2018, 2019, 2020, 2021, 2022, 2023, 2024


🔧 1500 - Alternator Replacement
Replacing the alternator on your 1500 means removing the serpentine belt, disconnecting the alternator wiring, unbolting the old alternator, and installing the new one. The alternator keeps the battery charged and powers the truck’s electrical system while the engine is running.
Difficulty Level: Intermediate | Estimated Time: 1.5-2.5 hours
⚠️ Safety & Precautions
- ⚠️ Disconnect the negative battery cable before touching alternator wiring. The large alternator cable has direct battery power.
- ⚠️ Let the engine cool before working near the belt, pulleys, fan, and radiator area.
- ⚠️ Keep fingers, clothing, and tools away from the serpentine belt path.
- ⚠️ Never start the engine while the belt is removed.
- ⚠️ Do not pry on the alternator pulley or plastic electrical connector.
🔧 Required Tools
You'll need the following tools for this repair:
- 10mm socket
- 13mm socket
- 15mm socket
- 3/8-inch drive ratchet
- 3/8-inch drive extension
- 1/2-inch drive breaker bar
- Serpentine belt tool (specialty)
- Flat-blade screwdriver
- Trim clip removal tool
- Torque wrench rated 10-100 ft-lbs
- Digital multimeter
- Battery terminal brush
- Mechanic gloves
- Safety glasses
🔩 Required Parts
HowToo sells all the parts you need for this repair:
- Alternator - Qty: 1
- Serpentine belt - Qty: 1
- Battery terminal protector spray - Qty: 1
- Dielectric grease - Qty: 1
📋 Before You Begin
- 🅿️ Park your 1500 on level ground, shift to Park, and set the parking brake.
- 🔋 Use a 10mm socket to disconnect the negative battery cable. Move it aside so it cannot touch the terminal.
- 🧊 Let the engine cool completely.
- 📸 Take a photo of the serpentine belt routing before removing it.
- 🔎 A serpentine belt tool is a long, flat tool that moves the belt tensioner in tight spaces.
- 🔎 The belt tensioner is a spring-loaded pulley arm that keeps the belt tight.
- 🔎 A digital multimeter checks voltage so you can confirm the new alternator is charging.
🔨 Step-by-Step Instructions
Follow these steps in order:
Step 1: Disconnect the Battery
- Put on safety glasses and mechanic gloves.
- Use a 10mm socket and 3/8-inch drive ratchet to loosen the negative battery terminal clamp.
- Lift the negative cable off the battery post.
- Use a battery terminal brush to clean corrosion if needed.
- Always disconnect negative first.
Step 2: Remove the Intake Duct for Access
- Use a flat-blade screwdriver to loosen the air intake duct clamps.
- Use a trim clip removal tool to remove any plastic retaining clips.
- Lift the intake duct out of the way.
- Set the duct and clips aside where they will not be stepped on.
Step 3: Release Serpentine Belt Tension
- Locate the belt tensioner at the front of the engine.
- Use a serpentine belt tool or 1/2-inch drive breaker bar on the tensioner.
- Rotate the tensioner clockwise to release belt tension.
- Slide the belt off the alternator pulley.
- Slowly release the tensioner back to its resting position.
- If you are replacing the belt, remove it fully from the remaining pulleys.
- Take your time with belt routing.
Step 4: Disconnect the Alternator Electrical Connector
- Use a flat-blade screwdriver to gently lift the connector lock tab.
- Pull the connector straight off the alternator by hand.
- Do not pull on the wires.
Step 5: Remove the Alternator Output Cable
- Lift the rubber protective boot from the alternator output stud.
- Use a 13mm socket and 3/8-inch drive ratchet to remove the output cable nut.
- Remove the cable from the stud and move it away from the alternator.
- Keep the nut safe if the replacement alternator does not include a new one.
Step 6: Remove the Alternator Mounting Bolts
- Support the alternator with one hand.
- Use a 15mm socket, 3/8-inch drive extension, and 3/8-inch drive ratchet to remove the alternator mounting bolts.
- Gently rock the alternator by hand to loosen it from the bracket.
- Lift the alternator out of the engine bay.
- Do not force plastic parts.
Step 7: Compare the Old and New Alternators
- Place both alternators on a clean work surface.
- Confirm the pulley, mounting ears, electrical connector, and output stud are in the same locations.
- Remove any shipping caps or protective covers from the new alternator.
Step 8: Install the New Alternator
- Lower the new alternator into the mounting bracket by hand.
- Start all mounting bolts by hand first. This prevents cross-threading, which means the bolt is going in crooked and damaging the threads.
- Use a 15mm socket and 3/8-inch drive ratchet to snug the bolts evenly.
- Use a torque wrench rated 10-100 ft-lbs with a 15mm socket to tighten the alternator mounting bolts to Torque to 54 Nm (40 ft-lbs).
Step 9: Reconnect the Alternator Wiring
- Apply a small amount of dielectric grease to the connector seal only. Dielectric grease helps keep moisture out of electrical connectors.
- Push the electrical connector onto the alternator until it clicks.
- Place the output cable onto the alternator output stud.
- Use a 13mm socket and torque wrench to tighten the output cable nut to Torque to 16 Nm (12 ft-lbs).
- Reinstall the rubber protective boot over the output stud.
Step 10: Reinstall the Serpentine Belt
- Route the serpentine belt around the pulleys using your photo as a guide.
- Leave the alternator pulley for last.
- Use the serpentine belt tool or 1/2-inch drive breaker bar to rotate the tensioner clockwise.
- Slide the belt over the alternator pulley.
- Slowly release the tensioner.
- Inspect every pulley and make sure the belt ribs sit fully in the pulley grooves.
- One skipped groove can destroy the belt.
Step 11: Reinstall the Intake Duct
- Set the intake duct back into position.
- Use a flat-blade screwdriver to tighten the intake duct clamps.
- Use a trim clip removal tool by hand to reinstall any plastic retaining clips.
- Check that the duct does not touch the belt or pulleys.
Step 12: Reconnect the Battery
- Place the negative battery cable back onto the negative battery post.
- Use a 10mm socket and 3/8-inch drive ratchet to tighten the terminal clamp until snug.
- Do not overtighten the clamp because the battery post can crack.
- Apply battery terminal protector spray after the clamp is tight.
Step 13: Check Charging Voltage
- Start the engine and let it idle.
- Use a digital multimeter set to DC volts.
- Touch the red probe to the positive battery terminal.
- Touch the black probe to the negative battery terminal.
- With the engine running, normal charging voltage should usually be about 13.5-14.8 volts.
- Turn on the headlights and blower motor, then confirm voltage stays stable.
✅ After Repair
- ✅ Confirm the battery warning light turns off after the engine starts.
- ✅ Listen for belt squeal, chirping, rubbing, or grinding noises.
- ✅ If the belt is noisy, shut the engine off and recheck belt alignment.
- ✅ Test drive your 1500 for 10-15 minutes.
- ✅ Recheck charging voltage after the test drive with the digital multimeter.
- ✅ If the battery was deeply discharged, charge it with a battery charger. Do not rely on the new alternator to recover a dead battery.
- ✅ Reset the clock, radio presets, and one-touch window function if needed after battery disconnect.
💰 DIY vs Shop Cost
Shop Cost: $550-$950 (parts + labor)
DIY Cost: $220-$500 (parts only)
You Save: $330-$450 by doing it yourself!
Shop labor rates vary but typically run $100-$150/hour. This repair takes a shop approximately 1.2-2.0 hours.
🎯 Ready to get started?
HowToo makes it easy: same-day/2-day shipping on every part, plus all the tools and specialty tools you need! Check out the parts and tools sections below to add everything to your cart.