


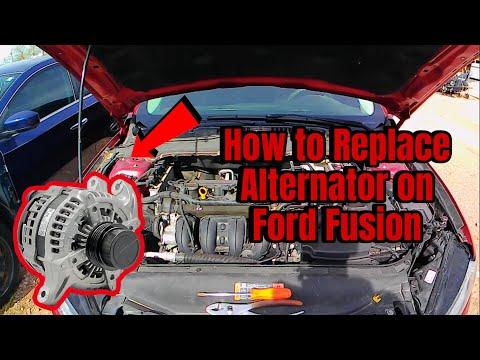


How to Replace the Alternator on a 2013-2020 Ford Fusion (Engine: Inline 4 2.5L)
Step-by-step DIY guide with tools, parts, torque specs, safety tips, and charging test for 2013, 2014, 2015, 2016, 2017, 2018, 2019, 2020
How to Replace the Alternator on a 2013-2020 Ford Fusion (Engine: Inline 4 2.5L)
Step-by-step DIY guide with tools, parts, torque specs, safety tips, and charging test for 2013, 2014, 2015, 2016, 2017, 2018, 2019, 2020
🔧 Fusion - Alternator Replacement
Replacing the alternator on your Fusion means removing the drive belt, disconnecting the electrical connections, unbolting the alternator, and installing the new unit. The alternator keeps the battery charged and powers electrical systems while the engine is running.
Difficulty Level: Intermediate | Estimated Time: 2-3 hours
⚠️ Safety & Precautions
- ⚠️ Disconnect the negative battery cable before touching the alternator wiring to prevent short circuits.
- ⚠️ Let the engine cool completely before working near the belt, pulleys, or exhaust-side components.
- ⚠️ Keep fingers, tools, and clothing away from the serpentine belt path.
- ⚠️ Support the vehicle with jack stands if lifting it. Never rely on a jack alone.
- ⚠️ Your Fusion uses a battery monitoring system, so avoid connecting chargers or jump packs directly to the negative battery post when testing afterward.
🔧 Required Tools
You'll need the following tools for this repair:
- 8mm socket
- 10mm socket
- 13mm socket
- 15mm socket
- 3/8-inch drive ratchet
- 3/8-inch drive breaker bar
- 3/8-inch drive extension set
- Serpentine belt tool (specialty)
- Flat-head screwdriver
- Trim clip removal tool
- Torque wrench 5-80 ft-lb
- Digital multimeter
- Floor jack rated 2-ton minimum
- Jack stands rated 2-ton minimum
- Wheel chocks
- Mechanic gloves
- Safety glasses
🔩 Required Parts
HowToo sells all the parts you need for this repair:
- Alternator - Qty: 1
- Serpentine drive belt - Qty: 1
📋 Before You Begin
- Park your Fusion on level ground, shift to Park, and set the parking brake.
- Place wheel chocks behind the rear wheels.
- Open the hood and let the engine cool fully.
- Use a 10mm socket to disconnect the negative battery cable. Move the cable away from the battery post.
- A serpentine belt is one long rubber belt that drives accessories like the alternator and A/C compressor.
- A belt tensioner is a spring-loaded pulley that keeps the belt tight.
- Take a photo of the belt routing before removal. There is usually a routing decal under the hood, but a photo helps first-time DIYers.
🔨 Step-by-Step Instructions
Follow these steps in order:
Step 1: Disconnect the Battery
- Put on safety glasses and mechanic gloves.
- Use a 10mm socket and 3/8-inch drive ratchet to loosen the negative battery terminal clamp.
- Lift the negative cable off the battery post and tuck it aside so it cannot spring back.
- Never skip this step.
Step 2: Raise and Support the Front of the Vehicle
- Use a floor jack rated 2-ton minimum to lift the front of your Fusion at the proper front jacking point.
- Place jack stands rated 2-ton minimum under the front support points.
- Gently lower the vehicle onto the jack stands and shake the vehicle lightly to confirm it is stable.
Step 3: Remove the Lower Splash Shield
- Use an 8mm socket and 3/8-inch drive ratchet to remove the lower splash shield fasteners.
- Use a trim clip removal tool to remove any plastic push clips without breaking them.
- Set the shield and fasteners aside in order.
Step 4: Release Serpentine Belt Tension
- Locate the belt tensioner on the front of the engine.
- Fit the serpentine belt tool (specialty) or 3/8-inch drive breaker bar into the tensioner drive opening.
- Rotate the tensioner to release belt tension.
- Slide the belt off the alternator pulley first, then slowly let the tensioner return to its resting position.
- Remove the belt from the other pulleys if replacing it.
- Release the tensioner slowly.
Step 5: Unplug the Alternator Electrical Connector
- From the top or lower front access area, locate the alternator electrical connector.
- Use your fingers or a flat-head screwdriver to gently lift the connector lock tab.
- Pull the connector straight off the alternator.
- Do not pull on the wires. Pull on the plastic connector body only.
Step 6: Remove the Alternator Battery Cable
- Lift the protective rubber cover from the alternator output terminal.
- Use a 10mm socket and 3/8-inch drive ratchet to remove the nut from the output terminal.
- Remove the battery cable eyelet from the alternator stud.
- Move the cable aside so it cannot touch metal parts.
Step 7: Remove the Alternator Mounting Bolts
- Use a 13mm socket, 3/8-inch drive extension, and 3/8-inch drive ratchet to remove the alternator mounting bolts.
- Support the alternator with one hand as the last bolt comes out.
- If the alternator is stuck in the bracket, gently rock it by hand. Do not pry hard against aluminum engine parts.
Step 8: Remove the Alternator
- Guide the alternator out through the available opening near the front/lower side of the engine bay.
- If clearance is tight, turn the alternator pulley-side first and work slowly around nearby hoses and wiring.
- Compare the old alternator to the new alternator before installation. The pulley, plug, mounting ears, and output stud must match.
Step 9: Install the New Alternator
- Position the new alternator into the mounting bracket by hand.
- Start all mounting bolts by hand first to avoid cross-threading.
- Use a 13mm socket, 3/8-inch drive extension, and torque wrench 5-80 ft-lb to tighten the alternator mounting bolts.
- Torque to 48 Nm (35 ft-lbs)
Step 10: Reconnect the Alternator Wiring
- Place the battery cable eyelet onto the alternator output stud.
- Use a 10mm socket and torque wrench 5-80 ft-lb to tighten the output terminal nut.
- Torque to 12 Nm (106 in-lbs)
- Push the rubber protective cover back over the terminal.
- Plug in the alternator electrical connector until it clicks.
Step 11: Reinstall the Serpentine Belt
- Route the belt around the pulleys using your photo or the under-hood belt routing decal.
- Leave the alternator pulley for last.
- Use the serpentine belt tool (specialty) or 3/8-inch drive breaker bar to rotate the tensioner again.
- Slide the belt over the alternator pulley, then slowly release the tensioner.
- Check that the belt ribs sit fully inside every grooved pulley.
- Misrouted belts can shred quickly.
Step 12: Reinstall the Lower Splash Shield
- Lift the splash shield back into position.
- Use a trim clip removal tool to reinstall plastic push clips by hand.
- Use an 8mm socket and 3/8-inch drive ratchet to reinstall the screws.
- Snug the splash shield fasteners only. Do not overtighten plastic fasteners.
Step 13: Lower the Vehicle
- Use a floor jack rated 2-ton minimum to lift the vehicle slightly off the jack stands.
- Remove the jack stands rated 2-ton minimum.
- Lower your Fusion slowly to the ground.
Step 14: Reconnect the Battery
- Install the negative battery cable onto the battery post.
- Use a 10mm socket and 3/8-inch drive ratchet to tighten the terminal clamp until snug.
- Do not overtighten the clamp. The battery post can be damaged.
Step 15: Check Charging Voltage
- Set a digital multimeter to DC volts.
- Touch the red meter lead to the battery positive post and the black meter lead to a clean engine/body ground.
- Start the engine and read the voltage.
- A healthy charging system is usually about 13.5-14.8 volts with the engine running.
- If voltage stays near 12 volts, shut the engine off and recheck the alternator connector, output cable, and belt routing.
✅ After Repair
- Start the engine and listen for squealing, grinding, or belt slapping noises.
- Turn on headlights, blower motor, rear defroster, and radio. Confirm the battery warning light stays off.
- Recheck belt alignment while the engine is off after the first short test run.
- Drive for 10-15 minutes, then restart the engine to confirm normal cranking.
- If the battery was deeply discharged, fully charge and test the battery. A weak battery can damage a new alternator.
💰 DIY vs Shop Cost
Shop Cost: $550-$850 (parts + labor)
DIY Cost: $220-$420 (parts only)
You Save: $330-$430 by doing it yourself!
Shop labor rates vary but typically run $100-$150/hour. This repair takes a shop approximately 1.5-2.5 hours.
🎯 Ready to get started?
HowToo makes it easy: same-day/2-day shipping on every part, plus all the tools and specialty tools you need! Check out the parts and tools sections below to add everything to your cart.
