


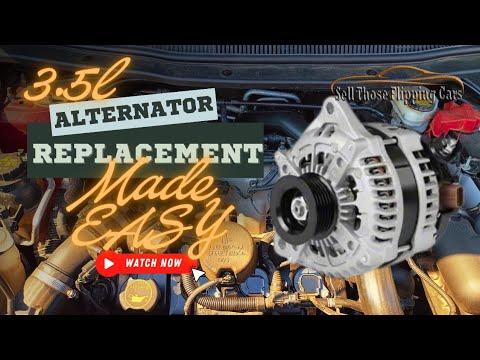




How to Replace the Alternator on a 2012-2019 Ford Explorer 3.5L EcoBoost (Engine: V6 3.5L)
Step-by-step instructions with required tools, parts, torque specs, and safety tips for 2012, 2013, 2014, 2015, 2016, 2017, 2018, 2019
How to Replace the Alternator on a 2012-2019 Ford Explorer 3.5L EcoBoost (Engine: V6 3.5L)
Step-by-step instructions with required tools, parts, torque specs, and safety tips for 2012, 2013, 2014, 2015, 2016, 2017, 2018, 2019


🔧 Explorer - Alternator Replacement
This is an intermediate job because the 3.5L EcoBoost alternator has tight working clearance. You’ll disconnect the battery, remove the intake duct and cooling-fan assembly, release the accessory belt, then remove the alternator through the top. Ford parts listings show more than one charging-output configuration, so match the replacement unit to the amperage printed on the original alternator. go-parts.com)
Difficulty Level: Intermediate | Estimated Time: 3-4 hours
Assumption: These instructions cover the factory 3.5L twin-turbo layout with no charging-system modifications.
⚠️ Safety & Precautions
- ⚠️ Disconnect the negative battery cable before touching alternator wiring. The large alternator terminal has a direct battery connection.
- 🧊 Let the engine cool completely before removing anything near the radiator or cooling fan.
- 🔒 Never work beneath your Explorer while it’s supported only by a floor jack.
- 🧤 The belt tensioner is spring-loaded. Keep your fingers away from the belt and pulley gaps.
- 🔌 Don’t allow a socket or wrench to bridge the alternator power terminal to metal.
- 🌀 Never switch the ignition on while the cooling-fan electrical connectors are disconnected.
- 🔋 Battery disconnection is required. The alternator does not normally require programming after installation.
🔧 Required Tools
You'll need the following tools for this repair:
- 8mm socket
- 10mm socket
- 13mm socket
- 15mm socket
- 3/8-inch drive ratchet
- 1/2-inch drive breaker bar
- 3/8-inch drive extension set
- 3/8-inch drive torque wrench rated 10-80 Nm
- Serpentine belt tool (specialty)
- Flat-blade screwdriver
- Plastic trim-clip removal tool
- Needle-nose pliers
- Floor jack rated 2-ton minimum
- Jack stands rated 2-ton minimum
- Wheel chocks
- Work light
- Safety glasses
- Nitrile gloves
🔩 Required Parts
HowToo sells all the parts you need for this repair:
- Alternator matching the original amperage rating - Qty: 1
- Accessory drive belt - Qty: 1 if cracked, glazed, contaminated, or noisy
- Alternator mounting hardware - Qty: 1 set if damaged or corroded
- Alternator connector pigtail - Qty: 1 only if the original plug is melted or brittle
- Dielectric grease - Qty: 1 small tube
I’d use a new or high-quality remanufactured alternator with the same output label as the removed unit. Saving a few rupees on an unknown charging unit gets expensive when it cooks a battery.
📋 Before You Begin
- 🚙 Park on level pavement, shift into Park, set the parking brake, and chock both rear wheels.
- 🔑 Switch everything off and move the key fob away from your Explorer.
- 🪟 Lower a window before disconnecting the battery so you don’t accidentally lock yourself out.
- 📷 Photograph the accessory-belt routing before releasing it.
- 🔍 Read the amperage rating on the original alternator label and compare it with the replacement.
- 🔧 If access from underneath is necessary, lift the front using the floor jack and place it securely on jack stands.
🔨 Step-by-Step Instructions
Follow these steps in order:
Step 1: Disconnect the battery
- Open the hood and locate the battery.
- Use the 10mm socket and 3/8-inch drive ratchet to loosen the negative terminal.
- Lift the terminal from the battery post and isolate it so it cannot spring back.
- Wait at least two minutes before disconnecting alternator wiring.
Step 2: Remove the engine cover and intake duct
- Pull the engine cover straight upward by hand to release its rubber mounting grommets.
- Use the 8mm socket or flat-blade screwdriver to loosen the intake-duct clamps.
- Release any attached wiring clips using the plastic trim-clip removal tool.
- Disconnect the intake sensor plug by pressing its lock and pulling on the connector, not the wires.
- Remove the intake duct and place clean covers over exposed openings.
Step 3: Remove the upper cooling-fan assembly
- Disconnect the cooling-fan electrical connectors by hand after releasing their locking tabs.
- Use the 8mm and 10mm sockets to remove the fan-shroud fasteners.
- Release wiring retainers with the plastic trim-clip removal tool.
- Check that no hoses or wires remain attached before lifting the fan and shroud upward.
- If a hose blocks removal, release only its retaining clip with needle-nose pliers and reposition the hose without opening the cooling system.
- Photograph every connector before unplugging it.
Step 4: Release the accessory drive belt
- Compare the belt path with your photograph before moving it.
- Install the serpentine belt tool or 1/2-inch drive breaker bar on the spring-loaded tensioner.
- Rotate the tensioner clockwise slowly until the belt becomes loose.
- Slide the belt off the alternator pulley while keeping your fingers outside the pulley gaps.
- Release the tensioner slowly. Never let it snap back.
- Leave the belt routed around the remaining pulleys unless you’re replacing it.
Step 5: Disconnect the alternator wiring
- Use the work light to locate the heavy charging cable and small control connector.
- Pull the protective rubber cap away from the charging terminal by hand.
- Use the 13mm socket and 3/8-inch drive ratchet to remove the charging-cable nut.
- Lift the cable from the stud and position it where it cannot contact metal.
- Press the control-connector lock and pull the plug straight out by hand.
- Inspect the plug for overheated, green, loose, or melted terminals.
Step 6: Remove the alternator fasteners
- Use the 15mm socket, extension, and 3/8-inch drive ratchet to loosen the alternator mounting bolts.
- Reach the lower fastener through the available lower or right-side access opening if it cannot be reached comfortably from above.
- Support the alternator with one hand while removing the final fastener.
- Keep the bolts arranged by position because a bolt and mounting stud may not be interchangeable.
Step 7: Remove the old alternator
- Rock the alternator gently by hand to free its mounting ears from the bracket.
- If it remains tight, use the flat-blade screwdriver carefully between the mounting ear and bracket. Don’t pry against wiring, plastic, or an aluminum sealing surface.
- Rotate and lift the alternator through the opening created by removing the cooling-fan assembly.
- Don’t force it past an air-conditioning line or coolant hose.
Step 8: Compare the replacement alternator
- Place both alternators side by side.
- Confirm matching mounting ears, pulley diameter, pulley grooves, electrical connector, charging stud, and amperage rating.
- Spin the replacement pulley by hand. It should move smoothly without grinding or excessive looseness.
- Don’t install it if any connection or mounting point differs.
Step 9: Install the replacement alternator
- Lower the replacement alternator into its bracket by hand.
- Start every mounting bolt several turns by hand before using tools. This prevents cross-threading.
- Use the 15mm socket and torque wrench to tighten the main bolt and mounting nut to 47 Nm (35 ft-lbs).
- If the mounting stud was removed, use the correct socket and torque wrench to tighten the stud to 8 Nm (71 in-lbs). These values match Ford service information for this mounting arrangement. charm.li
Step 10: Reconnect the alternator wiring
- Push the small control connector into the alternator until its lock clicks.
- Place the charging cable squarely over the terminal stud.
- Use the 13mm socket and torque wrench to tighten the charging-terminal nut to 17 Nm (150 in-lbs). charm.li
- Reinstall the protective rubber cap completely over the terminal.
- Apply only a light film of dielectric grease around the control connector seal. Don’t coat the charging stud.
Step 11: Reinstall the accessory drive belt
- Check the belt for cracks, missing ribs, shiny glazing, oil contamination, or frayed edges.
- Route the belt according to your photograph, leaving the alternator pulley until last.
- Use the serpentine belt tool or 1/2-inch drive breaker bar to rotate the tensioner clockwise.
- Slip the belt over the alternator pulley and release the tensioner slowly.
- Use the work light to verify every belt rib is centered in every grooved pulley.
Step 12: Reinstall the cooling-fan assembly
- Lower the fan and shroud carefully into their locating slots.
- Make sure the bottom locating tabs engage before installing the upper fasteners.
- Use the 8mm and 10mm sockets to reinstall the original fasteners snugly.
- Reconnect every fan connector by hand until its lock clicks.
- Secure the wiring harness in its original clips and keep it away from the belt and fan blades.
Step 13: Reinstall the intake system
- Remove the temporary covers from the intake openings.
- Fit the intake duct fully onto both mating surfaces.
- Use the 8mm socket or flat-blade screwdriver to tighten the clamps securely without crushing the plastic duct.
- Reconnect the intake sensor and all wiring clips.
- Press the engine cover onto its rubber grommets by hand.
Step 14: Reconnect the battery
- Check that no tools remain in the engine compartment.
- Use the 10mm socket and 3/8-inch drive ratchet to reconnect the negative battery terminal.
- Tighten the terminal until it cannot rotate by hand. Don’t overtighten it.
✅ After Repair
- 👀 Before starting, watch the belt while a helper briefly cranks the engine. Stop immediately if the belt walks off a pulley.
- 🔊 Start the engine and listen for squealing, grinding, knocking, or belt slapping.
- ⚡ Confirm the battery warning lamp switches off after the engine starts.
- 🌀 Confirm the radiator fan wiring is connected and no harness is near moving parts.
- 🔍 Inspect the alternator terminal, intake duct, and belt path after five minutes of idling.
- 🔋 Have the battery load-tested if it was repeatedly discharged. A failing battery can overwork a new alternator.
- 🧠 Allow several normal drive cycles for Ford’s battery-monitoring and charging strategy to relearn after power disconnection.
- 🕒 Recheck the belt alignment and battery-terminal tightness after the first drive.
💰 DIY vs Shop Cost
Shop Cost: ₹65,000-₹1,25,000 (imported part + labor)
DIY Cost: ₹25,000-₹65,000 (part and normal consumables)
You Save: Approximately ₹25,000-₹60,000 by doing it yourself!
Local pricing varies heavily because this U.S.-market Explorer may require an imported alternator. This repair usually takes a shop approximately 2.5-4 hours. go-parts.com
🎯 Ready to get started?
HowToo has opened the alternator, connector, and accessory-belt aisles matched to your Explorer. Same-day/2-day shipping is available on eligible parts, plus the tools and specialty tools you’ll need for the job.
