
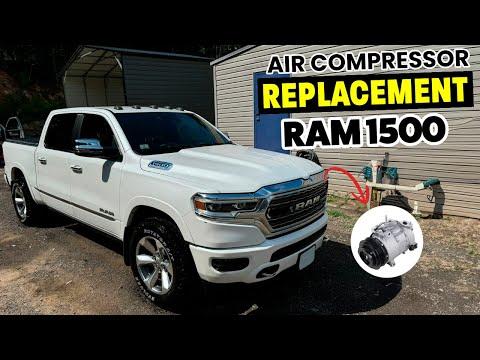



How to Replace the A/C Compressor on a 2022 Ram 1500 Classic 3.6L
Step-by-step DIY compressor replacement with tools, parts list, safety warnings, and recharge tips to restore cold air for 2019
How to Replace the A/C Compressor on a 2022 Ram 1500 Classic 3.6L
Step-by-step DIY compressor replacement with tools, parts list, safety warnings, and recharge tips to restore cold air for 2019


1500 Classic - A/C Compressor Replacement ❄️
Replacing the A/C compressor on your 1500 Classic is a medium–hard job because it involves the serpentine belt, refrigerant, and tight spaces. I’ll lay it out step by step.
First, 2 quick questions before exact steps:
- 🧊 Is your A/C system still charged (blows cold at all) or already empty / not cooling?
- 🛠️ Do you have access to an A/C shop or mobile tech who can recover and recharge refrigerant after you install the new compressor?
Answer briefly and then follow the guide below — you can still read ahead now.
1500 Classic - Safety & Big Warnings ⚠️
- ⚠️ Refrigerant must be recovered by a shop with proper equipment. Venting to air is illegal and dangerous.
- ⚠️ Disconnect the battery before working near the belt and compressor.
- ⚠️ The system must be evacuated and recharged with a machine after the repair. You cannot do this accurately with cans.
- ⚠️ Work on a cool engine. Hot exhaust and coolant parts are burn hazards.
1500 Classic - Parts You Should Replace Together 📦
- 📦 A/C compressor assembly (for 3.6L, with clutch and pulley)
- 📦 Receiver/drier (integrated in the condenser on this truck; OEM recommends replacing when the system is opened for compressor failure)
- 📦 Expansion valve or orifice tube (depending on exact system; usually an expansion valve at the evaporator on these)
- 📦 Compressor PAG oil – correct type and amount for the 3.6L system (usually PAG 46, but follow the compressor manufacturer’s label)
- 📦 New O-rings for all A/C line connections you open (A/C O-rings are special rubber for refrigerant)
- 📦 Serpentine belt (optional but smart if old or cracked)
HowToo will show you the exact compressor, drier, valve, O-rings, and belt for your truck below this answer so you can add them to your cart.
1500 Classic - Tools You’ll Need 🧰
- 🧰 Socket set (metric): 10mm, 13mm, 15mm, 16mm, 18mm sockets; 3/8" and 1/2" drive ratchets
- 🧰 Wrenches: 10mm–18mm combination wrenches
- 🧰 Serpentine belt tool or long breaker bar (a long handle that gives leverage to move the belt tensioner)
- 🧰 Torque wrench (10–80 Nm / 7–60 ft-lb range)
- 🧰 Plastic trim tool (for any clips you need to pop; safer than a screwdriver)
- 🧰 A/C line disconnect tools if your truck uses spring-lock fittings at the compressor (simple plastic rings that release the line)
- 🧰 Catch pan and rags (for any oil drips)
- 🧰 Safety glasses and gloves
Evacuation and recharge will be done by a shop with an A/C machine.
1500 Classic - Prep Steps 🧊
- 🧊 Step 1 – Have refrigerant recovered
- Drive to an A/C shop and ask them to recover the refrigerant only. Tell them you’re replacing the compressor yourself and will return for vacuum and recharge.
- Get a note of how much refrigerant they removed if they’ll tell you. It can hint at leaks.
- 🧊 Step 2 – Park and make it safe
- Park on level ground, set the parking brake, and chock a rear wheel.
- Open the hood and let the engine cool fully.
- 🧊 Step 3 – Disconnect the battery
- Use a 10mm wrench to remove the negative (black) battery cable and tuck it aside.
1500 Classic - Accessing the Compressor 🔧
The 3.6L compressor is low on the passenger side of the engine, front of the engine block.
- 🔧 Step 4 – Remove any lower splash shield (if equipped)
- Some trucks have a plastic shield under the front. Remove the push pins and bolts (usually 10mm) and set it aside.
- 🔧 Step 5 – Note the belt routing
- Take a clear photo of the serpentine belt routing or find the diagram sticker under the hood.
- 🔧 Step 6 – Remove the serpentine belt from the compressor
- Place your serpentine belt tool or long breaker bar on the belt tensioner (spring-loaded pulley).
- Rotate the tensioner to relieve tension (usually clockwise on this engine).
- Slip the belt off the A/C compressor pulley only, then slowly release the tensioner.
- You can leave the belt on the other pulleys if you’re careful, or remove it fully if you’re replacing it.
1500 Classic - Disconnecting A/C Lines & Wiring 🌬️
- 🌬️ Step 7 – Unplug the compressor electrical connector
- Locate the plug on the compressor body (for the clutch/control). Press the tab and pull it straight off.
- 🌬️ Step 8 – Remove A/C lines from the compressor
- Place rags under the line connections to catch any oil drips.
- Remove the line retaining bolts (usually 10mm or 13mm).
- If your truck uses spring-lock fittings, use the A/C line disconnect tool: slide it into the fitting to release the spring, then pull the line apart.
- Cap or tape the open lines and compressor ports to keep dirt out.
1500 Classic - Removing the Old Compressor 🪛
- 🪛 Step 9 – Remove compressor mounting bolts
- The compressor is held by several bolts to the engine block (typically 13mm or 15mm).
- Support the compressor with one hand while removing the last bolt so it doesn’t drop.
- 🪛 Step 10 – Remove the compressor
- Carefully work the compressor out of the engine bay. You may need to tilt or rotate it around other components.
1500 Classic - Preparing the New Compressor 🧴
This part is important for long life of the new unit.
- 🧴 Step 11 – Check and set oil level
- Most new compressors come with oil. Check the label or instructions.
- If required, drain the shipping oil into a clean container and measure it.
- Compare to the specified oil amount for the system and adjust as the compressor manufacturer instructs (often you add a portion to the compressor and some to other components if they’re new).
- Use only the correct PAG oil type listed for your compressor.
- 🧴 Step 12 – Install new O-rings
- Remove old O-rings from the A/C lines that attach to the compressor.
- Install new A/C-rated O-rings of the correct size.
- Lightly coat each O-ring with clean PAG oil so they seat without tearing.
1500 Classic - Installing the New Compressor 🔩
- 🔩 Step 13 – Position the new compressor
- Place the compressor in the same orientation as the old one.
- Start all mounting bolts by hand to avoid cross-threading.
- 🔩 Step 14 – Torque the compressor bolts
- Tighten the bolts evenly.
- Typical torque for 3.6L compressor bolts: about 25–30 Nm (18–22 ft-lb). If your compressor instructions specify a value, follow that.
- 🔩 Step 15 – Reconnect A/C lines
- Align the lines carefully and push them straight into place.
- Install and tighten the line bolts to about 10–12 Nm (7–9 ft-lb) – snug, not gorilla tight, so you don’t crush the O-rings.
- 🔩 Step 16 – Plug in the compressor connector
- Reconnect the electrical plug until it clicks.
1500 Classic - Belt & Reassembly 🔁
- 🔁 Step 17 – Install the serpentine belt
- Route the belt according to your photo/diagram.
- Use the belt tool to rotate the tensioner, slip the belt over the compressor pulley, then slowly release the tensioner.
- Double-check the belt is seated in all pulley grooves.
- 🔁 Step 18 – Reinstall splash shield
- Reinstall any lower shields and bolts you removed.
- 🔁 Step 19 – Reconnect the battery
- Reconnect the negative battery cable and tighten the 10mm nut.
1500 Classic - Evacuate & Recharge the A/C System 🧪
This part is done with an A/C machine, usually at a shop.
- 🧪 Step 20 – Take the truck for vacuum and recharge
- Drive to the A/C shop and tell them:
- You replaced the compressor (and any other parts you changed).
- You need the system evacuated (vacuumed), leak-tested, and recharged with the correct amount of R-134a.
- Under-hood label will show the exact refrigerant charge (in grams or ounces) and oil type.
- Drive to the A/C shop and tell them:
- 🧪 Step 21 – Verify operation
- With the engine running, A/C on MAX, fan high, and windows open, check:
- Compressor clutch engages smoothly.
- No strange noises from the compressor.
- Air from vents gets cold after a few minutes.
- No oily spots or hissing at the line connections.
- With the engine running, A/C on MAX, fan high, and windows open, check:
1500 Classic - Tips & Common Beginner Mistakes 💡
- 💡 Do not over-tighten line bolts. Most leaks come from crushed O-rings.
- 💡 Keep everything clean. Dirt in the system can damage the new compressor.
- 💡 Replace related parts now. Drier and expansion valve are cheap compared to doing the job twice.
- 💡 Listen carefully on first start. Any grinding or loud squeal from the compressor? Shut it off and re-check belt routing and mounting bolts.
Save Money with DIY & Parts from HowToo 🛒
A shop would typically charge for this job on your truck:
- 🛒 Labor: 3–5 hours
- 🛒 Total shop cost (parts + labor + recharge): often $900–$1,400+ depending on region and parts quality.
Doing the mechanical work yourself and only paying for the A/C recharge can save you several hundred dollars.
HowToo makes it easy: below this answer you’ll see the correct compressor, drier, expansion valve, O-rings, belt, and the tools you need. You can add them directly to your cart from the parts section.
Reply with: whether your system is currently charged or empty, and if you plan to replace the drier and expansion valve too. I can then fine-tune torque specs and any extra steps for those parts.
HowToo makes it easy: same-day/2-day shipping on every part, plus all the tools and specialty tools you need! 🚚