


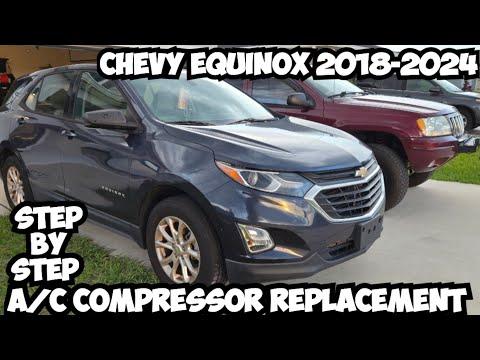







How to Replace the A/C Compressor on a 2019-2025 Cadillac XT4 (Engine: Inline 4 2.0L)
Step-by-step instructions covering tools, parts, safety, oil balancing, and recharge for 2019, 2020, 2021, 2022, 2023, 2024, 2025
How to Replace the A/C Compressor on a 2019-2025 Cadillac XT4 (Engine: Inline 4 2.0L)
Step-by-step instructions covering tools, parts, safety, oil balancing, and recharge for 2019, 2020, 2021, 2022, 2023, 2024, 2025


🔧 XT4 - A/C Compressor Replacement
This is an advanced repair because your XT4’s refrigerant must be professionally recovered, measured, evacuated, and recharged. You can handle the mechanical replacement, but an A/C shop must perform the recovery and recharge with equipment approved for the refrigerant shown on the under-hood label.
Difficulty Level: Advanced | Estimated Time: 4-6 hours
Important: Obtain the current GM service procedure by VIN through a repair-information service before starting. Compressor mounting, refrigerant-line, shield, and wheel torque specifications must not be guessed.
⚠️ Safety & Precautions
- ⚠️ Have a certified A/C shop completely recover the refrigerant before loosening either compressor line.
- 🥽 Liquid refrigerant can cause severe frostbite and permanent eye injury.
- 🚫 Never vent refrigerant into the air or rely on a pressure gauge to prove the system is empty.
- 🔥 Keep refrigerant away from flames, cigarettes, and hot surfaces.
- 🔋 Disconnect the negative battery cable after refrigerant recovery and before unplugging the compressor.
- 🛞 Support your XT4 with properly rated jack stands. Never work beneath a vehicle supported only by a jack.
- 🧴 Use only the refrigerant and compressor-oil type printed on the under-hood A/C label or specified by current GM service information.
- 🧼 Cap every open refrigerant line immediately. Moisture and dirt can ruin a new compressor.
- ⚙️ If the old compressor failed internally, replacing only the compressor can cause another failure. Metal debris requires a full contamination repair.
🔧 Required Tools
You'll need the following tools for this repair:
- Metric socket set, 7mm-18mm
- Metric wrench set, 8mm-18mm
- Torx bit set, T15-T50
- 3/8-inch drive ratchet
- 3/8-inch drive extensions, 3-inch and 6-inch
- 3/8-inch drive torque wrench, 10-80 Nm
- 1/2-inch drive torque wrench, 40-200 Nm
- Serpentine-belt tensioner tool (specialty)
- Plastic trim-clip removal tool
- Small flat-blade screwdriver
- Floor jack rated 2-ton minimum
- Jack stands rated 2-ton minimum
- Wheel chocks
- Refrigerant-line caps and plugs
- Clean graduated measuring cup
- Safety glasses
- Refrigerant-resistant gloves
🔩 Required Parts
HowToo sells the available service parts for this repair:
- Vehicle-specific A/C compressor - Qty: 1
- Compressor refrigerant-line seals - Qty: 1 set
- Correct GM-specified refrigerant oil - Qty: As measured and specified
- Serpentine belt - Qty: 1 if worn or contaminated
- Receiver-drier or desiccant component - Qty: 1 if required by compressor warranty or contamination repair
- Expansion device - Qty: 1 if contaminated or restricted
- Correct refrigerant - Qty: Exact under-hood label charge
Parts note: The current sidebar results don’t contain a confirmed direct-fit compressor for your XT4. Don’t substitute the universal fittings, sealing washer, or refrigerant oils shown there without matching them to GM specifications.
📋 Before You Begin
- 🚗 Park on level pavement, select Park, apply the parking brake, and chock the rear wheels.
- 🏷️ Photograph the under-hood refrigerant label so the shop has the exact refrigerant type and charge weight.
- 🧪 Have the shop recover and weigh the existing refrigerant. Ask them to report whether oil, metal, or dark debris was found.
- 🔍 Inspect the belt, tensioner, compressor connector, refrigerant lines, and condenser for damage before ordering parts.
- 📝 Record the replacement compressor manufacturer’s oil instructions. Some compressors ship dry, while others contain a full or partial oil charge.
- 🔑 Keep the key away from your XT4 after disconnecting the battery so the vehicle can’t wake up unexpectedly.
🔨 Step-by-Step Instructions
Follow these steps in order:
Step 1: Recover the Refrigerant
- Have a certified shop connect approved recovery equipment and completely recover the A/C charge.
- Do not proceed until the shop confirms the system has been recovered.
- Ask whether the recovered oil contained metal particles. Metal changes this from a compressor replacement into a system-contamination repair.
Step 2: Disconnect Electrical Power
- Open the hood and let the engine cool fully.
- Use the correct metric socket from the 7mm-18mm socket set to disconnect the negative battery terminal.
- Move the cable aside so it cannot spring back onto the battery post.
Step 3: Raise and Support the Vehicle
- Use the floor jack rated 2-ton minimum only at the specified lifting point.
- Place the jack stands rated 2-ton minimum beneath the approved support points and lower your XT4 onto them.
- Gently push the body before going underneath. It must remain completely stable.
Step 4: Remove the Lower Access Panels
- Use the appropriate bit from the Torx bit set, T15-T50 and the correct metric socket to remove the lower splash-shield fasteners.
- Use the plastic trim-clip removal tool to release reusable push clips without breaking them.
- Arrange the hardware in removal order because the fasteners may differ by location.
- Cardboard makes an excellent fastener map.
Step 5: Record the Belt Routing
- Photograph the serpentine belt around every pulley before removing it.
- Compare the belt routing with the under-hood diagram, if fitted.
- Inspect the belt for cracks, shiny ribs, missing material, or refrigerant-oil contamination.
Step 6: Remove the Serpentine Belt
- Fit the serpentine-belt tensioner tool securely onto the tensioner.
- Rotate the tensioner only in the direction that releases belt tension.
- Slip the belt off the compressor pulley, then slowly return the tensioner to its resting position.
- Do not let the tensioner snap back.
Step 7: Disconnect the Compressor Connector
- Release the connector lock with the small flat-blade screwdriver without pulling on the wires.
- Inspect the terminals for corrosion, overheating, looseness, or oil intrusion.
- Move the harness away from the compressor and belt path.
Step 8: Disconnect the Refrigerant Lines
- Put on safety glasses and refrigerant-resistant gloves.
- Use the correct metric socket from the 7mm-18mm socket set to remove the compressor line-retaining fastener.
- Separate the line block carefully. Don’t pry against the aluminum sealing surfaces.
- Immediately install refrigerant-line caps and plugs on the compressor and both lines.
- Discard the old seals. Never reuse flattened refrigerant seals.
Step 9: Support and Remove the Compressor
- Support the compressor by hand before removing its final mounting bolt.
- Use the appropriate metric socket, 3/8-inch drive ratchet, and extension to remove the compressor mounting bolts.
- Note every bolt’s original position because lengths may differ.
- Lower the compressor carefully without bending nearby lines or damaging the radiator area.
- Leave brackets and engine mounts in place unless the current GM procedure specifically requires removal.
Step 10: Check for Internal Failure
- Turn the old compressor pulley by hand and inspect its ports using a clean white cloth.
- If you find metal flakes, black sludge, or gritty oil, stop the installation.
- A contaminated system may require condenser replacement, line flushing where permitted, expansion-device replacement, and receiver-drier or desiccant replacement.
- Don’t flush the new compressor or components that GM identifies as non-flushable.
Step 11: Balance the Compressor Oil
- Drain the old compressor into the clean graduated measuring cup while rotating its shaft by hand.
- Follow the new compressor manufacturer’s instructions for draining, measuring, and adjusting its shipping oil.
- Use only the exact GM-specified oil type and quantity. Don’t use universal ester, PAG 46, PAG 100, PAG 150, PAO, or POE oil by guesswork.
- Too much oil reduces cooling. Too little oil destroys the compressor. This is not the place for “close enough.”
Step 12: Install the New Compressor
- Position the compressor against its mounting points without forcing it.
- Start every mounting bolt by hand to prevent cross-threading.
- Use the 3/8-inch drive torque wrench, 10-80 Nm to tighten the compressor bolts to the exact values and sequence in current GM service information.
- Do not use guessed torque figures. Aluminum threads are expensive teachers.
Step 13: Reconnect the Refrigerant Lines
- Remove the temporary caps only when the lines are ready to connect.
- Lightly wet the correct new seals with the specified clean compressor oil.
- Install the seals without twisting them, then seat the line block squarely against the compressor.
- Start the retaining fastener by hand.
- Use the 3/8-inch drive torque wrench, 10-80 Nm and tighten it to the current GM specification.
Step 14: Reconnect the Electrical Connector
- Push the connector straight into the compressor until its lock clicks.
- Gently pull on the connector body to confirm it is latched.
- Route the harness through every original clip and away from the belt.
Step 15: Reinstall the Serpentine Belt
- Route the belt according to your photo and the factory diagram.
- Use the serpentine-belt tensioner tool to release tension and slide the belt over the final pulley.
- Slowly release the tensioner.
- Check that every rib sits completely inside every pulley groove.
Step 16: Reinstall the Lower Panels
- Use the plastic trim-clip removal tool, correct Torx bit, and metric socket to reinstall all shields and clips.
- Use the 3/8-inch drive torque wrench, 10-80 Nm for any threaded shield fasteners that carry a GM torque specification.
- Do not overtighten screws installed in plastic retainers.
Step 17: Lower the Vehicle and Reconnect the Battery
- Use the floor jack rated 2-ton minimum to raise your XT4 slightly and remove the jack stands.
- Lower the vehicle slowly.
- Reconnect the negative battery terminal using the correct metric socket.
- Tighten the terminal only to the current GM specification.
Step 18: Evacuate and Recharge the System
- Have the A/C shop connect approved service equipment for the refrigerant printed on the under-hood label.
- The shop must pull and hold a deep vacuum, perform a leak test, and recharge by exact weight.
- Ask the technician to account for any oil removed during recovery and any components replaced.
- Do not charge by pressure alone or use a consumer recharge can.
✅ After Repair
- 🌡️ Start the engine and operate the A/C at maximum cooling with the blower on high.
- 👂 Listen for grinding, rattling, belt squeal, or repeated harsh compressor engagement.
- 🔍 Check both compressor-line connections electronically for refrigerant leaks.
- 💨 Confirm strong airflow and stable vent temperature at idle and during a road test.
- 🧰 Scan the HVAC and engine modules for stored trouble codes after the repair.
- 🛑 Shut the engine off immediately if the belt wanders, the compressor binds, or abnormal noise develops.
💰 DIY vs Shop Cost
Shop Cost: ₹75,000-₹150,000 for a straightforward compressor replacement, depending on local parts sourcing and refrigerant service
DIY Cost: ₹40,000-₹95,000 for parts plus professional recovery and recharge
You Save: Approximately ₹25,000-₹55,000 by handling the mechanical work yourself
Imported Cadillac parts and specialist labor around Haryana vary widely. Internal contamination can push the repair substantially higher.
🎯 Ready to get started?
HowToo makes it easy: same-day/2-day shipping on every available part, plus all the tools and specialty tools you need! Check the parts and tools sections below, but only order compressor oil and seals after their exact GM specifications are confirmed.
