

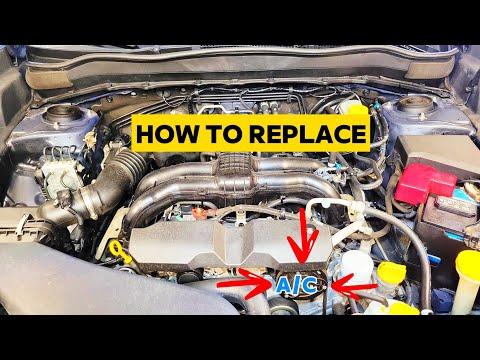







How to Replace the A/C Compressor on a 2019-2024 Subaru Ascent (Trim: Limited | Engine: Flat 4 2.4L)
Step-by-step instructions, tools, parts, R-1234yf safety, and compressor break-in for 2019, 2020, 2021, 2022, 2023, 2024
How to Replace the A/C Compressor on a 2019-2024 Subaru Ascent (Trim: Limited | Engine: Flat 4 2.4L)
Step-by-step instructions, tools, parts, R-1234yf safety, and compressor break-in for 2019, 2020, 2021, 2022, 2023, 2024


🔧 Ascent - A/C Compressor Replacement
This is an advanced repair. The compressor is mechanically replaceable at home, but your Ascent uses HFO-1234yf refrigerant, so a properly equipped A/C shop must recover the charge before you open the system and evacuate and recharge it afterward. Subaru also requires a scan-tool compressor break-in routine after replacement. tsbsearch.com
Important: Certain 2019 Ascents were covered by Subaru campaign WRK-20 for a leaking high-pressure A/C pipe. Check campaign eligibility before buying a compressor because a pipe leak can cause weak cooling without compressor failure. static.nhtsa.gov
Difficulty Level: Advanced | Estimated Time: 4-6 hours plus professional refrigerant service
⚠️ Safety & Precautions
- ⚠️ Never vent refrigerant. Have an R-1234yf-certified shop recover it completely before loosening any A/C connection.
- ⚠️ R-1234yf is mildly flammable. Keep sparks, cigarettes, heaters, and open flames away.
- ⚠️ Wear safety glasses and refrigerant-rated gloves. Escaping liquid refrigerant can cause severe frostbite.
- ⚠️ Disconnect the battery before unplugging or removing the compressor.
- ⚠️ Seal every opened line immediately. Moisture inside the system reacts with refrigerant oil and can damage the new compressor.
- ⚠️ If the old compressor contains metal debris, replacing only the compressor is not enough. The condenser, expansion valve, and contaminated lines must be addressed.
- ⚠️ Don’t start the engine with the system empty. This compressor’s pulley drives its internal mechanism continuously.
🔧 Required Tools
You'll need the following tools for this repair:
- Metric socket set from 8mm to 17mm
- Metric combination wrench set from 8mm to 17mm
- 3/8-inch drive ratchet
- 3/8-inch drive extensions
- 3/8-inch drive torque wrench rated 5-80 Nm
- Serpentine-belt tensioner tool
- Plastic trim-clip removal tool
- Small plastic O-ring pick
- Drain pan
- Plastic A/C line caps and plugs
- R-1234yf recovery and recharge machine (specialty)
- R-1234yf refrigerant scale (specialty)
- R-1234yf manifold gauge set (specialty)
- Vacuum pump rated for automotive A/C service (specialty)
- Subaru-capable bidirectional scan tool (specialty)
- Insulated battery-terminal wrench
- Nitrile refrigerant-rated gloves
- Safety glasses
🔩 Required Parts
HowToo sells all the parts you need for this repair:
- Vehicle-matched TSE17F A/C compressor with 6-groove, 110mm pulley - Qty: 1
- Ascent-specific A/C O-ring and gasket kit - Qty: 1
- Subaru-specified R-1234yf compressor oil - Qty: As measured from removed components
- HFO-1234yf refrigerant - Qty: Exact under-hood label charge
- Serpentine drive belt - Qty: 1 if cracked, glazed, contaminated, or worn
- A/C condenser - Qty: 1 if compressor debris is present
- A/C expansion valve - Qty: 1 if compressor debris is present
Parts note: The matching compressor aisle is open beside this guide. Do not substitute PAG 46, ester oil, or another universal oil unless the compressor manufacturer and current Subaru service information explicitly approve it for this R-1234yf system. Wrong oil is an expensive shortcut.
📋 Before You Begin
- 🚗 Have an A/C shop recover the existing refrigerant and document how much refrigerant and oil the machine removes.
- 🔍 Confirm the compressor is actually faulty. Check for refrigerant leaks, electrical faults, control-valve problems, belt noise, and campaign WRK-20 coverage first.
- 📋 Record the refrigerant type and exact charge printed on the under-hood A/C label. Charge by weight, never by pressure alone.
- 🧪 If the compressor seized or produced metal, stop and inspect the system for contamination before installing anything.
- 🅿️ Park your Ascent on level ground, select Park, apply the parking brake, and let the engine cool completely.
- 🔋 Save any needed settings, switch the ignition off, and keep the key away from the vehicle.
🔨 Step-by-Step Instructions
Follow these steps in order:
Step 1: Recover the refrigerant
- Use an R-1234yf recovery and recharge machine to recover the complete refrigerant charge.
- Record the refrigerant and oil recovered by the machine.
- Do not loosen a fitting until both high-side and low-side readings show no remaining pressure.
Step 2: Disconnect the battery
- Open the hood and use an insulated battery-terminal wrench to disconnect the negative battery terminal.
- Position the cable so it cannot spring back onto the terminal.
- Wait at least 60 seconds before disconnecting compressor wiring.
Step 3: Open access to the compressor
- Use the appropriate metric socket and plastic trim-clip removal tool to remove the intake ducting and covers blocking access.
- Keep each fastener grouped with the component it secures.
- Inspect the routing diagram before removing the drive belt. Take a clear photo for reference.
Step 4: Remove the serpentine belt
- Use the serpentine-belt tensioner tool on the automatic tensioner and rotate it only in its designed release direction.
- Slip the belt off the compressor pulley, then slowly release the tensioner.
- Inspect the belt for cracks, shiny glazing, missing ribs, or refrigerant-oil contamination.
- Draw the belt route before removal.
Step 5: Disconnect the compressor wiring
- Release the connector lock by hand and unplug the compressor electrical connector.
- Do not pull on the wires. Check the connector for oil, corrosion, heat damage, or bent terminals.
Step 6: Disconnect the refrigerant lines
- Clean dirt from both compressor line connections before opening them.
- Use the matching metric socket and 3/8-inch drive ratchet to remove the suction and discharge line retaining bolts.
- Move each line straight away from the compressor without bending or twisting it.
- Immediately seal the lines and compressor ports with plastic A/C line caps and plugs.
- Remove and discard the old seals with a small plastic O-ring pick. Never reuse an A/C O-ring.
Step 7: Remove the compressor
- Support the compressor with one hand or a stable support.
- Use the correct metric socket, extensions, and 3/8-inch drive ratchet to remove the compressor mounting bolts.
- Note each bolt’s original location because the mounting bolts may not all be the same length.
- Lift the compressor out without striking the radiator, hoses, or wiring.
Step 8: Inspect for internal damage
- Drain the removed compressor into a clean measuring container and inspect the oil under bright light.
- If the oil contains silver glitter, gray sludge, or metal fragments, do not install the new compressor as a stand-alone repair.
- Have the condenser and expansion valve replaced and all reusable lines professionally cleaned as required.
- Compare the old and new compressor’s pulley, mounting points, ports, connector, and control valve before installation.
Step 9: Set the compressor oil quantity
- Use only the exact oil specification supplied with the replacement compressor or identified by current Subaru service information.
- Measure the oil drained from the old compressor and account for oil removed by the recovery machine.
- Adjust the new compressor’s oil quantity according to the compressor manufacturer’s instructions and the components being replaced.
- Do not automatically pour an entire bottle into the compressor. Excess oil reduces cooling and can damage the system.
- Turn the new compressor shaft by hand as instructed by its manufacturer to distribute the oil.
Step 10: Install the new compressor
- Place the compressor squarely against its bracket without trapping wiring or hoses.
- Start every mounting bolt by hand before using the 3/8-inch drive ratchet.
- Use the 3/8-inch drive torque wrench to tighten the mounting bolts to the current Subaru service-manual value for each bolt position.
- Do not guess the mounting-bolt torque. Different bolt lengths and positions may carry different specifications.
Step 11: Install new line seals
- Match each new O-ring to the original seal before installation.
- Lightly coat each O-ring with the exact specified compressor oil.
- Install the seals without twisting them, then align each refrigerant line naturally with its compressor port.
- Start the retaining bolts by hand and use the 3/8-inch drive torque wrench to tighten them to the exact current Subaru specification.
- Never pull a misaligned line into place with its bolt. That usually buys you a leak.
Step 12: Reconnect the wiring and belt
- Push the electrical connector into place until its lock clicks.
- Use the serpentine-belt tensioner tool to reinstall the belt according to the original routing.
- Confirm every rib is centered in every grooved pulley before releasing the tensioner.
- Reinstall the intake ducting and covers with the appropriate metric socket and plastic trim-clip removal tool.
Step 13: Reconnect the battery
- Use the insulated battery-terminal wrench to reconnect the negative battery terminal.
- Make sure the terminal cannot rotate by hand.
- Do not start the engine while the A/C system remains empty.
Step 14: Evacuate and recharge the system
- Connect the R-1234yf recovery and recharge machine and pull a deep vacuum.
- Close the valves and confirm the system holds vacuum. A vacuum test is helpful but does not replace an electronic leak test.
- Add only the calculated amount of approved compressor oil.
- Use the R-1234yf refrigerant scale to charge the exact refrigerant weight printed on your Ascent’s under-hood label.
- Never use stop-leak, hydrocarbon refrigerant, or an R-134a conversion fitting.
Step 15: Perform the Subaru compressor break-in
- Connect a Subaru-capable bidirectional scan tool and select the air-conditioning system.
- Run the scan tool’s Variable Compressor Break-In function with the system fully charged.
- Follow every on-screen instruction until the status changes from incomplete to finished.
- Subaru revised this break-in procedure in bulletin 18-232-23, so use current scan-tool software and current service information. tsbsearch.com
✅ After Repair
- ✅ Use the scan tool to check and clear any A/C or engine diagnostic codes.
- ✅ Run the A/C at maximum cooling and verify stable compressor operation.
- ✅ Check vent temperature and compare high-side and low-side pressures with ambient-temperature specifications.
- ✅ Use an R-1234yf electronic leak detector around both compressor connections and all disturbed joints.
- ✅ Inspect the belt while the engine is running. It must remain centered and quiet.
- ✅ Recheck for refrigerant-oil traces after several heat cycles.
- ✅ If cooling remains weak, stop replacing parts and diagnose pressure, sensor, expansion-valve, and rear-HVAC operation.
💰 DIY vs Shop Cost
Shop Cost: $1,200-$2,200 equivalent, depending on compressor damage, refrigerant price, and local labor
DIY Cost: About $325-$700 for parts, plus professional recovery, evacuation, recharge, and scan-tool break-in
You Save: Approximately $400-$900 if the system is clean and you handle the mechanical replacement yourself.
Labor pricing in Sonīpat varies widely. The specialized R-1234yf service and break-in procedure shouldn’t be skipped.
🎯 Ready to get started?
HowToo has opened the compressor, seal, and refrigerant-service aisles for your Ascent. The cleanest beginner plan is to have an A/C shop recover the refrigerant, replace the compressor mechanically at home, then return for vacuum, recharge, leak testing, and Subaru’s required break-in routine.