

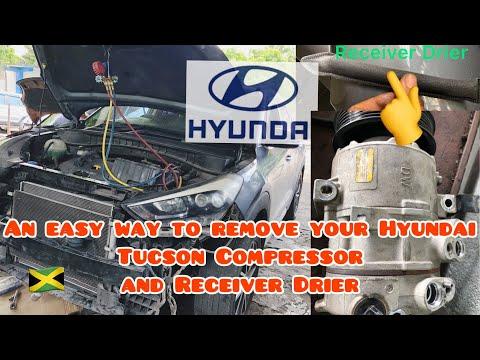





How to Replace the A/C Compressor on a 2019-2021 Hyundai Tucson (Engine: Inline 4 2.4L)
Step-by-step guide with R-1234yf service tools, parts, torque specs, and safety tips for 2019, 2020, 2021
How to Replace the A/C Compressor on a 2019-2021 Hyundai Tucson (Engine: Inline 4 2.4L)
Step-by-step guide with R-1234yf service tools, parts, torque specs, and safety tips for 2019, 2020, 2021


🔧 Tucson - A/C Compressor Replacement
Replacing the A/C compressor on your Tucson requires safely recovering the refrigerant, removing the drive belt and refrigerant lines, installing the new compressor, then evacuating and recharging the system. This job requires A/C service equipment because refrigerant must not be vented into the air.
Difficulty Level: Advanced | Estimated Time: 3-5 hours
⚠️ Safety & Precautions
- ⚠️ Refrigerant can cause frostbite and eye injury. Wear safety glasses and gloves.
- ⚠️ Do not vent refrigerant to the atmosphere. Have the system recovered with approved A/C recovery equipment before opening any lines.
- ⚠️ The A/C system is pressurized. Never loosen refrigerant lines until the system is fully recovered.
- ⚠️ Keep oil and refrigerant away from flames, hot exhaust parts, and cigarettes.
- ⚠️ Disconnect the negative battery cable before unplugging the compressor electrical connector.
- ⚠️ If the old compressor failed internally and sent metal debris into the system, the condenser and expansion valve may need replacement and the lines must be flushed.
🔧 Required Tools
You'll need the following tools for this repair:
- A/C refrigerant recovery machine (specialty)
- R-1234yf manifold gauge set (specialty)
- R-1234yf vacuum pump (specialty)
- R-1234yf refrigerant scale (specialty)
- Electronic refrigerant leak detector (specialty)
- Serpentine belt tool 3/8-inch drive (specialty)
- Ratchet handle 3/8-inch drive
- Socket set 8mm-19mm
- 10mm socket
- 12mm socket
- 14mm socket
- 17mm wrench
- Torque wrench 3/8-inch drive
- Trim clip removal tool
- Flat-blade screwdriver
- Drain pan
- A/C line cap and plug kit (specialty)
- Safety glasses
- Nitrile gloves
- Mechanic gloves
🔩 Required Parts
HowToo sells all the parts you need for this repair:
- A/C compressor - Qty: 1
- A/C compressor sealing washer/O-ring kit - Qty: 1
- PAG refrigerant oil for R-1234yf systems - Qty: As required
- R-1234yf refrigerant - Qty: By underhood label charge amount
- Serpentine belt - Qty: 1 if worn, cracked, or oil-contaminated
- A/C condenser with receiver/drier - Qty: 1 if compressor failed internally
- A/C expansion valve - Qty: 1 if compressor failed internally
📋 Before You Begin
- Park your Tucson on level ground and set the parking brake.
- Let the engine cool fully before working near the belt, radiator fan, or compressor.
- Recover the refrigerant using an A/C refrigerant recovery machine before opening the system.
- Check the underhood A/C label for the exact refrigerant type and charge amount.
- Most Tucson models of this year use R-1234yf refrigerant, but always follow the underhood label.
- Cap open A/C lines immediately. Moisture inside the A/C system can damage the new compressor.
🔨 Step-by-Step Instructions
Follow these steps in order:
Step 1: Recover the Refrigerant
- Use an A/C refrigerant recovery machine connected to the high-side and low-side service ports.
- Recover the refrigerant completely before loosening any A/C line.
- Confirm both manifold gauges read 0 psi after recovery.
- Never vent refrigerant.
Step 2: Disconnect the Battery
- Use a 10mm socket to loosen the negative battery terminal nut.
- Remove the negative battery cable from the battery post.
- Position the cable so it cannot spring back onto the terminal.
- Torque on installation: 5 Nm (44 in-lbs)
Step 3: Raise Access if Needed
- Use a trim clip removal tool and flat-blade screwdriver to remove the lower splash shield fasteners if the compressor is accessed from below.
- Use a 10mm socket to remove splash shield bolts if equipped.
- Set the shield and fasteners aside in order.
Step 4: Remove the Serpentine Belt from the Compressor Pulley
- Take a picture of the belt routing before removal.
- Use a serpentine belt tool 3/8-inch drive on the belt tensioner.
- Rotate the tensioner to relieve belt tension.
- Slip the belt off the A/C compressor pulley.
- Slowly release the tensioner.
- A serpentine belt is the single ribbed belt that drives accessories like the alternator and A/C compressor.
Step 5: Disconnect the Compressor Electrical Connector
- Use your fingers or a flat-blade screwdriver to gently release the compressor connector lock.
- Pull the connector straight off the compressor.
- Do not pull on the wires.
Step 6: Remove the Refrigerant Lines from the Compressor
- Use a 12mm socket or 14mm socket to remove the suction and discharge line retaining bolts at the compressor.
- Carefully pull the refrigerant line block fittings away from the compressor.
- Use an A/C line cap and plug kit to cap the open compressor ports and refrigerant lines immediately.
- Remove and discard the old sealing washers or O-rings.
- Torque on installation: 8-12 Nm (71-106 in-lbs)
Step 7: Remove the A/C Compressor Mounting Bolts
- Support the compressor with one hand.
- Use a 12mm socket or 14mm socket to remove the compressor mounting bolts.
- Lower the compressor carefully out of the bracket area.
- Keep it upright to avoid spilling oil.
- Torque on installation: 20-25 Nm (15-18 ft-lbs)
Step 8: Measure Compressor Oil
- Use a drain pan to drain oil from the old compressor into a clean measuring container.
- Rotate the old compressor clutch plate by hand to help oil drain out.
- Drain shipping oil from the new compressor into a clean container.
- Add the correct amount of fresh PAG refrigerant oil for R-1234yf systems to the new compressor.
- As a basic rule, match the amount removed from the old compressor unless the service information or compressor instructions specify a different amount.
- PAG oil is the special lubricant that circulates with refrigerant to protect the compressor.
Step 9: Install the New Compressor
- Position the new A/C compressor into the mounting bracket.
- Start all mounting bolts by hand to avoid cross-threading.
- Use a 12mm socket or 14mm socket to snug the bolts evenly.
- Use a torque wrench 3/8-inch drive to tighten the bolts.
- Torque to 20-25 Nm (15-18 ft-lbs)
Step 10: Install New A/C Line Seals
- Remove the caps from the refrigerant lines only when ready to connect them.
- Lightly coat the new sealing washers or O-rings with clean PAG refrigerant oil.
- Install the new seals on the suction and discharge line fittings.
- Push the fittings squarely into the compressor ports.
- Use a 12mm socket or 14mm socket to install the line retaining bolts.
- Use a torque wrench 3/8-inch drive to tighten the bolts.
- Torque to 8-12 Nm (71-106 in-lbs)
Step 11: Reconnect the Electrical Connector
- Push the compressor electrical connector onto the new compressor until it clicks.
- Gently tug the connector by the plastic body to confirm it is locked.
Step 12: Reinstall the Serpentine Belt
- Use your belt routing picture to route the belt around the pulleys.
- Use the serpentine belt tool 3/8-inch drive to rotate the tensioner.
- Slip the belt over the A/C compressor pulley last.
- Slowly release the tensioner.
- Check that the belt ribs sit fully in every pulley groove.
- Misrouted belts can shred quickly.
Step 13: Reinstall the Splash Shield
- Use a trim clip removal tool to align the splash shield clips.
- Use a 10mm socket to reinstall the splash shield bolts if equipped.
- Snug the bolts by hand; do not overtighten plastic shield fasteners.
Step 14: Reconnect the Battery
- Place the negative battery cable back on the battery post.
- Use a 10mm socket to tighten the terminal nut.
- Torque to 5 Nm (44 in-lbs)
Step 15: Evacuate the A/C System
- Use the R-1234yf manifold gauge set and R-1234yf vacuum pump.
- Connect the low-side and high-side service hoses to the A/C service ports.
- Pull vacuum for at least 30-45 minutes.
- Close the valves and confirm the system holds vacuum for at least 10 minutes.
- If vacuum drops, use an electronic refrigerant leak detector after partial charge to locate the leak.
Step 16: Recharge the A/C System
- Use an R-1234yf refrigerant scale to charge by weight.
- Add the exact refrigerant amount listed on the underhood A/C label.
- Do not charge by pressure alone.
- Start the engine and set A/C to max cool with the blower on high.
- Confirm the compressor operates and the vents blow cold air.
✅ After Repair
- Check for leaks at the compressor line fittings with an electronic refrigerant leak detector.
- Verify the serpentine belt tracks smoothly with the engine running.
- Confirm cold air from the center vents after several minutes of operation.
- Listen for abnormal grinding, squealing, or rattling from the compressor area.
- If the old compressor failed internally, replace the condenser with receiver/drier and expansion valve before extended A/C use.
💰 DIY vs Shop Cost
Shop Cost: $900-$1,600 (parts + labor + refrigerant service)
DIY Cost: $350-$850 (parts + refrigerant; equipment rental or service may be extra)
You Save: $300-$750 by doing it yourself!
Shop labor rates vary but typically run $100-$150/hour. This repair takes a shop approximately 3-5 hours.
🎯 Ready to get started?
HowToo makes it easy: same-day/2-day shipping on every part, plus all the tools and specialty tools you need! Check out the parts and tools sections below to add everything to your cart.