

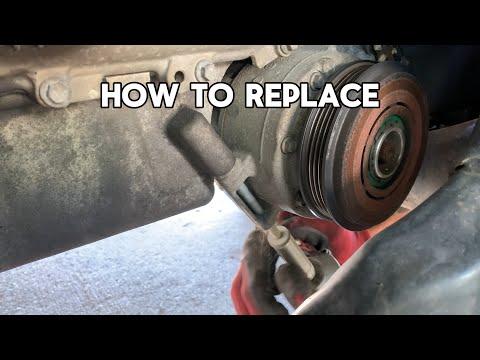






How to Replace the A/C Compressor on a 2018 Ford Fusion Hybrid (High-Voltage Electric)
Step-by-step HV shutdown safety, required tools/parts, O-rings, and R-134a recover/evacuate/recharge tips for 2013, 2014, 2015, 2016, 2017, 2018
How to Replace the A/C Compressor on a 2018 Ford Fusion Hybrid (High-Voltage Electric)
Step-by-step HV shutdown safety, required tools/parts, O-rings, and R-134a recover/evacuate/recharge tips for 2013, 2014, 2015, 2016, 2017, 2018


🔧 Fusion - A/C Compressor Replacement
On your Fusion, the A/C compressor is a high-voltage electric unit (it’s not belt-driven). Replacing it requires safely disabling the hybrid high-voltage system and properly recovering/evacuating/recharging the refrigerant—this is the part that can’t be “vented” to air.
Before I write the exact step-by-step (with correct torque specs), I need 2 quick confirmations:
1) Are we replacing the electric high-voltage A/C compressor (no drive belt on it)?
2) Do you have access to an R-134a recovery/evac/recharge machine, or will a shop handle the refrigerant recovery + recharge?
Difficulty Level: Advanced | Estimated Time: 3-6 hours (plus refrigerant service time)
⚠️ Safety & Precautions
- ⚠️ High voltage: Your Fusion’s A/C compressor uses hybrid high voltage; disabling HV incorrectly can cause severe injury.
- ⚠️ Refrigerant: R-134a must be recovered with proper equipment—never vent refrigerant to the air.
- ⚠️ Correct compressor oil: Electric compressors require non-conductive oil; using the wrong oil can damage the hybrid system.
- ⚠️ Cool-down: Let the vehicle sit so underhood parts aren’t hot before working.
- ⚠️ Battery disconnect is required: You’ll disable the high-voltage system and typically disconnect the 12V battery as part of the procedure.
🔧 Required Tools
You'll need the following tools for this repair:
- Safety glasses
- Mechanic gloves
- High-voltage insulated gloves (Class 0) (specialty)
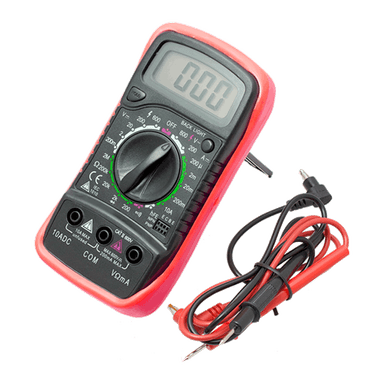
- Digital multimeter CAT III 600V (specialty)
- Floor jack (rated 3-ton minimum)
- Jack stands (rated 3-ton minimum)
- Wheel chocks
- Trim clip removal tool
- 1/4" drive ratchet
- 3/8" drive ratchet
- Socket set 8mm-15mm
- Torque wrench 5-80 Nm
- Line wrench set 10mm-19mm
- A/C manifold gauge set for R-134a
- R-134a recovery/evac/recharge machine (specialty)
- Vacuum pump (A/C) (specialty)
- Refrigerant scale (specialty)
- Shop towels
🔩 Required Parts
HowToo sells all the parts you need for this repair:
- A/C compressor (electric/hybrid type) - Qty: 1
- A/C compressor O-ring seal set - Qty: 1
- Receiver/drier or desiccant element (as applicable) - Qty: 1
- Refrigerant R-134a - Qty: 1 charge
- Electric A/C compressor oil (non-conductive type) - Qty: as required
📋 Before You Begin
- Park on level ground, shift to Park, set the parking brake, and use wheel chocks.
- Confirm the A/C system has been or will be professionally recovered before any lines are opened.
- Plan a clean work area: any dirt in A/C lines can damage the new compressor.
- High-voltage shutdown: You’ll remove the hybrid service disconnect and wait the specified discharge time before touching HV components.
- If you reply to my 2 questions above, I’ll tailor the exact procedure.
🔨 Step-by-Step Instructions
Follow these steps in order:
Step 1: Confirm compressor type and refrigerant plan
- Reply with your answers to the 2 questions in the Overview so I can give the correct, safe procedure for your Fusion.
- Do not start disassembly until you have a refrigerant recovery plan.
Step 2: (Next) High-voltage disable + 12V disconnect
- Once confirmed, I’ll walk you through the exact shutdown sequence and verification using a digital multimeter CAT III 600V.
Step 3: (Next) Remove shields/undertrays and access compressor
- I’ll outline which panels come off and the fastener types, using your socket set 8mm-15mm and trim clip removal tool.
Step 4: (Next) Disconnect A/C lines and replace seals
- I’ll specify the line fitting method using line wrenches 10mm-19mm and which O-rings to replace.
Step 5: (Next) Remove and install compressor
- I’ll provide the exact mounting bolt torque specs once you confirm the configuration.
Step 6: (Next) Evacuate and recharge
- Recharge must be done by weight using a refrigerant scale and R-134a recovery/evac/recharge machine.
✅ After Repair
- Verify A/C blows cold and that the compressor runs quietly.
- Check for leaks at all A/C connections using the A/C machine’s leak test features (or shop leak test).
- Clear any stored HVAC/hybrid codes if present (a capable scan tool may be needed depending on what set).
- Recheck for warning lights on the dash after restoring the high-voltage system.
💰 DIY vs Shop Cost
Shop Cost: ₹45,000-₹120,000 (parts + labor + refrigerant service)
DIY Cost: ₹25,000-₹90,000 (parts only, assuming you have A/C equipment)
You Save: ₹10,000-₹40,000 by doing it yourself!
Shops typically charge 2.5-4.5 hours labor plus A/C service.
🎯 Ready to get started?
HowToo makes it easy: same-day/2-day shipping on every part, plus all the tools and specialty tools you need! Check out the parts and tools sections below to add everything to your cart.