







How to Replace the A/C Compressor on a 2018-2023 Chevrolet Traverse (Engine: V6 3.6L)
Step-by-step guide covering tools, parts, refrigerant safety, oil setup, and recharging for 2018, 2019, 2020, 2021, 2022, 2023
How to Replace the A/C Compressor on a 2018-2023 Chevrolet Traverse (Engine: V6 3.6L)
Step-by-step guide covering tools, parts, refrigerant safety, oil setup, and recharging for 2018, 2019, 2020, 2021, 2022, 2023


🔧 Traverse - A/C Compressor Replacement
This is an advanced repair. The compressor is mechanically replaceable at home, but a certified A/C shop must recover the refrigerant before you loosen either refrigerant line. After installation, the system must be vacuum-tested and charged by weight.
The compressor sits low on the engine, so access is mainly through the right-front wheel well and underneath. Plan on replacing the line seals and matching the new compressor’s oil quantity to the old compressor.
Difficulty Level: Advanced | Estimated Time: 4-6 hours, plus recovery and charging
Assumption: These instructions cover the stock FWD layout. Verify final fastener torque and refrigerant specifications through current GM Service Information and the underhood A/C label before assembly. GM identifies its Service Information system as the source for model-specific repair procedures. experience.gm.com
⚠️ Safety & Precautions
- ⚠️ Do not vent refrigerant. Have the system completely recovered with approved A/C equipment before disconnecting a line.
- 🧤 Wear refrigerant-rated gloves and safety glasses. Escaping refrigerant can cause severe frostbite.
- 🔥 Keep sparks, cigarettes, and open flames away from the work area.
- 🔌 Disconnect the negative battery cable after refrigerant recovery.
- 🛞 Support your Traverse on jack stands. Never work under a vehicle supported only by a jack.
- 🧼 Plug every open refrigerant line immediately. Moisture or dirt can damage the replacement compressor. Service guidance likewise stresses sealing compressor ports immediately after disconnection. static.nhtsa.gov
- 🛢️ Never guess the oil charge. Too much oil reduces cooling, while too little can destroy the compressor.
- ⛔ If the old compressor seized or discharged metallic debris, stop. The condenser, expansion device, and lines may require additional service before another compressor is installed.
🔧 Required Tools
You'll need the following tools for this repair:
- R-1234yf-compatible recovery machine (specialty)
- R-1234yf-compatible manifold gauge set (specialty)
- R-1234yf-compatible vacuum pump (specialty)
- Refrigerant charging scale accurate to 10 grams (specialty)
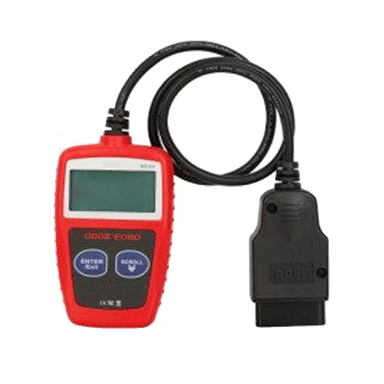
- Automotive scan tool with HVAC data capability (specialty)
- Metric socket set, 7mm-18mm
- Metric wrench set, 10mm-18mm
- 3/8-inch drive ratchet
- 3/8-inch drive extensions, 3-inch and 6-inch
- 3/8-inch drive breaker bar
- 3/8-inch drive torque wrench, 10-100 Nm
- 1/2-inch drive torque wrench, 40-200 Nm
- Serpentine-belt tool, 15mm (specialty)
- Trim-clip removal tool
- Flat-blade screwdriver, 6mm
- Floor jack rated 2-ton minimum
- Jack stands rated 2-ton minimum
- Wheel chocks
- Drain pan, 2-quart minimum
- Graduated measuring cup, 250ml
- Refrigerant line plugs and caps (specialty)
- Nitrile gloves
- Refrigerant-rated gloves
- Safety glasses
🔩 Required Parts
HowToo sells all the parts you need for this repair:
- A/C compressor - Qty: 1
- A/C compressor sealing washers - Qty: 1 set
- Compressor-specified refrigerant oil - Qty: As measured and specified
- Correct refrigerant shown on the underhood label - Qty: Exact label charge by weight
- Serpentine drive belt - Qty: 1 if cracked, glazed, contaminated, or damaged
- A/C receiver-drier or desiccant component - Qty: 1 if required by the compressor warranty or contamination condition
Parts warning: Use the oil type required by the compressor manufacturer and the vehicle label. Don’t substitute a universal oil merely because the viscosity sounds close. Compressors are expensive enough without feeding one the wrong oil.
📋 Before You Begin
- 🚗 Park your Traverse on level concrete. Shift into Park, apply the parking brake, and chock both rear wheels.
- ❄️ Have a qualified A/C technician identify the refrigerant, check for contamination, and recover the complete charge.
- 🏷️ Photograph the underhood refrigerant label. You’ll need its exact refrigerant type and charge weight during recharging.
- 🔍 Confirm why the compressor failed. Check pressure readings, command data, wiring, belt condition, and cooling-fan operation before condemning it.
- 🔋 After recovery, switch the ignition off, remove the key, wait two minutes, and disconnect the negative battery terminal.
- 🧴 Read the new compressor instructions before removing its shipping plugs. Some units arrive with a full oil charge, while others contain only assembly oil.
- 📱 No infotainment service mode or battery registration is required for this mechanical repair.
🔨 Step-by-Step Instructions
Follow these steps in order:
Step 1: Recover the refrigerant
- Connect the R-1234yf-compatible recovery machine to the high- and low-side service ports.
- Identify and recover the refrigerant according to the machine manufacturer’s instructions.
- Confirm both sides remain at approximately zero gauge pressure before disconnecting any A/C line.
- Do not use pressure alone to identify the refrigerant. Contaminated systems require dedicated handling.
Step 2: Disconnect electrical power
- Use a 10mm wrench to loosen the negative battery-terminal nut.
- Remove and isolate the negative cable so it cannot spring back onto the battery post.
Step 3: Raise the right-front corner
- Use the 1/2-inch drive breaker bar and correct metric socket to loosen the right-front wheel nuts one turn.
- Raise the front of your Traverse with the 2-ton floor jack at an approved lifting point.
- Lower the vehicle securely onto 2-ton jack stands.
- Remove the wheel nuts and right-front wheel using the metric socket set.
Step 4: Remove the lower shields
- Use the appropriate 7mm or 10mm socket and trim-clip removal tool to remove the right-front splash-shield fasteners.
- Remove the lower engine shield if it blocks the compressor.
- Arrange the fasteners by location. Similar-looking clips have a talent for becoming “extras.”
Step 5: Record the belt routing
- Photograph the serpentine belt routing before removal.
- Inspect the belt for cracks, missing ribs, glazing, oil saturation, or damaged edges.
- Replace a damaged belt rather than reinstalling it.
Step 6: Remove the serpentine belt
- Fit the 15mm serpentine-belt tool onto the automatic tensioner.
- Rotate the tensioner slowly to release belt tension.
- Slide the belt off the compressor pulley, then slowly return the tensioner to its stop.
- Do not let the tensioner snap back.
- Keep the belt ribs seated in every pulley.
Step 7: Disconnect the compressor electrical connector
- Release the connector lock with the 6mm flat-blade screwdriver.
- Pull on the connector body, not the wires.
- Inspect the terminals for heat damage, corrosion, or refrigerant-oil contamination.
Step 8: Disconnect the refrigerant lines
- Place the 2-quart drain pan beneath the compressor.
- Use the correct socket from the metric socket set to remove the suction-and-discharge manifold retaining bolt.
- Gently pull the line manifold straight away from the compressor. Don’t pry against an aluminum sealing surface.
- Immediately cap the vehicle lines and compressor ports with refrigerant line plugs and caps.
- Remove and discard the old sealing washers.
Step 9: Remove the old compressor
- Support the compressor with one hand or a suitable strap.
- Use the metric socket set, 3/8-inch ratchet, and extensions to remove the compressor mounting bolts.
- Note each bolt’s position and length.
- Lower the compressor carefully through the available lower or wheel-well opening.
- Avoid striking the radiator, condenser, wiring, or refrigerant lines.
Step 10: Measure the old compressor oil
- Position the old compressor over the 250ml graduated measuring cup.
- Rotate the pulley hub by hand while draining oil from both ports.
- Record the amount and inspect it under bright light.
- Clean oil without metallic glitter supports a straightforward replacement. Gray oil or metal debris means the system needs contamination repair, not just another compressor.
Step 11: Prepare the replacement compressor
- Read the compressor’s supplied oil statement before draining or adding anything.
- Use the 250ml graduated measuring cup to adjust the replacement compressor according to its instructions and the measured oil removed.
- Use only the specified refrigerant oil.
- Rotate the compressor hub by hand approximately ten turns to distribute the oil internally.
- Leave the shipping plugs installed until immediately before connecting the lines.
Step 12: Install the replacement compressor
- Position the compressor against its mounting bracket without trapping the wiring harness.
- Start every mounting bolt by hand to prevent cross-threading.
- Use the metric socket set to snug the mounting bolts evenly.
- Use the 3/8-inch torque wrench to tighten the mounting bolts to the current GM Service Information specification for your Traverse.
- Do not use an unverified generic torque value. Aluminum mounting ears can crack if overtightened.
Step 13: Install new line seals
- Confirm the replacement sealing washers match the old washer positions and dimensions.
- Lightly coat the new seals with the exact refrigerant oil specified for the system.
- Remove the port plugs and immediately install the line manifold squarely onto the compressor.
- Start the retaining bolt by hand, then tighten it with the 3/8-inch torque wrench to the current GM Service Information specification.
- Do not reuse the old seals or guess this torque. A distorted manifold or crushed seal will leak.
Step 14: Reconnect the wiring and belt
- Push the electrical connector onto the compressor until its lock clicks.
- Route the belt using your photograph and the underhood routing diagram.
- Use the 15mm serpentine-belt tool to rotate the tensioner and slip the belt over the final pulley.
- Slowly release the tensioner.
- Check every pulley by sight and touch. Each belt rib must sit inside a pulley groove.
Step 15: Reassemble the wheel well
- Install the splash shield and lower engine shield using the 7mm or 10mm socket and original clips.
- Install the right-front wheel and hand-start all wheel nuts.
- Raise the vehicle slightly with the 2-ton floor jack, remove the stands, and lower it carefully.
- Tighten the wheel nuts in a star pattern with the 1/2-inch torque wrench to the wheel torque specified in the owner information or current GM Service Information.
Step 16: Evacuate and leak-test the system
- Connect the R-1234yf-compatible manifold gauge set and vacuum pump.
- Evacuate the system using professional A/C service procedures.
- Close the manifold valves and verify that the vacuum holds. A loss of vacuum means the leak must be corrected before charging.
- A vacuum test doesn’t replace an electronic leak test, but it catches many assembly leaks before refrigerant is wasted.
Step 17: Charge by exact weight
- Place the refrigerant cylinder on the charging scale accurate to 10 grams.
- Charge only the refrigerant type and exact weight printed on your Traverse’s underhood label.
- Don’t charge by pressure or can count. Ambient temperature changes pressure, and partially filled cans make the math unreliable.
- Reconnect the negative battery cable using the 10mm wrench.
✅ After Repair
- ✅ Start the engine and switch the A/C to maximum cooling with the blower on high.
- 👀 Watch the belt and tensioner from a safe distance. Stop immediately if the belt walks sideways or makes noise.
- 🔍 Use the automotive scan tool and gauge set to check compressor command, refrigerant pressures, vent temperature, and cooling-fan operation.
- 🧪 Leak-check both compressor connections and service ports with equipment suitable for the installed refrigerant.
- 🌡️ Confirm steady cooling at idle and around 1,500 rpm without abnormal compressor noise.
- 🛞 Recheck wheel-nut torque after approximately 80-160 km of driving.
- 📝 Keep the recovery weight, oil amount, and recharge weight with your service records.
💰 DIY vs Shop Cost
Shop Cost: $1,100-$1,900, including compressor, refrigerant service, and labor
DIY Cost: $450-$850, including the compressor, seals, oil, and professional recovery/recharge
You Save: Approximately $500-$1,000 by handling the mechanical work yourself!
Local labor pricing and imported refrigerant availability around Sonīpat can change these figures considerably. This repair usually occupies a shop for approximately 3-5 hours, including evacuation and charging.
🎯 Ready to get started?
The compressor, sealing washers, and refrigerant-oil aisle are now open beside this guide. Match the oil to the compressor instructions and underhood label before ordering.
🚗 HowToo offers same-day/2-day shipping on every part, plus all the tools and specialty tools you need! Check out the parts and tools sections below to add everything to your cart.