

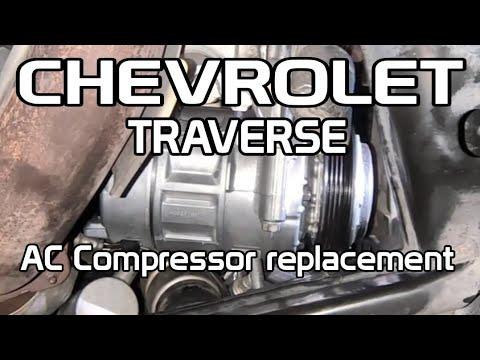




How to Replace the A/C Compressor on a 2018-2022 Chevrolet Traverse (Engine: V6 3.6L)
Step-by-step R-1234yf recovery, installation, oil, torque, leak-test, and recharge guide for 2018, 2019, 2020, 2021, 2022
How to Replace the A/C Compressor on a 2018-2022 Chevrolet Traverse (Engine: V6 3.6L)
Step-by-step R-1234yf recovery, installation, oil, torque, leak-test, and recharge guide for 2018, 2019, 2020, 2021, 2022


🔧 Traverse - A/C Compressor Replacement
Replacing the A/C compressor requires recovering the R-1234yf refrigerant, removing the drive belt, disconnecting the refrigerant lines, and removing the compressor from below. A certified A/C machine is required to recover, evacuate, measure oil, leak-test, and recharge the system safely.
Difficulty Level: Advanced | Estimated Time: 4-6 hours
Assumption: The compressor is being replaced after a confirmed mechanical or electrical diagnosis. Refrigerant and oil quantities must follow the underhood A/C label and compressor instructions.
⚠️ Safety & Precautions
- ⚠️ Your Traverse uses high-pressure R-1234yf refrigerant, which is mildly flammable and can cause severe frostbite or eye injury.
- ⚠️ Never vent refrigerant. Have a qualified automotive A/C technician recover it with an SAE-approved R-1234yf machine.
- ⚠️ Do not use an R-134a machine, adapters, refrigerant, or oil in this system.
- ⚠️ Work in a ventilated area without cigarettes, flames, sparks, or hot work nearby.
- ⚠️ Disconnect the negative battery cable before touching the compressor connector or removing the compressor.
- ⚠️ Never loosen an A/C fitting until a recovery machine confirms that system pressure is zero.
- ⚠️ Support your Traverse with properly rated jack stands. Never work beneath a vehicle supported only by a jack.
- ⚠️ If the old compressor failed internally, metal debris may require condenser replacement and line flushing. Installing only a compressor can cause immediate repeat failure.
🔧 Required Tools
You'll need the following tools for this repair:
- SAE J2843-approved R-1234yf recovery and recharge machine (specialty)
- R-1234yf electronic refrigerant leak detector (specialty)
- Refrigerant oil measuring cylinder marked in millilitres
- Digital scale rated for 5 kilograms minimum
- 15mm six-point socket
- 10mm socket
- 13mm socket
- 7mm socket
- 1/4-inch-drive ratchet
- 3/8-inch-drive ratchet
- 3/8-inch-drive 6-inch extension
- Serpentine-belt tool with 15mm adapter
- Torque wrench rated 5-60 Nm
- Plastic trim-clip removal tool
- Refrigerant line caps and plugs
- Floor jack rated 2-ton minimum
- Jack stands rated 2-ton minimum
- Wheel chocks
- Drain pan rated 5 litres minimum
- Inspection light
- Paint marker
- Nitrile mechanic's gloves
- Safety glasses with side shields
🔩 Required Parts
HowToo sells all the parts you need for this repair:
- A/C compressor matched to the original electrical connector and pulley - Qty: 1
- Compressor suction-line sealing washer - Qty: 1
- Compressor discharge-line sealing washer - Qty: 1
- R-1234yf refrigerant - Qty: As specified on the underhood A/C label
- GM-specified R-1234yf-compatible PAG refrigerant oil - Qty: As measured and required
- Serpentine drive belt - Qty: 1 if worn, cracked, stretched, or contaminated
- A/C condenser - Qty: 1 if compressor debris contaminated the system
- Desiccant-containing condenser assembly - Qty: 1 if the system remained open or is contaminated
Do not choose compressor oil by viscosity alone. Use the exact oil identified by GM service information and the replacement compressor manufacturer.
📋 Before You Begin
- 📍 Park your Traverse on level pavement, select Park, apply the parking brake, and chock both rear wheels.
- 🏷️ Photograph the underhood A/C label. Its refrigerant charge is authoritative for your Traverse.
- 🔎 Confirm the compressor is faulty. A blown fuse, pressure-sensor fault, wiring problem, low refrigerant charge, or cooling-fan fault can imitate compressor failure.
- ♻️ Connect the R-1234yf recovery machine and recover the refrigerant completely before opening the system.
- 🔋 Switch the ignition off, move the key fob away, loosen the negative battery terminal with a 10mm socket, and isolate the cable.
- 🧊 Keep every refrigerant opening capped. Moisture entering the system can damage the desiccant and form corrosive acids.
- 🛢️ Plan to measure the oil removed from the old compressor. Do not automatically pour the replacement compressor's entire shipping-oil quantity into the system.
🔨 Step-by-Step Instructions
Follow these steps in order:
Step 1: Recover the Refrigerant
- Use the SAE J2843-approved R-1234yf machine and connect its couplers to the identified high- and low-side service ports.
- Follow the machine's recovery program until it reports that recovery is complete and system pressure remains at zero.
- Use safety glasses and gloves whenever connecting or disconnecting service couplers.
- Record the recovered refrigerant quantity. A very low amount indicates that a leak must be found before recharging.
Step 2: Raise and Support the Vehicle
- Use the floor jack at an approved front lifting point, then lower your Traverse securely onto both jack stands.
- Shake the vehicle gently by hand to confirm it is stable before going underneath.
- Use a 7mm or 10mm socket, as fitted, and the trim-clip removal tool to remove the lower splash shield fasteners.
- Set the splash shield aside without bending it.
Step 3: Record and Remove the Drive Belt
- Use a paint marker to draw the belt route or take a clear photograph before removal.
- Inspect the belt-routing label under the hood and use it as the primary routing reference.
- Fit the serpentine-belt tool with its 15mm adapter onto the tensioner and rotate the tensioner slowly to release belt tension.
- Slip the belt off the compressor pulley, then slowly return the tensioner to its stop.
- Inspect the belt for cracks, glazing, missing ribs, and refrigerant-oil contamination.
- Never let the tensioner snap backward.
Step 4: Disconnect the Compressor Wiring
- Use the inspection light to locate the compressor electrical connector from below.
- Release the connector lock by hand and unplug it by pulling on the connector body, not the wires.
- Inspect the terminals for heat damage, corrosion, oil intrusion, or loose pins.
Step 5: Disconnect the Refrigerant Lines
- Confirm with the R-1234yf machine that system pressure remains at zero.
- Position the drain pan below the compressor to catch refrigerant oil.
- Use the correctly fitting 10mm or 13mm socket and ratchet to remove the compressor line-manifold retaining bolt.
- Pull the manifold straight away without twisting or prying against its sealing surfaces.
- Immediately install refrigerant line caps and plugs in the lines and compressor ports.
- Discard both old sealing washers. Never reuse refrigerant seals.
Step 6: Remove the Old Compressor
- Support the compressor with one hand because it is heavy and awkward.
- Use a 13mm socket, 6-inch extension, and ratchet to loosen the compressor mounting bolts evenly.
- Remove the lower bolts first and the upper bolt last while supporting the compressor.
- Lower the compressor carefully without striking the radiator, lines, or wiring.
- Keep the old compressor upright until its oil can be measured.
Step 7: Check for Internal Compressor Failure
- Use the drain pan and marked measuring cylinder to drain oil from the old compressor while rotating its hub by hand.
- Inspect the oil under the inspection light. Grey oil, metallic glitter, black debris, or burnt material indicates internal failure.
- If debris is present, do not install only the new compressor. Replace the condenser/desiccant assembly and clean or replace contaminated lines following GM A/C contamination procedures.
- The expansion device and evaporator circuit must also be evaluated if contamination travelled beyond the condenser.
Step 8: Set the Compressor Oil Quantity
- Use the measuring cylinder to record how much oil drained from the old compressor.
- Check the replacement compressor instructions to determine whether it is shipped dry, partially filled, or fully filled.
- Use only the specified R-1234yf-compatible PAG oil and adjust the new compressor to the required replacement amount.
- Never exceed the total system oil capacity. Excess oil reduces cooling and may damage the compressor.
- Use gloved hands to rotate the new compressor hub approximately ten turns, if permitted by its instructions, to distribute oil internally.
Step 9: Install the New Compressor
- Place the compressor against its mounting bracket and start every mounting bolt by hand.
- Use a 13mm socket and torque wrench to tighten the compressor mounting bolts evenly to 25 Nm (18 ft-lbs).
- Verify that the compressor sits flush against the bracket and no wiring is trapped behind it.
Step 10: Install the Refrigerant Lines
- Remove the caps only when you are ready to connect the lines.
- Use gloved fingers to coat both new sealing washers lightly with the specified clean PAG oil.
- Place the seals in their correct positions and seat the line manifold squarely against the compressor.
- Start the retaining bolt by hand, then use the correct socket and torque wrench to tighten it to 22 Nm (16 ft-lbs).
- Do not use sealant, thread tape, or mineral oil on the fittings.
Step 11: Reconnect the Wiring and Belt
- Push the compressor electrical connector together by hand until its lock clicks.
- Route the belt around every pulley according to the underhood routing label, leaving the easiest smooth pulley until last.
- Use the serpentine-belt tool with 15mm adapter to rotate the tensioner, slip the belt over the final pulley, and release the tensioner slowly.
- Use the inspection light to verify that every belt rib sits fully inside every grooved pulley.
Step 12: Reassemble the Lower Covers
- Use the 7mm or 10mm socket and ratchet to reinstall the lower splash shield with its original fasteners.
- Tighten the small shield fasteners only until seated. Do not strip the plastic retainers.
- Use the floor jack to raise your Traverse, remove the jack stands, and lower it carefully.
Step 13: Reconnect the Battery
- Place the negative battery terminal fully onto its post.
- Use a 10mm socket and torque wrench to tighten the negative terminal to 5 Nm (44 in-lbs).
- Do not start the engine until the system has passed evacuation and leak testing.
Step 14: Evacuate and Leak-Test the System
- Use the SAE J2843-approved R-1234yf machine to evacuate the system according to the machine instructions.
- Maintain the vacuum long enough to remove moisture, then perform the machine's vacuum-decay leak test.
- If vacuum is lost, use the R-1234yf electronic leak detector to locate and repair the leak before charging.
- Never use compressed air or oxygen to pressure-test an A/C system.
Step 15: Recharge the System
- Program the R-1234yf machine with the exact refrigerant mass printed on the underhood A/C label.
- Add only the calculated quantity of specified PAG oil. Account for oil already installed in the compressor.
- Use the machine to charge the system by weight. Do not charge by pressure or by can count.
- Disconnect and cap both service ports after the machine completes its procedure.
✅ After Repair
- ✅ Start the engine and verify that the belt runs centrally without flutter, squealing, or wandering.
- ✅ Set the blower to high, select the coldest temperature, open the centre vents, and command A/C operation.
- ✅ Use the inspection light to check the compressor connections for oil residue or leakage.
- ✅ Use the R-1234yf electronic leak detector around both compressor fittings and service ports.
- ✅ Confirm stable vent cooling and normal compressor operation under the recovery machine manufacturer's test conditions.
- ✅ Shut the engine off and recheck the belt seating after the system has operated.
- ✅ If the battery disconnect changed automatic window operation, fully close each window and hold its switch upward briefly to restore express operation.
- ✅ Stop immediately if the compressor knocks, the belt smokes, or high-side pressure rises abnormally.
💰 DIY vs Shop Cost
Shop Cost: ₹75,000-₹145,000 (parts + labor)
DIY Cost: ₹38,000-₹85,000 (parts only, excluding A/C machine rental or service)
You Save: ₹25,000-₹60,000 by doing the mechanical work yourself!
Panipat pricing varies because this U.S.-market compressor and R-1234yf equipment may require specialist sourcing. This repair takes a shop approximately 4-6 hours.
🎯 Ready to get started?
HowToo makes it easy: same-day/2-day shipping on every part, plus all the tools and specialty tools you need! Check out the parts and tools sections below to add everything to your cart.