

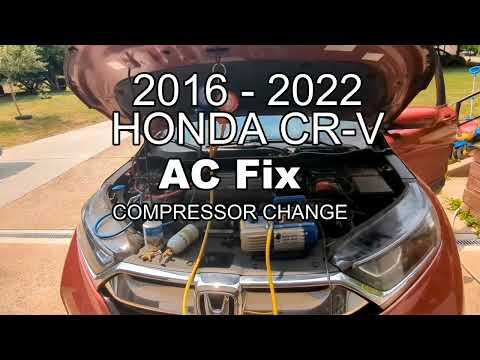







How to Replace the A/C Compressor on a 2017-2019 Honda CR-V (Trim: LX | Engine: Inline 4 2.4L)
Step-by-step guide covering tools, parts, oil, torque specs, safety, and R-1234yf recharge for 2017, 2018, 2019
How to Replace the A/C Compressor on a 2017-2019 Honda CR-V (Trim: LX | Engine: Inline 4 2.4L)
Step-by-step guide covering tools, parts, oil, torque specs, safety, and R-1234yf recharge for 2017, 2018, 2019


🔧 CR-V - A/C Compressor Replacement
Replacing the A/C compressor requires recovering the refrigerant, removing the drive belt and refrigerant lines, then installing the new compressor with the correct amount of oil. A certified A/C shop must recover and recharge the system because releasing refrigerant is unsafe and illegal.
Difficulty Level: Advanced | Estimated Time: 3-5 hours
Assumption: The A/C system has no internal compressor debris or major refrigerant leak.
⚠️ Safety & Precautions
- ⚠️ Have an A/C shop completely recover the refrigerant before loosening any refrigerant connection.
- ⚠️ Liquid refrigerant can cause severe frostbite and eye injury.
- ⚠️ Never vent refrigerant into the atmosphere or use compressed air to test the system.
- ⚠️ Keep moisture and dirt out by capping every open refrigerant line immediately.
- ⚠️ If the old compressor seized or released metal debris, replace the condenser and expansion valve and flush approved reusable lines.
- ⚠️ Disconnect the negative battery cable before unplugging or removing the compressor.
- ⚠️ Support your CR-V with jack stands. Never work beneath a vehicle supported only by a floor jack.
- ⚠️ Use only the refrigerant type, oil type, and charge weight printed on the under-hood A/C label.
🔧 Required Tools
You'll need the following tools for this repair:
- R-1234yf recovery and recharge machine (specialty)
- A/C refrigerant identification equipment (specialty)
- A/C flush equipment (specialty)
- Metric socket set, 8mm-17mm
- Metric combination wrench set, 8mm-17mm
- 3/8-inch drive ratchet
- 3/8-inch drive 6-inch extension
- 3/8-inch drive torque wrench, 7-80 ft-lbs
- 14mm serpentine-belt wrench
- Phillips No. 2 screwdriver
- Trim-clip removal tool
- A/C line caps and plugs (specialty)
- Clean graduated oil measuring cylinder
- Digital gram scale
- Floor jack rated 2-ton minimum
- Jack stands rated 2-ton minimum
- Wheel chocks
- Mechanic gloves
- Safety glasses
🔩 Required Parts
HowToo sells all the parts you need for this repair:
- A/C compressor assembly with clutch - Qty: 1
- Compressor suction-line O-ring - Qty: 1
- Compressor discharge-line O-ring - Qty: 1
- Honda-specified R-1234yf compressor oil - Qty: As measured
- R-1234yf refrigerant - Qty: Under-hood label specification
- Serpentine drive belt - Qty: 1 if worn, cracked, or contaminated
- A/C condenser - Qty: 1 if compressor debris is present
- A/C expansion valve - Qty: 1 if compressor debris is present
📋 Before You Begin
- Park your CR-V on level pavement, select Park, apply the parking brake, and chock the rear wheels.
- Have a certified shop identify and fully recover the refrigerant with an R-1234yf recovery machine.
- Record the amount of refrigerant and oil removed by the recovery machine.
- Turn the ignition off and keep the key away from your CR-V.
- Disconnecting the battery may reset the clock, radio presets, and automatic window functions.
- Check the replacement compressor instructions before opening its shipping plugs. Some compressors arrive prefilled with oil.
- Do not rotate or energize the new compressor until its oil quantity has been correctly adjusted.
🔨 Step-by-Step Instructions
Follow these steps in order:
Step 1: Recover the Refrigerant
- Use an R-1234yf recovery and recharge machine to identify and recover the refrigerant completely.
- Confirm both high- and low-side readings remain at zero pressure before opening the system.
- Record the refrigerant and oil quantities reported by the machine.
- Do not continue if pressure remains in the system.
Step 2: Disconnect the Battery
- Open the hood and use a 10mm socket to loosen the negative battery-terminal nut.
- Remove the negative terminal and isolate it so it cannot touch the battery post.
- Wait at least three minutes before working around electrical connectors.
Step 3: Raise and Support the Vehicle
- Use a floor jack at the front center lifting point to raise your CR-V.
- Place 2-ton jack stands beneath both front-side support points and lower the vehicle onto them.
- Gently push the body to verify it is stable before going underneath.
Step 4: Remove the Lower Covers
- Use a Phillips No. 2 screwdriver and trim-clip removal tool to remove the fasteners securing the lower engine splash shield.
- Remove any right-side splash panel blocking access to the compressor.
- Keep the clips organized so each one returns to its original position.
Step 5: Remove the Drive Belt
- Photograph the drive-belt routing before removal.
- Use a 14mm serpentine-belt wrench on the automatic tensioner. The tensioner is the spring-loaded pulley that keeps the belt tight.
- Rotate the tensioner slowly to release belt tension, then slide the belt off the compressor pulley.
- Release the tensioner slowly. Do not let it snap back.
- Remove the belt if it will be replaced; otherwise secure it away from oil and dirt.
Step 6: Disconnect the Compressor Wiring
- Press the locking tab and unplug the compressor electrical connector by hand.
- Release the wiring harness from its retainers using the trim-clip removal tool.
- Inspect the connector for melted plastic, corrosion, or damaged terminals.
Step 7: Disconnect the Refrigerant Lines
- Clean around both compressor line connections before opening them.
- Use the correctly fitting metric socket from the 8mm-17mm socket set to remove each refrigerant-line retaining bolt.
- Pull each line straight away without twisting or bending it.
- Use A/C line caps and plugs immediately on the open lines and compressor ports.
- Remove and discard both old O-rings. Never reuse refrigerant O-rings.
Step 8: Remove the Old Compressor
- Support the compressor by hand. It is heavier than it appears.
- Use the correctly fitting metric socket, ratchet, and 6-inch extension to remove the compressor mounting bolts.
- Note the position and length of every mounting bolt.
- Lower the compressor carefully without contacting the radiator, hoses, or wiring.
Step 9: Check for Internal Damage
- Use a clean graduated oil measuring cylinder to drain and measure the oil from the old compressor.
- Inspect the drained oil and line openings for shiny metal particles, black residue, or burnt oil.
- If debris is present, stop the installation. Use approved A/C flush equipment on flushable lines and replace the condenser and expansion valve.
- Do not flush the compressor, condenser, expansion valve, or flexible muffler hoses.
- Metal debris requires full contamination cleanup.
Step 10: Adjust the New Compressor Oil
- Read the compressor supplier’s oil label and installation instructions before removing its plugs.
- Use a clean graduated oil measuring cylinder to verify the oil supplied in the new compressor.
- Adjust the new compressor so the system receives the amount of Honda-specified oil removed with the old component and recovery process.
- Use only the exact oil type stated on the under-hood A/C label or compressor instructions. Do not mix PAG and POE oils.
- Turn the compressor hub by hand approximately ten revolutions after adjustment to distribute the oil.
- If the old compressor cannot be drained or the oil amount is uncertain, have an A/C specialist set the oil charge from Honda service data.
Step 11: Install the New Compressor
- Lift the new compressor into position while keeping its ports plugged.
- Start all mounting bolts by hand to prevent crossed threads.
- Use a metric socket and torque wrench to tighten the compressor mounting bolts evenly to 22 Nm (16 ft-lbs).
- Do not use an impact wrench on the aluminum mounting points.
Step 12: Reconnect the Refrigerant Lines
- Remove the shipping plugs only when each line is ready to connect.
- Lightly coat both new O-rings with the same Honda-specified compressor oil using a gloved fingertip.
- Install the O-rings without twisting them and seat each line squarely against its compressor port.
- Start the line bolts by hand, then use a metric socket and torque wrench to tighten each connection to 9.8 Nm (87 in-lbs).
- Do not overtighten the line bolts; the compressor housing is aluminum.
Step 13: Reconnect the Wiring
- Push the compressor electrical connector into place by hand until its lock clicks.
- Use the trim-clip removal tool as needed to return the harness to its original retainers.
- Verify the harness cannot touch the belt or pulley.
Step 14: Reinstall the Drive Belt
- Route the belt according to the routing photograph, leaving the easiest pulley for last.
- Use the 14mm serpentine-belt wrench to rotate the tensioner and slip the belt over the final pulley.
- Release the tensioner slowly.
- Inspect every pulley and confirm the belt ribs sit fully inside the pulley grooves.
Step 15: Reinstall the Lower Covers
- Position the splash shields and use the trim-clip removal tool and Phillips No. 2 screwdriver to reinstall their original fasteners.
- Replace any broken clips rather than leaving the shield loose.
- Use the floor jack to raise your CR-V slightly, remove the jack stands, and lower it completely.
Step 16: Reconnect the Battery
- Install the negative battery terminal and use a 10mm socket to tighten its nut securely.
- Do not overtighten or distort the battery terminal.
Step 17: Evacuate and Recharge the System
- Use an R-1234yf recovery and recharge machine to pull a deep vacuum for at least 30 minutes.
- Close the machine valves and verify the vacuum holds for at least 10 minutes. A loss of vacuum indicates a leak.
- Use the machine and digital gram scale to charge exactly the refrigerant weight shown on your CR-V’s under-hood A/C label.
- Do not charge by pressure alone and do not add sealant.
✅ After Repair
- ✅ Start the engine with the climate control off and inspect the drive belt for smooth, centered operation.
- ✅ Set the blower to high, select the coldest temperature, turn A/C on, and open the doors.
- ✅ Verify the compressor operates without grinding, knocking, or belt squeal.
- ✅ Use the R-1234yf machine to confirm operating pressures are appropriate for the ambient temperature.
- ✅ Check both compressor connections with an approved electronic leak detector.
- ✅ Confirm cold vent output and verify the cooling fans operate when commanded.
- ✅ Recheck the compressor and line connections for oil residue after a short road test.
- ✅ Reset the clock, radio presets, and automatic window function if they were lost.
💰 DIY vs Shop Cost
Shop Cost: $1,100-$1,900 (parts + labor)
DIY Cost: $450-$900 (parts only, excluding recovery and recharge service)
You Save: $400-$900 by doing it yourself!
Shop labor rates vary but typically run $100-$150/hour. This repair takes a shop approximately 3-5 hours.
🎯 Ready to get started?
HowToo makes it easy: same-day/2-day shipping on every part, plus all the tools and specialty tools you need! Check out the parts and tools sections below to add everything to your cart.