





How to Replace the A/C Compressor on a 2015-2020 Ford F-150 3.5L EcoBoost (Trim: Limited | Engine: V6 3.5L | Body: Crew Cab Pickup)
Step-by-step instructions with tools, parts, torque specs, R-1234yf charging, and safety tips for 2015, 2016, 2017, 2018, 2019, 2020
How to Replace the A/C Compressor on a 2015-2020 Ford F-150 3.5L EcoBoost (Trim: Limited | Engine: V6 3.5L | Body: Crew Cab Pickup)
Step-by-step instructions with tools, parts, torque specs, R-1234yf charging, and safety tips for 2015, 2016, 2017, 2018, 2019, 2020


🔧 F-150 - A/C Compressor Replacement
This is an advanced repair, and the refrigerant must be professionally recovered before you loosen any A/C connection. After recovery, you can replace the compressor mechanically, then have the system vacuum-tested and charged by weight. The compressor and related A/C parts aisle is open beside this guide.
Difficulty Level: Advanced | Estimated Time: 4-6 hours, plus refrigerant service
Assumption: These steps cover the stock 3.5L turbocharged engine and a compressor that hasn’t scattered metal through the system.
⚠️ Safety & Precautions
- ⚠️ Your F-150 uses high-pressure refrigerant. Never vent it or loosen a charged line.
- ⚠️ Have a qualified A/C shop recover the refrigerant before beginning.
- ⚠️ R-1234yf is mildly flammable. Keep sparks, flames and smoking materials away.
- ⚠️ Wear gloves and sealed safety glasses. Escaping refrigerant can cause frostbite and eye injury.
- ⚠️ Disconnect the negative battery terminal before unplugging the compressor.
- ⚠️ Support the truck with jack stands. Never work beneath a truck supported only by a jack.
- ⚠️ Do not use stop-leak. It contaminates recovery equipment and causes expensive trouble.
- ⚠️ If the old compressor seized or discharged metallic debris, replace contaminated components and flush approved lines before installing the new compressor.
🔧 Required Tools
You'll need the following tools for this repair:
- 8mm socket
- 10mm socket
- 13mm socket
- 15mm socket
- 3/8-inch drive ratchet
- 3/8-inch drive torque wrench rated 7-75 ft-lbs
- 3-inch and 6-inch socket extensions
- Serpentine-belt tool with 15mm adapter
- Flat-blade trim tool
- Floor jack rated 3-ton minimum
- Jack stands rated 3-ton minimum
- Wheel chocks
- Drain pan
- Graduated fluid measuring cup
- Plastic A/C line caps and plugs
- Refrigerant recovery machine for R-1234yf (specialty)
- R-1234yf manifold gauge set (specialty)
- Vacuum pump rated for automotive A/C service (specialty)
- Electronic refrigerant scale (specialty)
- Electronic R-1234yf leak detector (specialty)
- Nitrile mechanic gloves
- Sealed safety glasses
🔩 Required Parts
HowToo sells all the parts you need for this repair:
- Vehicle-matched A/C compressor - Qty: 1
- A/C compressor replacement service kit - Qty: 1
- Compressor manifold O-ring set compatible with R-1234yf - Qty: 1
- Ford-specification R-1234yf PAG oil meeting WSS-M2C300-A2 - Qty: As measured
- R-1234yf refrigerant meeting WSS-M17B21-A - Qty: Charged by weight
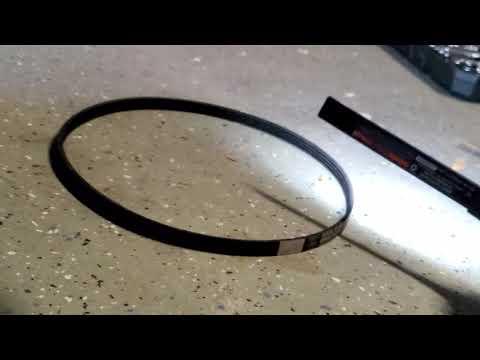
- Accessory drive belt - Qty: 1 if cracked, glazed or contaminated
- Receiver-drier or desiccant component - Qty: 1 if required by the compressor warranty or contamination condition
- Expansion device or refrigerant line containing the fixed restriction - Qty: 1 if contaminated
- A/C condenser - Qty: 1 if metal debris cannot be completely removed
Ford’s 2019 manual lists R-1234yf, a U.S./Canada system charge of 29 oz (0.82 kg), and total compressor-oil capacity of 2.7 fl oz (80 ml). Oil added during replacement must be based on what was recovered and the new compressor manufacturer’s instructions, not an automatic full 80 ml pour. fordservicecontent.com)
📋 Before You Begin
- Park your F-150 on level ground, select Park and apply the parking brake.
- Chock both rear wheels with wheel chocks.
- Have the refrigerant recovered using an R-1234yf recovery machine.
- Record how much refrigerant and oil the machine recovers.
- Switch the ignition off and keep the key away from the truck.
- Use a 10mm socket to disconnect the negative battery cable. Isolate it so it cannot spring back onto the terminal.
- Photograph the belt routing before removing the belt.
- Read the replacement compressor instructions. Some compressors arrive with shipping oil that must be drained and measured.
🔨 Step-by-Step Instructions
Follow these steps in order:
Step 1: Confirm the System Is Empty
- Use the R-1234yf manifold gauge set to confirm both sides of the system are at zero pressure after professional recovery.
- Do not press a service-port valve to test pressure.
- If pressure remains, stop and repeat the recovery process with the recovery machine.
Step 2: Disconnect Battery Power
- Use a 10mm socket to loosen the negative battery-terminal clamp.
- Remove and isolate the cable for at least one minute.
- No battery registration or programming is normally required for this repair.
Step 3: Raise and Support the Truck
- Use the 3-ton floor jack at an approved front lifting point.
- Place 3-ton jack stands beneath the frame support points.
- Lower the truck onto the stands and gently push the body to confirm stability.
Step 4: Remove Access Panels and Intake Ducting
- Use an 8mm socket and flat-blade trim tool to remove any lower splash shield blocking compressor access.
- Use an 8mm socket to loosen intake-duct clamps if the upper intake duct obstructs access.
- Move only the ducting and harness retainers needed for working clearance.
- Photograph every clip before moving it.
Step 5: Release the Drive Belt
- Follow the belt-routing photograph or under-hood routing diagram.
- Use the serpentine-belt tool with its 15mm adapter to rotate the belt tensioner.
- Slide the belt off the compressor pulley, then slowly release the tensioner.
- Inspect the belt for cracks, glazing, missing ribs or refrigerant-oil contamination.
Step 6: Disconnect the Compressor Electrical Connector
- Use the flat-blade trim tool to release the connector lock without pulling on the wires.
- Unplug the compressor connector and move the harness clear.
- Use an 8mm or 10mm socket as applicable to release nearby harness brackets.
Step 7: Disconnect the Refrigerant Manifold
- Place the drain pan beneath the compressor.
- Use the correctly fitting socket, commonly 10mm or 13mm, to remove the refrigerant manifold retaining bolt.
- Pull the manifold block straight away from the compressor. Do not pry against its sealing faces.
- Remove and discard both old O-rings.
- Immediately install plastic A/C line caps and plugs to keep Haryana humidity and dirt out of the open system.
Step 8: Remove the Compressor
- Support the compressor with one hand or a suitable support.
- Use the 13mm socket, extensions and ratchet to remove the compressor fasteners.
- Note the position of every stud, nut, bracket and wiring retainer.
- Lower the compressor carefully without bending the refrigerant lines.
Step 9: Inspect for Internal Failure
- Use the graduated measuring cup to drain and measure the oil from the old compressor.
- Inspect the oil and line openings for silver flakes, grey sludge or black debris.
- If the oil is clean, continue with a normal compressor replacement.
- If debris is present, stop. Replace the contaminated condenser, desiccant component and expansion device as required, then flush only components approved for flushing.
- A modern parallel-flow condenser usually cannot be reliably cleaned after severe compressor failure.
Step 10: Prepare the New Compressor
- Use the graduated measuring cup to check how much oil arrived in the new compressor.
- Follow the compressor manufacturer’s oil-balancing instructions exactly.
- Use only PAG oil meeting Ford WSS-M2C300-A2.
- Do not automatically add the full system capacity. Too much oil reduces cooling and can damage the compressor.
- Turn the compressor hub by hand approximately ten revolutions to distribute oil internally.
Step 11: Install the New Compressor
- Lift the compressor into its bracket and start every fastener by hand.
- Use the 13mm socket to snug the mounting fasteners evenly.
- Use the torque wrench and tighten the compressor mounting fasteners to 15 Nm (133 in-lbs) unless the supplied compressor instructions specify a revised value.
- Do not use an impact wrench on the compressor housing.
Step 12: Reconnect the Refrigerant Lines
- Lightly coat new R-1234yf-compatible O-rings with the correct clean PAG oil.
- Install the O-rings without twisting or stretching them.
- Remove the plastic caps and seat the manifold squarely against the compressor.
- Start the retaining bolt by hand, then use the torque wrench to tighten it to 12 Nm (106 in-lbs).
- Reconnect the electrical connector until its lock clicks.
Step 13: Reinstall the Belt
- Route the belt around every pulley according to the belt diagram.
- Use the serpentine-belt tool with the 15mm adapter to rotate the tensioner.
- Slip the belt onto the final pulley and slowly release the tensioner.
- Check that every rib sits completely inside its matching pulley groove.
Step 14: Reassemble the Truck
- Use the 8mm and 10mm sockets to reinstall intake ducting, harness brackets and the splash shield.
- Use the torque wrench to tighten small splash-shield and bracket fasteners to 9 Nm (80 in-lbs) unless otherwise marked.
- Use the floor jack to raise the truck, remove the jack stands and lower it completely.
- Use the 10mm socket to reconnect the negative battery terminal and tighten it securely without overtightening.
Step 15: Evacuate and Leak-Test the System
- Connect the R-1234yf manifold gauge set and vacuum pump.
- Evacuate the system for at least 45 minutes, longer in humid conditions.
- Close the manifold valves and verify the vacuum holds for at least 20 minutes.
- If vacuum decays, find and repair the leak before charging.
Step 16: Recharge by Weight
- Place the R-1234yf supply on the electronic refrigerant scale.
- Charge the exact amount shown on your F-150’s under-hood refrigerant label.
- For the U.S.-market 2019 specification, Ford lists 29 oz (0.82 kg) of R-1234yf. Use the vehicle label if it differs. fordservicecontent.com
- Never charge by pressure alone. Ambient temperature changes pressure considerably.
✅ After Repair
- Start the engine and select maximum A/C, recirculation and high blower speed.
- Inspect the compressor and refrigerant connections with an electronic R-1234yf leak detector.
- Watch the belt and pulley from a safe distance. They should run smoothly without wobble or squealing.
- Confirm the center vents cool evenly and the compressor produces no grinding or knocking.
- Check the high-side and low-side pressures against ambient temperature using the R-1234yf manifold gauge set.
- Shut the engine off and recheck for oil residue around both compressor connections.
- If the compressor was replaced because of internal seizure, verify the rest of the system was cleaned before extended operation. Nobody wins when a new compressor eats the old compressor’s glitter.
💰 DIY vs Shop Cost
Shop Cost: ₹85,000-₹180,000, depending on compressor source and contamination
DIY Cost: ₹35,000-₹90,000 for parts, recovery and recharge
You Save: Approximately ₹30,000-₹90,000 by handling the mechanical work yourself
Local labor and imported R-1234yf part prices vary considerably. The mechanical repair usually takes a shop approximately 4-6 hours.
🎯 Ready to get started?
HowToo makes it easy: same-day/2-day shipping on every part, plus all the tools and specialty tools you need! Check out the parts and tools sections below to add everything to your cart.