

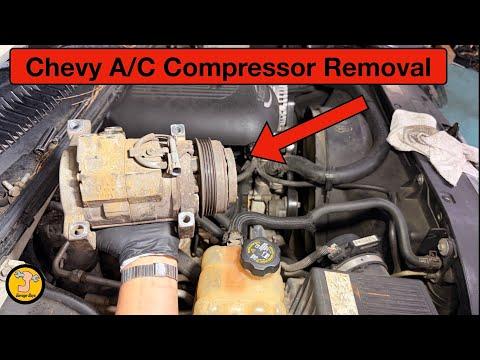





How to Replace the A/C Compressor on a 2015-2020 Chevrolet Suburban 5.3L V8 (Trim: Premier | Engine: V8 5.3L | Body: Sport Utility)
Step-by-step instructions with tools, parts, torque specs, refrigerant service, and safety tips for 2015, 2016, 2017, 2018, 2019, 2020
How to Replace the A/C Compressor on a 2015-2020 Chevrolet Suburban 5.3L V8 (Trim: Premier | Engine: V8 5.3L | Body: Sport Utility)
Step-by-step instructions with tools, parts, torque specs, refrigerant service, and safety tips for 2015, 2016, 2017, 2018, 2019, 2020


🔧 Suburban - A/C Compressor Replacement
The compressor sits low on the passenger side of the 5.3L V8. Replacement requires recovering the refrigerant, removing the drive belt and refrigerant lines, transferring the correct amount of oil, and recharging the system by weight.
Difficulty Level: Advanced | Estimated Time: 4-6 hours
Assumption: Your Suburban retains its original front-and-rear factory A/C system; verify the refrigerant type and exact charge on the underhood label.
⚠️ Safety & Precautions
- ⚠️ Refrigerant must be recovered with certified A/C equipment. Never vent refrigerant into the air.
- 🧊 Escaping refrigerant can cause severe frostbite and eye injury. Wear safety glasses and refrigerant-rated gloves.
- 🏷️ Use only the refrigerant and compressor oil specified on the underhood A/C label. Do not mix R-134a and R-1234yf equipment or refrigerants.
- 🔌 Disconnect the negative battery cable before unplugging or removing the compressor.
- 🔥 Work only with the engine and exhaust completely cool.
- 🚙 Support your Suburban with properly rated jack stands. Never work beneath a vehicle supported only by a jack.
- 🧼 Keep every open refrigerant connection perfectly clean and capped. Moisture or dirt can damage the new compressor.
- 🛑 If the old compressor seized or released metal debris, the system must be professionally flushed and inspected; the condenser may require replacement.
🔧 Required Tools
You'll need the following tools for this repair:
- SAE J2843 or SAE J2788 refrigerant recovery and recharge machine (specialty)
- R-1234yf or R-134a manifold gauge set matching underhood label (specialty)
- Vacuum pump rated 5 CFM minimum (specialty)
- Electronic refrigerant scale accurate to 10 grams (specialty)
- Electronic refrigerant leak detector matching underhood label (specialty)
- Compressor oil measuring cylinder graduated in milliliters (specialty)
- A/C line caps and plugs assortment (specialty)
- Serpentine belt routing tool with 15mm socket
- 10mm socket
- 13mm socket
- 15mm socket
- 3/8-inch-drive ratchet
- 3/8-inch-drive 6-inch extension
- 3/8-inch-drive torque wrench rated 10-80 Nm
- Plastic trim-clip removal tool
- Small nylon O-ring pick
- Floor jack rated 3-ton minimum
- Jack stands rated 3-ton minimum per pair
- Wheel chocks
- Refrigerant-rated safety gloves
- Safety glasses
🔩 Required Parts
HowToo sells all the parts you need for this repair:
- A/C compressor with clutch - Qty: 1
- A/C compressor suction-line seal - Qty: 1
- A/C compressor discharge-line seal - Qty: 1
- Compressor oil matching underhood label and refrigerant type - Qty: 1 container
- Refrigerant matching underhood label - Qty: Exact underhood-label charge
- Serpentine drive belt - Qty: 1 if worn, cracked, glazed, or contaminated
- A/C receiver-desiccant component - Qty: 1 if the system was open for an extended period or contaminated
- A/C condenser - Qty: 1 if metal debris from compressor failure is present
📋 Before You Begin
- 🅿️ Park your Suburban on level pavement. Shift to Park, apply the parking brake, and chock both rear wheels.
- 🏷️ Photograph the underhood A/C label. Record the specified refrigerant type and total charge weight before connecting any equipment.
- 🌡️ If the compressor still operates, record vent temperature and high- and low-side pressures before recovery.
- ♻️ Have a certified shop recover the refrigerant if you do not have the correct recovery machine. Recovery means safely removing and storing the refrigerant.
- 🔋 After recovery, switch the ignition off and keep the key away from the vehicle. Disconnect the negative battery cable with a 10mm socket.
- 📏 Note the drive-belt routing or photograph it before removing the belt.
🔨 Step-by-Step Instructions
Follow these steps in order:
Step 1: Recover the Refrigerant
- Use the refrigerant recovery machine specified for the refrigerant shown on the underhood label.
- Connect the machine’s high- and low-side couplers to the matching service ports.
- Follow the machine prompts and recover the system completely. Confirm both gauges remain at 0 psi before opening any refrigerant connection.
- Do not use a vacuum pump to recover refrigerant. A vacuum pump removes air and moisture only after recovery.
Step 2: Disconnect the Battery
- Use a 10mm socket and ratchet to loosen the negative battery-terminal clamp.
- Remove the clamp and isolate it so it cannot spring back onto the terminal.
Step 3: Raise and Support the Vehicle
- Use the 3-ton floor jack at an approved front lifting point.
- Place the 3-ton jack stands beneath the front frame support points, then lower the vehicle carefully onto them.
- Push lightly on the body to confirm the vehicle is stable before going underneath.
Step 4: Remove the Lower Shield
- Use a 10mm or 15mm socket, as fitted, to remove the lower splash-shield fasteners beneath the passenger side of the engine.
- Use the plastic trim-clip removal tool for any push retainers, then lower the shield.
- Keep each fastener with its original mounting location.
Step 5: Remove the Drive Belt
- Compare the belt routing with your photograph before releasing tension.
- Fit the serpentine belt routing tool with a 15mm socket onto the automatic tensioner. The tensioner is the spring-loaded pulley that keeps the belt tight.
- Rotate the tensioner slowly to release belt tension, then slide the belt off the compressor pulley.
- Release the tensioner gently. Do not let it snap against its stop.
- Inspect the belt for cracks, missing ribs, glazing, or refrigerant oil contamination.
Step 6: Disconnect the Compressor Electrical Connector
- Reach the compressor from below on the passenger side.
- Press the connector lock by hand and unplug the compressor electrical connector.
- Do not pull on the wires. Move the harness away from the mounting bolts.
Step 7: Disconnect the Refrigerant Lines
- Clean dirt from around both compressor line connections before opening them.
- Use a 13mm socket, extension, and ratchet to remove the refrigerant-line retaining bolt.
- Pull the line manifold straight away from the compressor without twisting the aluminum tubes.
- Immediately seal the open lines with A/C line caps and plugs.
- Remove the old seals with the small nylon O-ring pick. Do not scratch the aluminum sealing surfaces.
Step 8: Remove the Old Compressor
- Support the compressor with one hand before removing its final fastener.
- Use a 15mm socket, extension, and ratchet to remove the compressor mounting bolts.
- Lower the compressor carefully through the available opening. On four-wheel-drive versions, guide it around the front differential without forcing the refrigerant lines or wiring.
- Keep the old compressor upright until its oil quantity has been measured.
Step 9: Balance the Compressor Oil
- Use the graduated oil measuring cylinder to drain the old compressor through its ports while rotating the clutch hub by hand several turns.
- Drain the shipping oil from the new compressor into a separate clean measuring cylinder.
- Add back the same measured amount removed from the old compressor, using only the oil type specified by the underhood label or compressor manufacturer.
- If the system was flushed or other A/C components were replaced, use the component-specific oil allocation from current GM service information rather than estimating.
- Rotate the new compressor clutch hub by hand approximately 10 turns to distribute the oil internally.
- Never assume a new compressor has the correct oil charge.
Step 10: Install the New Compressor
- Position the new compressor against its bracket without using the bolts to pull it into alignment.
- Start every mounting bolt by hand to prevent cross-threading.
- Use the 15mm socket and torque wrench to tighten the compressor mounting bolts evenly to 50 Nm (37 ft-lbs).
Step 11: Reconnect the Refrigerant Lines
- Lightly wet the new suction- and discharge-line seals with the correct clean compressor oil.
- Install the seals by hand. Do not stretch, twist, or reuse the old seals.
- Seat the line manifold squarely against the compressor.
- Start the retaining bolt by hand, then use the 13mm socket and torque wrench to tighten it to 22 Nm (16 ft-lbs).
- Remove the caps only immediately before making the connection.
Step 12: Reconnect the Electrical Connector
- Push the compressor electrical connector into place by hand until its lock clicks.
- Gently pull on the connector body to confirm it is latched.
- Confirm the harness cannot contact the belt, pulley, or exhaust.
Step 13: Reinstall the Drive Belt
- Route the belt according to the underhood diagram or your photograph, leaving the easiest pulley for last.
- Use the serpentine belt routing tool and 15mm socket to rotate the tensioner.
- Slip the belt over the final pulley and release the tensioner slowly.
- Inspect every pulley and confirm all belt ribs are fully seated in their grooves.
Step 14: Reinstall the Lower Shield
- Raise the shield into place and install the push retainers by hand.
- Use the original 10mm or 15mm socket to reinstall the threaded fasteners snugly.
- Do not overtighten fasteners installed into plastic retainers.
Step 15: Lower the Vehicle and Reconnect the Battery
- Use the floor jack to lift your Suburban slightly, remove the jack stands, and lower it to the ground.
- Install the negative battery clamp and use the 10mm socket to tighten it securely. Do not overtighten the battery terminal.
Step 16: Evacuate and Leak-Test the System
- Use the matching manifold gauge set and 5-CFM vacuum pump to evacuate the system for at least 45 minutes.
- Close the manifold valves and switch off the pump.
- Observe the gauges for at least 10 minutes. Any vacuum loss requires finding and repairing the leak before charging.
- Use the electronic leak detector around the compressor connections if the vacuum does not hold.
Step 17: Recharge by Exact Weight
- Use the refrigerant recovery and recharge machine or electronic refrigerant scale to add the exact weight printed on the underhood A/C label.
- Do not charge by pressure alone. Your Suburban’s front-and-rear A/C system is sensitive to charge quantity.
- Keep the refrigerant cylinder and service equipment matched to the specified refrigerant type.
✅ After Repair
- 🔍 Before starting the engine, verify that tools are removed and the belt is correctly seated.
- 🌬️ Start the engine, select maximum cooling, set the blower high, and activate both front and rear A/C.
- 👀 Watch the belt and compressor for wobbling, rubbing, or abnormal noise. Stop the engine immediately if either occurs.
- 🧪 Use the electronic refrigerant leak detector at the compressor line connections and service ports.
- 🌡️ Confirm that front and rear vents cool normally and that system pressures are appropriate for the outdoor temperature.
- 💧 Inspect beneath the compressor for refrigerant oil. Oily residue usually indicates leakage.
- 🕒 Recheck belt alignment, connector security, and line connections after a complete cooling cycle.
- 🧰 If compressor debris was found, do not operate the system until the contaminated condenser and other affected components have been serviced.
💰 DIY vs Shop Cost
Shop Cost: ₹95,000-₹180,000 (parts + labor, refrigerant service, and imported-part variability)
DIY Cost: ₹40,000-₹95,000 (parts and refrigerant service only)
You Save: ₹35,000-₹85,000 by doing it yourself!
Local labor rates and imported U.S.-spec parts vary considerably. The mechanical repair takes a shop approximately 4-6 hours, including recovery, evacuation, and recharge.
🎯 Ready to get started?
HowToo makes it easy: same-day/2-day shipping on every part, plus all the tools and specialty tools you need! Check out the parts and tools sections below to add everything to your cart.