

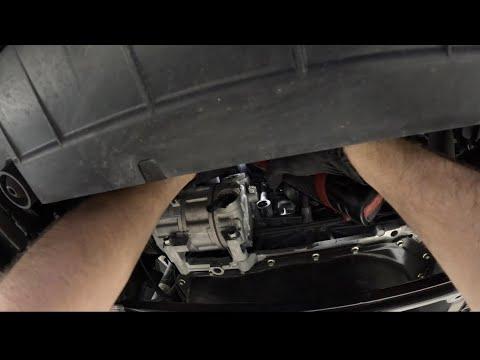







How to Replace the A/C Compressor on a 2013-2021 Mazda CX-5 (Trim: Grand Touring | Engine: Inline 4 2.5L)
Step-by-step instructions with required tools, parts, torque specs, safety tips, and recharge guidance for 2013
How to Replace the A/C Compressor on a 2013-2021 Mazda CX-5 (Trim: Grand Touring | Engine: Inline 4 2.5L)
Step-by-step instructions with required tools, parts, torque specs, safety tips, and recharge guidance for 2013


🔧 CX-5 - A/C Compressor Replacement
This is an advanced repair, not a first A/C project. The mechanical replacement is manageable, but the refrigerant must be recovered before opening the system. After installation, the system must be vacuum-tested and recharged by exact weight.
The correct compressor aisle is open in the parts list. Before buying, match the refrigerant listed on the under-hood A/C label. Mazda warns that using the wrong refrigerant can seriously damage the system. mazdausa.com
Difficulty Level: Advanced | Estimated Time: 4-6 hours, including professional recovery and recharge
⚠️ Safety & Precautions
- ⚠️ Never loosen an A/C fitting while refrigerant remains in the system. Escaping refrigerant can freeze skin and damage eyes.
- ⚠️ Have the refrigerant recovered with an approved recovery machine before starting.
- ⚠️ Never vent refrigerant into the atmosphere.
- ⚠️ Wear safety glasses and refrigerant-rated gloves whenever working around open A/C lines.
- ⚠️ Disconnect the negative battery terminal before unplugging or removing the compressor.
- ⚠️ Support your CX-5 with jack stands. Never work beneath a vehicle held up only by a jack.
- ⚠️ Cap every open A/C fitting immediately. Moisture and dirt can damage the replacement compressor.
- ⚠️ If the old compressor shed metal internally, stop. The condenser and contaminated components may also require replacement and flushing.
🔧 Required Tools
You'll need the following tools for this repair:
- A/C refrigerant recovery machine (specialty)
- A/C manifold gauge set matching the specified refrigerant (specialty)
- Two-stage vacuum pump (specialty)
- Electronic refrigerant scale (specialty)
- Refrigerant identification equipment (specialty)
- 3-ton floor jack
- 3-ton jack stands
- Wheel chocks
- Metric socket set, 8mm-19mm
- Metric combination wrench set, 8mm-19mm
- 3/8-inch drive ratchet
- 3/8-inch drive extensions
- 3/8-inch drive torque wrench, 5-80 Nm
- Serpentine belt tool (specialty)
- Trim clip removal tool
- 90-degree O-ring pick
- Clean graduated measuring cup, 150ml minimum
- A/C line caps and plugs
- Safety glasses
- Refrigerant-rated gloves
- Nitrile gloves
- Portable work light
🔩 Required Parts
HowToo sells all the parts you need for this repair:
- Vehicle-matched new A/C compressor with clutch - Qty: 1
- Compressor suction and discharge O-rings - Qty: 1 set
- Receiver drier or desiccant element - Qty: 1
- Expansion valve - Qty: 1 if contamination or compressor failure is confirmed
- Correct A/C compressor oil - Qty: As measured
- Correct refrigerant shown on the under-hood label - Qty: Exact label-specified charge
- Serpentine drive belt - Qty: 1 if cracked, glazed or refrigerant-soaked
Important: Don’t order universal oil solely by viscosity. Mazda service information identifies FD46XG compressor oil and an approximate total compressor oil volume of 100ml, but the replacement compressor must be oil-balanced against the removed unit. mcx5.org
📋 Before You Begin
- 📋 Park your CX-5 on level pavement, apply the parking brake and chock the rear wheels.
- 📋 Read the under-hood A/C label and record the refrigerant type and charge weight.
- 📋 Have an A/C technician recover the existing refrigerant completely.
- 📋 Determine why the original compressor failed before installing the new one.
- 📋 Inspect recovered oil and accessible lines for shiny metal debris or dark contamination.
- 📋 Keep replacement O-rings sealed until immediately before installation.
- 📋 Plan to finish the open-system work promptly. A/C oil absorbs moisture from the air.
🔨 Step-by-Step Instructions
Follow these steps in order:
Step 1: Recover the refrigerant
- Connect an A/C refrigerant recovery machine to the high- and low-pressure service ports.
- Recover the complete refrigerant charge according to the machine instructions.
- Confirm that the system is empty before disconnecting any line.
- If you don’t have certified recovery equipment, have a professional perform this stage. A recharge can doesn’t recover refrigerant.
Step 2: Disconnect the battery
- Open the hood and switch off the ignition.
- Use a 10mm socket and 3/8-inch drive ratchet to loosen the negative battery terminal.
- Remove the negative terminal and isolate it so it cannot spring back onto the post.
Step 3: Raise and support the front
- Use the 3-ton floor jack at an approved lifting point.
- Place the 3-ton jack stands beneath the approved support points.
- Lower the vehicle onto the stands and gently verify that it is stable.
Step 4: Remove the lower cover
- Use the trim clip removal tool and correct metric socket to remove the front lower cover fasteners.
- Lower the cover and arrange its clips and bolts by position.
- Cardboard makes a great fastener map.
Step 5: Remove the drive belt
- Photograph or sketch the belt routing before removing it.
- Place the serpentine belt tool on the automatic tensioner.
- Rotate the tensioner slowly to release belt tension.
- Slip the belt off the compressor pulley, then slowly release the tensioner.
- Replace the belt if it has cracks, missing ribs, glazing or fluid contamination.
Step 6: Disconnect the compressor wiring
- Locate the electrical connector on the compressor.
- Press the connector lock by hand and pull the connector straight apart.
- Move the wiring harness clear of the compressor and mounting bolts.
Step 7: Disconnect the refrigerant lines
- Place absorbent material beneath the compressor connections.
- Use the correct metric socket, extension and 3/8-inch drive ratchet to remove the suction and discharge line retaining bolts.
- Pull each line straight away without bending or prying against the aluminum fitting.
- Immediately seal the compressor and both open lines using A/C line caps and plugs.
- Use the 90-degree O-ring pick to remove the old O-rings without scratching the sealing surfaces.
- For installation, tighten the refrigerant-line retaining bolts to 8-10 Nm (71-88 in-lbs). Mazda warns that incorrect tightening can cause compressor sealing problems. static.nhtsa.gov
Step 8: Remove the old compressor
- Support the compressor securely with one hand.
- Use the correct metric socket, extension and 3/8-inch drive ratchet to remove the compressor mounting bolts.
- Lower the compressor carefully without spilling its oil.
- Keep the old compressor upright because its recovered oil amount is needed for comparison.
- During installation, tighten the compressor mounting bolts evenly to 19-25 Nm (15-18 ft-lbs). static.nhtsa.gov
Step 9: Inspect for internal contamination
- Pour a small sample of oil from the removed compressor into a clean container.
- Look for silver particles, black sludge or a burned smell.
- If metal debris is present, do not install only a compressor. The condenser, receiver drier and expansion valve must be evaluated, and flushable lines and evaporator passages require professional cleaning.
- A modern parallel-flow condenser may trap debris that cannot be reliably flushed. This is where a cheap shortcut gets expensive twice.
Step 10: Oil-balance the replacement compressor
- Keep dirt, moisture and incompatible oil away from both compressors.
- Use the clean graduated measuring cup to measure the oil drained from the old compressor.
- Rotate the old compressor shaft by hand six to eight revolutions while draining it.
- Using a second clean container, rotate the new compressor shaft six to eight revolutions and drain its shipping oil.
- Return to the new compressor the same measured amount that came from the old compressor, using only the specified oil.
- Complete draining and refilling promptly because the oil readily absorbs atmospheric moisture. This is Mazda's published replacement method. mcx5.org
Step 11: Install the replacement compressor
- Compare the new and old compressors, including mounting ears, pulley grooves, connector and refrigerant ports.
- Lift the replacement compressor into position.
- Start every mounting bolt by hand to prevent cross-threading.
- Use the 3/8-inch drive torque wrench and correct metric socket to tighten the mounting bolts evenly to 19-25 Nm (15-18 ft-lbs). static.nhtsa.gov
Step 12: Install new O-rings and reconnect the lines
- Confirm that the old O-rings are not stuck inside either fitting.
- Lightly coat the new O-rings with the correct compressor oil using a clean gloved fingertip.
- Install the O-rings without twisting them.
- Align each line squarely with its compressor port. Never pull a line into position with the retaining bolt.
- Start the retaining bolts by hand.
- Use the 3/8-inch drive torque wrench and correct metric socket to tighten them to 8-10 Nm (71-88 in-lbs). static.nhtsa.gov
Step 13: Reconnect the electrical connector
- Push the connector onto the compressor until its locking tab clicks.
- Gently tug the connector to verify that it is locked.
- Route the wiring away from the belt and pulley.
Step 14: Reinstall the drive belt
- Route the belt according to your photograph or routing diagram.
- Use the serpentine belt tool to rotate the automatic tensioner.
- Slip the belt over the final pulley and release the tensioner slowly.
- Check every pulley and confirm that all belt ribs are fully seated.
Step 15: Reinstall the lower cover
- Raise the lower cover into position.
- Install the clips and bolts using the trim clip removal tool and appropriate metric socket.
- Tighten small splash-shield fasteners only until secure. Do not crush the plastic.
Step 16: Lower the vehicle and reconnect the battery
- Use the 3-ton floor jack to raise the front slightly.
- Remove the 3-ton jack stands and lower your CX-5 carefully.
- Reconnect the negative battery terminal.
- Use the 10mm socket and 3/8-inch drive ratchet to tighten the terminal securely without overtightening it.
Step 17: Evacuate and leak-test the system
- Connect the A/C manifold gauge set and two-stage vacuum pump.
- Evacuate the system to remove air and moisture.
- Close the manifold valves and verify that the system holds vacuum.
- If vacuum decays, locate and repair the leak before adding refrigerant.
- A vacuum test doesn’t replace a pressurized leak inspection, but it can reveal a significant installation leak.
Step 18: Recharge by exact weight
- Place the correct refrigerant container on the electronic refrigerant scale.
- Charge only the refrigerant type and exact mass printed on your CX-5's under-hood label.
- Do not charge by low-side pressure alone. Pressure changes with ambient temperature, airflow and compressor operation.
- Never mix R-134a and R-1234yf equipment, adapters or refrigerants.
✅ After Repair
- ✅ Start the engine with the A/C initially switched off and listen for belt noise.
- ✅ Inspect the belt and compressor pulley for smooth operation.
- ✅ Switch the A/C on, select the coldest setting and set the blower to medium-high.
- ✅ Confirm that the compressor engages normally and the vents begin cooling.
- ✅ Use the A/C manifold gauge set to verify system operation against current ambient conditions.
- ✅ Check both compressor fittings with an electronic leak detector or approved leak-detection method.
- ✅ Recheck the lower cover and inspect beneath the vehicle for loose hardware or oil residue.
- ✅ Perform a final cooling performance test. Mazda's workshop procedure calls for this after compressor installation. mcx5.org
💰 DIY vs Shop Cost
Shop Cost: Approximately ₹70,000-₹130,000, depending on compressor brand, refrigerant type and contamination
DIY Cost: Approximately ₹35,000-₹75,000 for parts plus professional recovery and recharge
You Save: Approximately ₹20,000-₹55,000 by handling the mechanical work yourself
Local labour and refrigerant prices vary. A contaminated system can cost considerably more because the condenser, drier and expansion valve may also require replacement.
🎯 Ready to get started?
HowToo has opened the vehicle-matched compressor and A/C service aisles for your CX-5. Use a new compressor, replace every disturbed O-ring, and arrange proper refrigerant recovery and recharge before taking the system apart.