

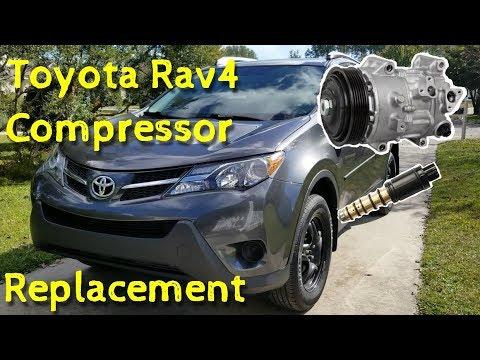





How to Replace the A/C Compressor on a 2012-2014 Toyota RAV4 Hybrid (Trim: Hybrid SE | Engine: Inline 4 2.5L)
Step-by-step electric compressor guide with hybrid safety, tools, parts, and torque specs for 2012, 2013, 2014
How to Replace the A/C Compressor on a 2012-2014 Toyota RAV4 Hybrid (Trim: Hybrid SE | Engine: Inline 4 2.5L)
Step-by-step electric compressor guide with hybrid safety, tools, parts, and torque specs for 2012, 2013, 2014


🔧 RAV4 - A/C Compressor Replacement
Replacing the A/C compressor on your RAV4 is an advanced job because this hybrid uses an electric high-voltage compressor instead of a belt-driven compressor. The refrigerant must be professionally recovered first, then the hybrid system must be disabled before the compressor is unplugged or removed.
Difficulty Level: Advanced | Estimated Time: 3-5 hours
⚠️ Safety & Precautions
- ⚠️ Your RAV4 uses a high-voltage electric A/C compressor. Orange wiring can carry dangerous voltage.
- ⚠️ Have the refrigerant professionally recovered before loosening any A/C line. Do not vent refrigerant.
- ⚠️ Disconnect the 12V battery and disable the hybrid high-voltage system before compressor electrical work.
- ⚠️ Wait at least 10 minutes after removing the hybrid service plug grip before touching high-voltage connectors.
- ⚠️ Use only ND-OIL 11 hybrid compressor oil. Regular PAG oil can damage the electric compressor.
- ⚠️ Do not turn the vehicle ON or READY with the A/C compressor unplugged.
- ⚠️ Final evacuation and recharge must be done by exact refrigerant weight from the under-hood label.
🔧 Required Tools
You'll need the following tools for this repair:
- 10mm socket
- 12mm socket
- 14mm socket
- 3/8-inch drive ratchet
- 3/8-inch drive extension set
- Torque wrench 5-80 Nm
- Metric line wrench set
- Trim clip removal tool
- Needle-nose pliers
- A/C manifold gauge set R-134a
- 2-stage A/C vacuum pump
- Refrigerant scale
- Hybrid insulated gloves Class 0 1000V (specialty)
- CAT III 1000V digital multimeter (specialty)
- Toyota-capable scan tool with hybrid and A/C functions (specialty)
- Floor jack rated 3-ton minimum
- Jack stands rated 3-ton minimum
- Wheel chocks
- Safety glasses
- Nitrile gloves
🔩 Required Parts
HowToo sells all the parts you need for this repair:
- Electric A/C compressor - Qty: 1
- A/C compressor O-ring seal kit - Qty: 1
- ND-OIL 11 hybrid compressor oil - Qty: As needed
- R-134a refrigerant - Qty: Charge by under-hood label specification
- A/C receiver/drier or condenser assembly with drier - Qty: 1 if compressor failed internally or system was open to air
📋 Before You Begin
- Park your RAV4 on level ground, shift to Park, and apply the parking brake.
- Have a certified A/C shop recover the refrigerant before you remove any A/C line.
- Turn the ignition OFF and keep the key away from the vehicle.
- Disconnect the negative 12V battery cable with a 10mm socket.
- Remove the hybrid service plug grip. This is the orange safety disconnect for the high-voltage battery circuit.
- Wait at least 10 minutes before touching any high-voltage compressor connector.
- Plan for professional evacuation and recharge if you do not own A/C service equipment.
🔨 Step-by-Step Instructions
Follow these steps in order:
Step 1: Recover the Refrigerant
- Have the refrigerant recovered using professional A/C recovery equipment before opening the system.
- Use an A/C manifold gauge set R-134a to confirm the system pressure is empty before loosening A/C lines.
- No pressure means safer disassembly.
Step 2: Disconnect the 12V Battery
- Open the hood and locate the 12V battery negative cable connection.
- Use a 10mm socket and 3/8-inch drive ratchet to loosen the negative cable nut.
- Move the cable away from the terminal so it cannot accidentally touch.
Step 3: Disable the Hybrid High-Voltage System
- Put on Hybrid insulated gloves Class 0 1000V. These gloves protect you from high-voltage shock.
- Remove the hybrid service plug grip from the hybrid battery service area.
- Wait at least 10 minutes so stored voltage can discharge.
- Use a CAT III 1000V digital multimeter to verify zero voltage at the compressor high-voltage connector before unplugging it.
- Orange cables are high-voltage cables.
Step 4: Raise the Front of the Vehicle
- Place wheel chocks behind the rear wheels.
- Use a floor jack rated 3-ton minimum at the front jacking point.
- Set the vehicle securely on jack stands rated 3-ton minimum.
- Give the vehicle a gentle push to confirm it is stable before going underneath.
Step 5: Remove the Lower Engine Cover
- Use a 10mm socket, 3/8-inch drive ratchet, and 3/8-inch drive extension set to remove the lower cover bolts.
- Use a trim clip removal tool to remove the plastic push clips.
- Lower the cover and set it aside.
Step 6: Locate the Electric A/C Compressor
- Find the compressor mounted low on the engine side of the hybrid transaxle area.
- Look for the A/C lines and the orange high-voltage electrical connector.
- Use a 10mm socket or 12mm socket to remove any small brackets or splash shields blocking access.
- Take photos before unplugging anything.
Step 7: Unplug the Compressor Electrical Connector
- Confirm the 12V battery is disconnected and the hybrid service plug grip is removed.
- Use the CAT III 1000V digital multimeter to confirm no voltage is present at the compressor connector.
- Release the connector lock by hand.
- Use needle-nose pliers only for gentle help on a small lock tab.
- Do not pull on the orange cable.
Step 8: Disconnect the A/C Lines
- Use a metric line wrench set or the correct socket to remove the suction and discharge line retaining bolts.
- Pull the A/C lines straight away from the compressor.
- Remove the old O-rings and discard them.
- Cover the open line ends to keep dirt and moisture out.
- Torque A/C line retaining bolts to 9.8 Nm (87 in-lbs) during reassembly.
Step 9: Remove the Compressor Mounting Bolts
- Support the compressor with one hand so it does not drop.
- Use a 12mm socket or 14mm socket, 3/8-inch drive ratchet, and 3/8-inch drive extension set to remove the compressor mounting bolts.
- Lower the compressor out of the vehicle carefully.
- Torque compressor mounting bolts to 25 Nm (18 ft-lbs) during reassembly.
Step 10: Prepare the New Compressor
- Compare the new electric A/C compressor with the old one before installing it.
- Check the compressor supplier instructions for oil amount.
- If oil adjustment is required, use only ND-OIL 11 hybrid compressor oil.
- Lightly coat the new O-rings with ND-OIL 11 hybrid compressor oil.
- Wrong oil can ruin the compressor.
Step 11: Install the New Compressor
- Lift the compressor into place by hand.
- Start all mounting bolts by hand first. This prevents cross-threading, which means damaging the bolt threads.
- Use a 12mm socket or 14mm socket and 3/8-inch drive ratchet to snug the bolts evenly.
- Use a torque wrench 5-80 Nm to tighten the mounting bolts to 25 Nm (18 ft-lbs).
Step 12: Reconnect the A/C Lines
- Install new O-rings from the A/C compressor O-ring seal kit.
- Push each A/C line straight into the compressor port.
- Install the line retaining bolts by hand first.
- Use a torque wrench 5-80 Nm to tighten the line retaining bolts to 9.8 Nm (87 in-lbs).
Step 13: Reconnect the High-Voltage Connector
- Inspect the orange compressor connector for dirt, water, or bent terminals.
- Push the connector in by hand until it fully seats.
- Lock the connector latch by hand.
- Do not apply grease or cleaner to the high-voltage connector.
Step 14: Reinstall Covers and Brackets
- Use a 10mm socket or 12mm socket to reinstall any removed brackets or shields.
- Use the trim clip removal tool to reinstall plastic clips without damaging them.
- Use a 10mm socket to reinstall the lower engine cover bolts.
Step 15: Evacuate the A/C System
- Connect the A/C manifold gauge set R-134a to the high-side and low-side service ports.
- Connect the 2-stage A/C vacuum pump to the gauge set.
- Run the vacuum pump for 30-45 minutes.
- Close the gauge valves and confirm the system holds vacuum for at least 10 minutes.
- If vacuum drops, there is a leak that must be fixed before charging.
Step 16: Recharge the System by Weight
- Place the R-134a refrigerant container on a refrigerant scale.
- Charge the exact amount shown on your RAV4 under-hood A/C label.
- Do not guess by vent temperature or can pressure.
Step 17: Restore Vehicle Power
- Reinstall and lock the hybrid service plug grip fully.
- Use a 10mm socket to reconnect the negative 12V battery cable.
- Use a torque wrench 5-80 Nm to tighten the 12V battery terminal nut to 5.4 Nm (48 in-lbs).
Step 18: Clear Codes and Test the A/C
- Connect a Toyota-capable scan tool with hybrid and A/C functions.
- Clear any stored A/C or hybrid control codes.
- Start your RAV4 in READY mode.
- Set the climate control to LO temperature and high fan speed.
- Confirm the A/C blows cold and no warning lights return.
✅ After Repair
- ✅ Check for oily residue or refrigerant dye around both compressor line fittings.
- ✅ Confirm the cabin vents blow cold with the vehicle in READY mode.
- ✅ Recheck the A/C system with a scan tool for new compressor or hybrid faults.
- ✅ If the old compressor failed internally, replace the receiver/drier or condenser assembly with drier before final recharge.
- ✅ If cooling is poor, recover and recharge by exact weight instead of adding more refrigerant.
💰 DIY vs Shop Cost
Shop Cost: $1,200-$2,200 parts + labor, recovery, evacuation, and recharge
DIY Cost: $550-$1,200 parts and A/C service materials
You Save: $500-$1,000 by doing it yourself!
Shop labor rates vary but typically run $100-$150/hour. This repair takes a shop approximately 3-5 hours.
🎯 Ready to get started?
HowToo makes it easy: same-day/2-day shipping on every part, plus all the tools and specialty tools you need! Check out the parts and tools sections below to add everything to your cart.