


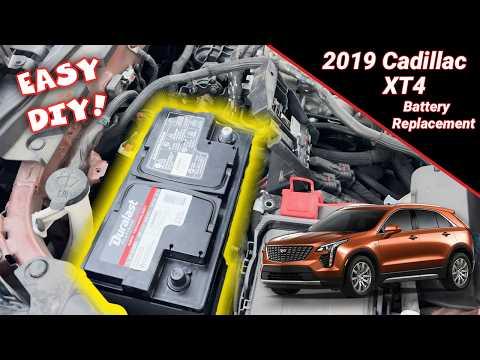





How to Replace the 12V Battery in a 2019-2025 Cadillac XT4 (Engine: Inline 4 2.0L)
Step-by-step H7/94R AGM battery replacement with tools, torque specs, and safety tips for 2019, 2020, 2021, 2022, 2023, 2024, 2025
How to Replace the 12V Battery in a 2019-2025 Cadillac XT4 (Engine: Inline 4 2.0L)
Step-by-step H7/94R AGM battery replacement with tools, torque specs, and safety tips for 2019, 2020, 2021, 2022, 2023, 2024, 2025


🔧 XT4 - 12V Battery Replacement
This is a manageable first battery job, but the XT4’s fuse block and intake duct make access tighter than average. Replace the original battery with the same H7/94R AGM type. AGM means absorbed glass mat, a sealed battery designed for start-stop systems and heavy electrical loads.
Difficulty Level: Beginner | Estimated Time: 0.5-1.0 hours
Assumption: This procedure covers the main underhood 12-volt battery with the factory battery tray and cables.
⚠️ Safety & Precautions
- ⚠️ Park outside or in a well-ventilated area. Batteries can release flammable gas.
- ⚠️ Wear safety glasses and nitrile gloves. Battery residue is corrosive.
- ⚠️ Switch everything off and keep the key fob at least 10 feet from the XT4.
- ⚠️ Disconnect negative first, then positive. Reconnect positive first, then negative.
- ⚠️ Never let a metal tool bridge a battery post and the vehicle body.
- ⚠️ Keep the new battery upright. An H7 AGM battery weighs roughly 50 pounds.
- ⚠️ Don’t use a memory saver if you aren’t familiar with one. It can leave circuits energized while you work.
🔧 Required Tools
You'll need the following tools for this repair:
- 10mm socket
- 13mm socket
- 1/4-inch ratchet
- 3/8-inch ratchet
- 6-inch socket extension
- Small flat-blade screwdriver
- Plastic trim clip tool
- Battery terminal puller (specialty)
- Battery carrying strap (specialty)
- Battery terminal cleaning brush
- Inch-pound torque wrench
- Foot-pound torque wrench
- Nitrile gloves
- Safety glasses
🔩 Required Parts
HowToo sells all the parts you need for this repair:
- H7/94R AGM 12V battery - Qty: 1
- Battery terminal cleaner - Qty: 1
- Battery terminal protector - Qty: 1
Match the new battery’s case size, post arrangement, AGM construction, and vent connection to the old battery. Don’t substitute a basic flooded battery. The XT4’s charging strategy is built around AGM performance.
📋 Before You Begin
- 📍 Park the XT4 on level ground, select Park, set the parking brake, and open the hood.
- 📍 Lower a window before disconnecting power so you can still reach the cabin if the doors lock.
- 📍 Switch off the ignition, lights, climate control, and all accessories.
- 📍 Move the key fob away and wait at least three minutes for the control modules to shut down.
- 📍 Take a clear photo of the battery, cables, clips, and vent tube before removing anything.
- 📍 Confirm the replacement battery’s positive and negative posts match the old battery’s orientation.
🔨 Step-by-Step Instructions
Follow these steps in order:
Step 1: Remove the intake duct and battery covers
- Use the plastic trim clip tool to release any push clips securing the intake duct or battery-area trim.
- Use the small flat-blade screwdriver only where needed to lift the center of a push clip.
- Use the appropriate 10mm socket or 13mm socket if a retaining bolt is fitted.
- Lift the duct away carefully and set every fastener in a container.
- Photograph every clip before moving it.
Step 2: Disconnect the negative terminal
- Identify the negative terminal by its black cable and minus symbol.
- Use the 10mm socket and 1/4-inch ratchet to loosen the negative terminal clamp.
- Lift the clamp straight off. Use the battery terminal puller if it won’t release by hand. Don’t pry against the battery case.
- Wrap or position the disconnected cable so it cannot touch the battery post.
- During installation, tighten the connection to 15 Nm (11 ft-lbs). Don’t crush or twist the battery post.
Step 3: Move the positive fuse-block assembly
- Open the red positive-terminal cover by hand.
- Use the 10mm socket to loosen the positive terminal connection.
- Use the plastic trim clip tool and small flat-blade screwdriver to release the wiring retainers attached to the battery or fuse-block support.
- Lift the positive fuse-block assembly from the battery post and move it aside without pulling or sharply bending its cables.
- During installation, tighten the positive connection to 15 Nm (11 ft-lbs).
- The fuse block is plastic, not gym equipment.
Step 4: Remove the upper battery brace
- Use the matching 10mm socket or 13mm socket, extension, and ratchet to remove the upper battery brace fasteners.
- Lift the brace away and note its orientation for reassembly.
- Keep its fasteners separate from the lower hold-down bolt.
Step 5: Remove the lower battery hold-down
- Locate the retaining block at the bottom edge of the battery.
- Use the 13mm socket, 6-inch socket extension, and 3/8-inch ratchet to remove its bolt.
- Remove the retaining block without dropping it into the engine compartment.
- During installation, tighten the battery hold-down to 10 Nm (89 in-lbs).
Step 6: Disconnect the battery vent
- Locate the small vent hose connected near the upper side of the battery.
- Pull the fitting straight out by hand. Don’t pull on the hose itself.
- Make sure the hose remains open and undamaged because it must connect to the replacement battery.
Step 7: Remove the old battery
- Attach the battery carrying strap securely or use the battery’s built-in handles.
- Lift the battery straight upward while keeping it level.
- Place it upright on cardboard or in a plastic battery tray.
- Don’t place tools or the replacement battery across loose cables.
Step 8: Clean and inspect the tray
- Use the battery terminal cleaning brush and battery terminal cleaner to remove corrosion from the cable clamps.
- Inspect the battery tray, hold-down, vent hose, and terminal clamps for cracks or severe corrosion.
- Allow cleaned connections to dry completely before installation.
Step 9: Install the new AGM battery
- Use the battery carrying strap to lower the new battery into the tray with the posts facing exactly like the old battery.
- Ensure the battery sits flat and no wiring is trapped beneath it.
- Reconnect the vent hose to the battery’s vent port. Install the supplied plug in the unused vent port if the battery manufacturer provides one.
- Reinstall the lower retaining block using the 13mm socket and extension.
- Torque the hold-down to 10 Nm (89 in-lbs).
- Try to move the battery by hand. It must remain firmly secured.
Step 10: Reinstall the upper brace and fuse block
- Return the upper brace to its original position using the appropriate 10mm socket or 13mm socket.
- Reattach every wiring retainer and clip by hand or with the plastic trim clip tool.
- Position the positive fuse-block assembly squarely over the positive battery post.
Step 11: Reconnect positive, then negative
- Seat the positive clamp fully down on the positive post.
- Use the 10mm socket and torque wrench to tighten it to 15 Nm (11 ft-lbs).
- Close the red positive-terminal cover.
- Seat the negative clamp fully down on the negative post.
- Use the 10mm socket and torque wrench to tighten it to 15 Nm (11 ft-lbs).
- Apply battery terminal protector after both clamps are secured.
Step 12: Reinstall the intake duct and trim
- Return the duct and covers to their original positions.
- Install the fasteners using the appropriate 10mm socket, 13mm socket, or plastic trim clip tool.
- Check that the intake duct is fully seated and no tools remain under the hood.
✅ After Repair
- ✅ Turn the ignition on without starting the engine and leave it on for at least three minutes. Cadillac specifies this so the electronic throttle can relearn its home position. cadillac.com
- ✅ Switch the ignition off and leave it off for at least one minute.
- ✅ Start the engine and verify that it cranks normally.
- ✅ Check the instrument cluster for persistent battery, charging-system, or engine warnings.
- ✅ Reset the clock, express-window function, and personalized settings if needed.
- ✅ A compatible scan tool can perform the battery monitor reset or new-battery procedure. This is recommended so the charging system immediately recognizes the replacement battery.
- ✅ If no scan tool is available, normal driving may allow the battery monitoring system to relearn gradually. Stop and scan the XT4 if charging or stop-start warnings remain.
- ✅ Recheck that the battery is secure and the terminal clamps cannot rotate by hand.
- ✅ Return the old battery to a battery retailer or recycling facility. Never place it in household waste.
💰 DIY vs Shop Cost
Shop Cost: $320-$550 USD (parts + labor)
DIY Cost: $200-$320 USD (parts only)
You Save: $120-$230 USD by doing it yourself!
Labor pricing varies by region. This repair normally takes a shop approximately 0.5-1.0 hour.
🎯 Ready to get started?
HowToo makes it easy: same-day/2-day shipping on every part, plus all the tools and specialty tools you need! The battery aisle is open beside this guide so you can match an H7/94R AGM battery for your XT4.
