


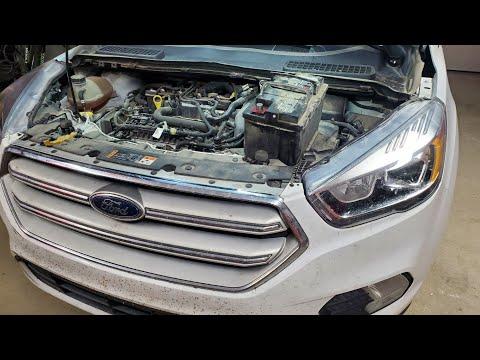




How to Replace the 12V Battery in a 2017-2026 Ford Escape (Engine: Inline 4 2.0L)
Step-by-step airbox removal, installation, torque specs, safety tips, and BMS reset for 2017, 2018, 2019
How to Replace the 12V Battery in a 2017-2026 Ford Escape (Engine: Inline 4 2.0L)
Step-by-step airbox removal, installation, torque specs, safety tips, and BMS reset for 2017, 2018, 2019


🔧 Escape - 12V Battery Replacement
The cleanest method is removing the air-filter housing, opening the front of the battery box, and sliding the battery forward. It’s more involved than most battery swaps, but it’s manageable if you work slowly. Ford identifies the battery at the rear of the engine compartment on your Escape. fordservicecontent.com
Difficulty Level: Intermediate | Estimated Time: 1-1.5 hours
Assumption: These instructions use the factory airbox removal method and an H6/Group 48 AGM replacement battery.
⚠️ Safety & Precautions
- 🅿️ Apply the electric parking brake before disconnecting power, since it cannot operate with a completely dead battery. fordservicecontent.com
- 🧤 Wear gloves and safety glasses. Battery acid can cause serious burns.
- 🔑 Switch everything off, remove the key, and wait at least two minutes before disconnecting the battery.
- ➖ Disconnect the negative terminal first and reconnect it last.
- ➕ Never let a tool bridge the positive terminal to body metal.
- 🏋️ An H6 battery is heavy. Lift it with both hands or use a carrying strap.
- 🚫 Don’t smoke or create sparks near the battery.
🔧 Required Tools
You'll need the following tools for this repair:
- 8mm socket
- 10mm socket
- 13mm socket
- 7mm socket
- 3/8-inch ratchet
- 6-inch socket extension
- 3/8-inch torque wrench
- Flat-blade trim tool
- Battery terminal brush
- Battery carrying strap
- Insulated work gloves
- Safety glasses
🔩 Required Parts
HowToo sells all the parts you need for this repair:
- H6/Group 48 AGM vehicle battery - Qty: 1
- Battery terminal protector washers - Qty: 1 set
- Battery terminal cleaner - Qty: 1
Use an AGM battery matching the original battery’s electrical rating and terminal layout. Ford requires the replacement to meet the vehicle’s electrical requirements. fordservicecontent.com
📋 Before You Begin
- 🚙 Park your Escape on level ground, shift into Park, and apply the electric parking brake.
- 💡 Switch off the lights, climate control, radio, and all accessories.
- 🪟 Lower one window so you cannot accidentally lock yourself out.
- 📻 Save any radio presets you want to restore later.
- 🔎 Photograph the battery orientation and cable routing before removing anything.
🔨 Step-by-Step Instructions
Follow these steps in order:
Step 1: Remove the engine air intake duct
- Use the 7mm socket and ratchet to loosen the clamp where the intake hose attaches to the air-filter housing.
- Disconnect any small breather hose or wiring retainer attached to the intake duct. Press the locking tab rather than pulling on the wires.
- Move the intake duct carefully aside without sharply bending it.
- During installation, tighten the intake clamp to approximately 5 Nm (44 in-lbs). fordescape4.com
Step 2: Remove the air-filter housing
- Use the 8mm or 10mm socket, as fitted, to remove the airbox retaining bolt.
- Release the front fresh-air inlet from the housing.
- Grip the lower housing firmly and pull upward to release its rubber mounting grommets.
- Lift the complete air-filter housing out of the engine compartment.
- Steady pressure beats yanking plastic parts.
Step 3: Open access to the battery
- Use the flat-blade trim tool to release the wiring retainers from the removable front wall of the battery box.
- Release the battery-box locking tabs and lift or slide the front panel out.
- Move the attached wiring only far enough to create a clear path for the battery.
Step 4: Disconnect the negative terminal
- Identify the negative terminal by its black cable and minus symbol.
- Use the 10mm socket to loosen the negative terminal clamp.
- Lift the clamp straight off and position it where it cannot spring back onto the post.
- Handle the battery-monitoring sensor built into the negative cable gently.
Step 5: Disconnect the positive terminal
- Open the red positive-terminal cover.
- Use the 10mm socket to loosen the positive terminal clamp.
- Lift the clamp off and cover it with a clean, dry cloth so it cannot touch metal.
Step 6: Remove the battery hold-down
- Use the 13mm socket, extension, and ratchet to remove the hold-down fastener at the base of the battery.
- Remove the hold-down bracket and place its hardware somewhere safe.
- Disconnect the battery vent tube if one is installed. Ford instructs that the vent tube and battery shield must be reinstalled. fordservicecontent.com
Step 7: Remove the old battery
- Fit the battery carrying strap securely around the battery.
- Slide the battery forward through the opening left by the airbox.
- Lift the battery out while keeping it upright.
- Inspect the tray for corrosion, cracks, or loose hardware.
Step 8: Clean the terminals and tray
- Wear insulated work gloves and safety glasses.
- Apply battery terminal cleaner and use the battery terminal brush to clean the inside of both cable clamps.
- Wipe the tray dry. Don’t allow cleaner or debris into the intake opening.
Step 9: Install the new battery
- Place the new battery in the tray with the positive and negative posts matching the original orientation.
- Reconnect the vent tube, if equipped, and confirm it isn’t kinked.
- Install the hold-down bracket using the 13mm socket and torque wrench.
- Torque the battery hold-down to 10 Nm (89 in-lbs).
- Push the battery firmly by hand. It must not shift.
Step 10: Reconnect the battery
- Install the positive clamp first. Use the 10mm socket and tighten it securely without crushing the post.
- Close the positive-terminal cover.
- Install the negative clamp last. Use the 10mm socket and tighten to approximately 5.4 Nm (48 in-lbs). fordescape4.com)
- Try rotating both clamps by hand. Neither should move.
Step 11: Reassemble the battery box and airbox
- Refit the battery-box front panel and engage every locking tab.
- Use the flat-blade trim tool to reinstall the wiring retainers.
- Push the air-filter housing fully into its rubber grommets.
- Reinstall its retaining bolt with the appropriate 8mm or 10mm socket.
- Reconnect the fresh-air inlet, intake hose, breather connection, and electrical retainers.
- Use the 7mm socket and torque wrench to tighten the intake clamp to 5 Nm (44 in-lbs). fordescape4.com)
Step 12: Reset the Battery Monitoring System
- Switch the ignition on without starting the engine.
- Within 10 seconds, flash the high beams five times, ending with the high beams off.
- Press and release the brake pedal three times.
- Watch for the battery warning lamp to flash three times, indicating the reset was accepted.
- If it doesn’t confirm after two careful attempts, use a Ford-capable scan tool to perform the battery-monitor reset.
✅ After Repair
- 🚗 Start the engine and check that no charging-system warning remains illuminated.
- ⏱️ Let the engine reach operating temperature, then allow it to idle for at least one minute.
- 🛣️ Drive at least 10 miles so the engine computer can relearn its idle and fuel-trim settings. fordservicecontent.com
- 🪟 Reset the power-window bounce-back feature if one-touch operation no longer works.
- 🕒 Reset the clock and radio presets as necessary.
- 🔍 Recheck that the intake hose, airbox, vent tube, battery clamps, and hold-down are secure.
- ♻️ Keep the old battery upright and return it to a battery retailer or approved recycling center.
💰 DIY vs Shop Cost
Shop Cost: $300-$475 (parts + labor)
DIY Cost: $175-$250 (parts only)
You Save: $125-$225 by doing it yourself!
Shop labor rates vary but typically run $100-$150/hour. This repair takes a shop approximately 0.7-1.0 hour.
🎯 Ready to get started?
HowToo makes it easy: same-day/2-day shipping on every part, plus all the tools and specialty tools you need! Check out the parts and tools sections below to add everything to your cart.
