

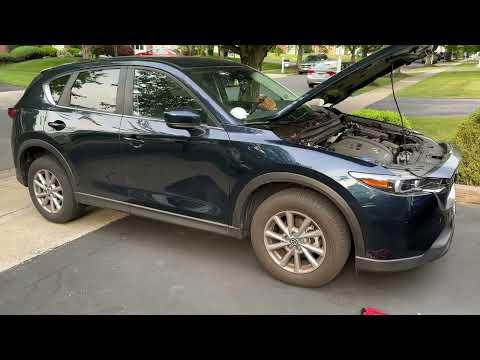






How to Replace the 12-Volt Battery in a 2013-2024 Mazda CX-5 (Engine: Inline 4 2.5L)
Step-by-step instructions with required tools, safety tips, and terminal torque specs for 2013, 2014, 2015, 2016
How to Replace the 12-Volt Battery in a 2013-2024 Mazda CX-5 (Engine: Inline 4 2.5L)
Step-by-step instructions with required tools, safety tips, and terminal torque specs for 2013, 2014, 2015, 2016


🔧 CX-5 - Battery Replacement
This is a straightforward beginner job. The battery sits under the hood and comes out after removing its cover, two terminal clamps, and the upper hold-down bracket. The battery aisle is now open with replacements matched to your CX-5.
Difficulty Level: Beginner | Estimated Time: 20-40 minutes
Assumption: These instructions cover the main 12-volt starting battery, not the key-fob battery.
⚠️ Safety & Precautions
- ⚠️ Wear safety glasses and gloves. Mazda warns that the battery contains corrosive sulfuric acid and can release flammable hydrogen gas. mazdausa.com
- 🔥 Keep cigarettes, flames, chargers, and anything that could spark away from the battery.
- 🔑 Switch the ignition completely off and move the key fob away from your CX-5.
- ➖ Disconnect the negative terminal first and reconnect it last.
- ➕ Never let a tool bridge the positive terminal and metal bodywork.
- 🏋️ The battery is heavy. Lift it upright with both hands and don’t tip it.
- 🔌 No battery registration or scan-tool programming is normally required for this replacement.
🔧 Required Tools
You'll need the following tools for this repair:
- 10mm socket
- 1/4-inch drive ratchet
- 3-inch socket extension
- Small inch-pound torque wrench
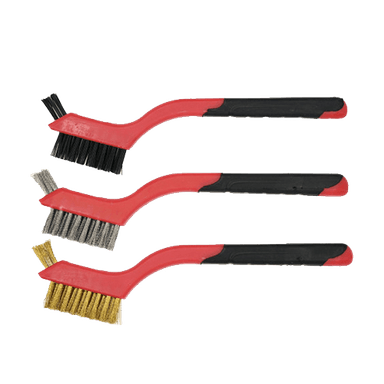
- Battery terminal brush
- Battery lifting strap
- Nitrile work gloves
- ANSI-rated safety glasses
- Clean shop towels
🔩 Required Parts
HowToo sells all the parts you need for this repair:
- Vehicle battery matched to the CX-5 - Qty: 1
- Battery terminal protector washers - Qty: 1 set
- Battery terminal cleaner - Qty: 1
Match the replacement battery’s case size, terminal position, and rating to the fitment shown in the battery aisle. Don’t substitute a reversed-terminal battery just because it physically fits.
📋 Before You Begin
- 🅿️ Park on level ground, select Park, apply the parking brake, and switch everything off.
- 🪟 Lower the driver’s window before disconnecting power so you can’t accidentally lock yourself out.
- 💾 Save any radio favorites you care about. The clock and automatic window function may need resetting afterward.
- ⏱️ Wait at least one minute after switching off the ignition before touching the terminals.
- 🔍 Inspect the new battery before installation. The case must not be cracked, swollen, or leaking.
🔨 Step-by-Step Instructions
Follow these steps in order:
Step 1: Open the hood and expose the battery
- Pull the hood release inside your CX-5, release the secondary latch, and raise the hood.
- Remove the plastic battery cover by lifting it straight upward with your hands. Mazda specifies removing this cover before battery maintenance. mazdausa.com
- Use a clean shop towel to remove loose dirt from around the battery.
Step 2: Disconnect the negative terminal
- Identify the negative terminal by the minus symbol and black cable.
- Use the 10mm socket, extension, and ratchet to loosen the negative clamp nut.
- Twist the clamp gently and lift it straight off the battery post.
- Move the cable aside where it cannot spring back onto the post.
- Negative off first prevents accidental short circuits.
Step 3: Disconnect the positive terminal
- Lift the red positive-terminal cover with your gloved hand.
- Use the 10mm socket and ratchet to loosen the positive clamp nut.
- Lift the clamp straight off and keep it away from surrounding metal.
Step 4: Remove the hold-down bracket
- Use the 10mm socket, extension, and ratchet to loosen the two upper hold-down fasteners.
- Keep control of the hooked rods while removing the nuts. Don’t let them drop into the engine compartment.
- Lift off the metal crossbar and place the hardware together.
- Loose hardware loves disappearing under battery trays.
Step 5: Remove the old battery
- Fit the battery lifting strap securely around the battery if it lacks a built-in handle.
- Lift the battery straight upward with both hands.
- Keep it level and place it upright on a stable surface.
- Inspect the battery tray for corrosion, cracks, or trapped debris.
Step 6: Clean the tray and terminals
- Use the battery terminal brush to clean light corrosion from inside both cable clamps.
- Wipe the tray clean with shop towels.
- If corrosion is severe, damaged cables or a badly rusted hold-down should be replaced rather than reused.
Step 7: Install the new battery
- Use the battery lifting strap to lower the new battery squarely into the tray.
- Orient it exactly like the old battery, with positive and negative posts on their original sides.
- Make sure the battery sits flat and no cable is trapped underneath it.
Step 8: Reinstall the hold-down bracket
- Position the crossbar and engage both hooked rods correctly.
- Use the 10mm socket, extension, and ratchet to tighten both sides evenly.
- Tighten only until the battery cannot slide or rock. Don’t crush or distort the battery case.
- Where a calibrated specification is available, use the small inch-pound torque wrench. Otherwise, securely snug both fasteners evenly rather than forcing them.
Step 9: Connect the positive terminal
- Install the positive clamp fully down on the positive post.
- Use the 10mm socket and small inch-pound torque wrench to tighten the clamp to 4-5 Nm (35-44 in-lbs). Mazda accessory instructions specify this range for the battery cable connection. parts.mazdausa.com
- Try to rotate the clamp by hand. It must not move.
- Close the red protective cover.
Step 10: Connect the negative terminal
- Install the negative clamp fully down on the negative post.
- Use the 10mm socket and small inch-pound torque wrench to tighten it to 4-5 Nm (35-44 in-lbs). parts.mazdausa.com
- Check that the clamp cannot rotate by hand.
- Reinstall the plastic battery cover.
✅ After Repair
- 🚗 Start the engine and confirm that it cranks normally.
- 💡 Check that the charging-system warning light goes out after starting.
- 🪟 Reset each automatic window if needed: close the window, then hold the switch in the upward position for about two seconds.
- 🕐 Reset the clock and restore any lost audio settings.
- 🔄 Turn the steering wheel smoothly from center toward each side, then take a short drive if stability or steering warning lights remain temporarily illuminated.
- 🔍 With the engine off, recheck that the battery and both terminal clamps cannot move.
- ♻️ Return the old battery to a battery retailer or recycling center. Never place it in household waste.
💰 DIY vs Shop Cost
Shop Cost: $230-$400 equivalent, depending on battery grade and local labor
DIY Cost: $175-$280 equivalent for a typical matched replacement battery
You Save: Approximately $50-$120 by doing it yourself!
Local labor and battery pricing vary. This repair takes a shop approximately 0.3-0.5 hour.
🎯 Ready to get started?
HowToo makes it easy: same-day/2-day shipping on every part, plus all the tools and specialty tools you need! Check out the parts and tools sections below to add everything to your cart.