

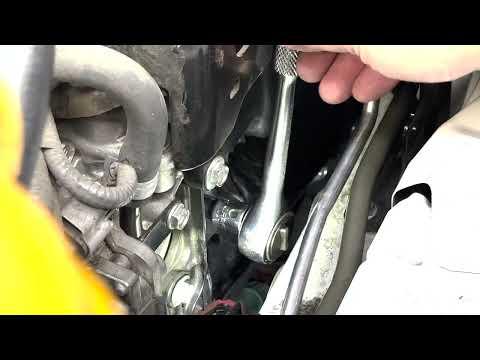





How to Replace Spark Plugs on a 2019-2024 Subaru Ascent 2.4L Turbo (Engine: Flat 4 2.4L)
Step-by-step DIY instructions with required tools, parts, torque specs, and safety tips for 2019, 2020, 2021, 2022, 2023, 2024
How to Replace Spark Plugs on a 2019-2024 Subaru Ascent 2.4L Turbo (Engine: Flat 4 2.4L)
Step-by-step DIY instructions with required tools, parts, torque specs, and safety tips for 2019, 2020, 2021, 2022, 2023, 2024


🔧 Ascent - Spark Plug Replacement
This is doable at home, but tight access makes it a patient beginner project. You’ll remove the battery-side obstructions and intake airbox, then replace one plug at a time using a thin-wall socket and short extensions.
Difficulty Level: Intermediate | Estimated Time: 3-5 hours
Assumption: These instructions cover the stock 2.4L turbocharged engine. Subaru’s flat engine puts the plugs beside the frame rails, so tool selection matters more than brute force. howtoo.com
⚠️ Safety & Precautions
- ⚠️ Let the engine become completely cold before removing any spark plug.
- ⚠️ Disconnect the negative battery terminal before unplugging the ignition coils.
- ⚠️ Support a removed battery securely. It’s heavy and contains corrosive acid.
- ⚠️ Blow debris from each plug well before removing the plug.
- ⚠️ Start every new plug by hand. Cross-threading the aluminum cylinder head can become a major repair.
- ⚠️ Don’t apply anti-seize to the plated NGK spark-plug threads.
- ⚠️ Never use an impact wrench on spark plugs.
🔧 Required Tools
You'll need the following tools for this repair:
- 10mm socket
- 12mm socket
- 14mm thin-wall spark plug socket
- 1/4-inch drive ratchet
- 3/8-inch drive flex-head ratchet
- 3/8-inch drive torque wrench rated 7-30 ft-lbs
- 3-inch 3/8-inch drive extension
- 6-inch 3/8-inch drive extension
- 3/8-inch drive universal joint
- Flat-blade screwdriver
- Plastic trim-clip removal tool
- 0.024-inch wire spark plug gap gauge
- Compressed-air blow gun
- Battery lifting strap
- LED work light
- Safety glasses
- Nitrile mechanic gloves
A universal joint is a hinged socket adapter that allows the extension to approach the plug at a slight angle.
🔩 Required Parts
HowToo sells all the parts you need for this repair:
- NGK OE Series Laser Iridium spark plugs - Gap: 0.024 inch - Qty: 4
- Dielectric ignition grease - Qty: 1 small tube
The listed NGK plugs use a 14mm hex, M12 x 1.25 threads, and a factory gap of 0.024 inch or 0.6mm. Replace all four together. howtoo.com
📋 Before You Begin
- 📋 Park your Ascent on level ground, select Park, and engage the parking brake.
- 📋 Switch off the ignition, remove the key from the work area, and open the hood.
- 📋 Allow at least one hour for the engine and turbocharger area to cool.
- 📋 Photograph the intake hose, clamps, clips, and battery connections before disassembly.
- 📋 Keep bolts from the battery area and airbox in separate labeled containers.
- 📋 Replace one plug at a time so the ignition coils and connectors stay organized.
- 📋 No infotainment service mode, scan-tool command, coding, or battery registration is required.
🔨 Step-by-Step Instructions
Follow these steps in order:
Step 1: Disconnect and remove the battery
- Use a 10mm socket to loosen the negative terminal and lift it from the battery post.
- Move the negative cable aside so it cannot spring back onto the post.
- Use the 10mm socket to disconnect the positive terminal.
- Use the appropriate 10mm or 12mm socket to remove the battery hold-down bracket.
- Use the battery lifting strap to lift the battery straight out.
- Negative off first, negative on last.
Step 2: Remove the intake duct and airbox
- Use a flat-blade screwdriver to loosen the intake-hose clamp.
- Disconnect any attached breather hose by releasing its clamp by hand.
- Use the plastic trim-clip removal tool and 10mm socket to remove the intake snorkel and airbox fasteners.
- Lift the intake pieces and airbox from the engine compartment without pulling on wiring.
- Cover the exposed intake opening with a clean, lint-free cloth.
Step 3: Remove the first ignition coil
- Use the LED work light to locate the ignition coils on the sides of the engine.
- Press the electrical connector lock and pull on the connector body, not its wires.
- Use the 10mm socket and 1/4-inch drive ratchet to remove the coil retaining bolt.
- Rotate the coil gently, then work it outward from the spark-plug well.
- Don’t pry against the plastic coil housing.
Step 4: Clean the spark-plug well
- Put on safety glasses.
- Use the compressed-air blow gun to remove sand and debris from around the plug.
- Look inside with the LED work light and verify that the well is clean and dry.
- If oil is present, stop. A leaking seal should be diagnosed before installing new plugs.
Step 5: Remove the old spark plug
- Fit the 14mm thin-wall spark plug socket to the shortest extension that reaches the plug.
- Add the 3/8-inch drive universal joint only where the frame clearance requires it.
- Use the 3/8-inch drive flex-head ratchet to loosen the plug counterclockwise.
- Once loose, turn the extension by hand and withdraw the plug carefully.
- If the plug remains tight after breaking loose, turn it slightly inward and outward while removing it.
Step 6: Inspect and prepare the new plug
- Use the 0.024-inch wire spark plug gap gauge to verify a 0.024-inch or 0.6mm gap.
- Don’t force a flat blade between the fine iridium electrode and ground strap.
- If the gap is substantially incorrect or the ceramic is cracked, replace the plug instead of bending it.
- Leave the threads clean and dry. Don’t add anti-seize.
- Place a tiny smear of dielectric grease inside the coil boot, not on the plug terminal or threads.
Step 7: Hand-thread the new spark plug
- Place the plug into the 14mm thin-wall spark plug socket.
- Lower it gently into the well using only the extension.
- Turn the extension clockwise with your fingers until the plug seats.
- If it doesn’t turn easily for several complete rotations, back it out and start again.
- Finger-starting protects the aluminum threads.
Step 8: Torque the spark plug
- Attach the 3/8-inch drive torque wrench while keeping the extension aligned as straight as possible.
- Tighten the plug to 21 Nm (15.5 ft-lbs). howtoo.com
- Stop immediately when the torque wrench clicks.
- Don’t click the wrench repeatedly. That can overtighten the plug.
Step 9: Reinstall the ignition coil
- Push the coil straight onto the spark plug until the boot is fully seated.
- Start the retaining bolt by hand.
- Use the 3/8-inch drive torque wrench with the 10mm socket to tighten the coil bolt to 8 Nm (71 in-lbs or 5.9 ft-lbs). howtoo.com
- Reconnect the electrical connector and verify that its lock clicks.
Step 10: Replace the remaining three plugs
- Repeat Steps 3 through 9 for each remaining cylinder.
- Use the shortest extension combination that provides enough working room.
- Confirm every coil bolt and connector before moving to the next cylinder.
- Patience wins this job. The frame rails aren’t interested in negotiating.
Step 11: Reinstall the intake system
- Remove the clean cloth from the intake opening.
- Use the 10mm socket and plastic trim-clip removal tool to reinstall the airbox, snorkel, and retaining clips.
- Reconnect any breather hose removed earlier.
- Use the flat-blade screwdriver to secure the intake-hose clamp.
- Check that the intake hose is fully seated around its entire connection.
Step 12: Reinstall and connect the battery
- Use the battery lifting strap to lower the battery into its tray.
- Use the appropriate 10mm or 12mm socket to reinstall the battery hold-down securely.
- Use the 10mm socket to connect the positive terminal first.
- Use the 10mm socket to connect the negative terminal last.
- Make the terminals secure without crushing or deforming them.
✅ After Repair
- ✅ Check the engine compartment for sockets, extensions, loose connectors, and uncovered openings.
- ✅ Start the engine and allow it to idle for two minutes.
- ✅ A brief uneven start may occur after the battery disconnect, but the idle should quickly become smooth.
- ✅ If the check-engine light flashes or the engine shakes strongly, switch it off and inspect every coil connector.
- ✅ Listen around the intake hose for hissing that could indicate a loose clamp.
- ✅ Take a short test drive and confirm smooth acceleration without hesitation or warning lights.
- ✅ Reset the clock and any convenience settings lost during the battery disconnect.
💰 DIY vs Shop Cost
Shop Cost: $350-$650 equivalent (parts + labor)
DIY Cost: Approximately $107 for four listed NGK plugs, plus tools and supplies
You Save: Approximately $240-$540 by doing it yourself!
Labor pricing around Sonīpat can differ considerably from U.S. estimates. Tight boxer-engine access is why this service carries substantial labor time.
🎯 Ready to get started?
HowToo makes it easy: same-day/2-day shipping on every part, plus all the tools and specialty tools you need! Check out the parts and tools sections below to add everything to your cart.