

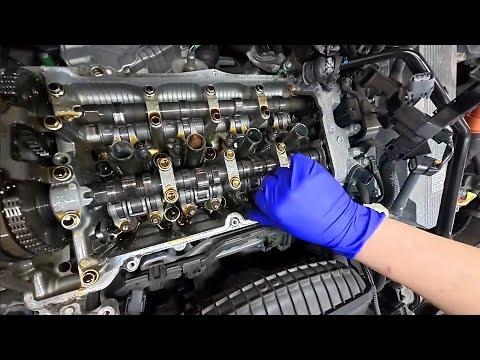







How to Replace Spark Plugs on a 2019-2022 Honda Insight 1.5L Hybrid (Engine: Inline 4 1.5L)
Step-by-step DIY instructions with required tools, parts, 16 ft-lb torque spec, and safety tips for 2019, 2020, 2021, 2022
How to Replace Spark Plugs on a 2019-2022 Honda Insight 1.5L Hybrid (Engine: Inline 4 1.5L)
Step-by-step DIY instructions with required tools, parts, 16 ft-lb torque spec, and safety tips for 2019, 2020, 2021, 2022


🔧 Insight - Spark Plug Replacement
This is a solid beginner job. Your Insight uses four coil-on-plug ignition coils, and replacing all four spark plugs should take about an hour on a cold engine.
Honda lists spark-plug replacement under Maintenance Minder sub-code 4, together with a valve-clearance inspection. owners.honda.com
Difficulty Level: Beginner | Estimated Time: 1-1.5 hours
Assumption: Your Insight has its stock engine and ignition system.
⚠️ Safety & Precautions
- ⚠️ Work only with the engine completely cold. Removing plugs from a hot aluminum cylinder head can damage its threads.
- 🔑 Turn the vehicle completely off, remove the key from the cabin, and verify that the green READY light is off.
- 🟠 Don’t touch or disconnect any orange high-voltage cables or connectors.
- 🧹 Clean around the coils before removing them. Dirt must not fall into an open cylinder.
- 🔋 Disconnecting the 12-volt battery isn’t normally necessary for this repair.
- 🚫 Don’t put oil or anti-seize on the new plug threads unless the plug manufacturer expressly requires it.
🔧 Required Tools
You'll need the following tools for this repair:
- 10mm socket
- 14mm 3/8-inch drive spark plug socket
- 3/8-inch drive ratchet
- 3/8-inch drive 6-inch extension
- 3/8-inch drive torque wrench rated 10-80 ft-lbs
- Compressed-air blow gun or soft detailing brush
- Small flat-blade screwdriver
- Clean shop towels
- Nitrile gloves
- Safety glasses
A spark plug socket is a deep socket with a rubber or magnetic insert that holds the plug during removal and installation.
🔩 Required Parts
HowToo sells all the parts you need for this repair:
- Catalog-matched iridium spark plugs - Qty: 4
Replace all four plugs together. The matching plug and 14mm spark-plug socket aisles are now open in the parts sidebar.
📋 Before You Begin
- 🚗 Park your Insight on level ground, select Park, apply the parking brake, and turn the vehicle off.
- ❄️ Let the engine cool for several hours, ideally overnight.
- 🔑 Move the key away from the vehicle and verify the instrument panel is dark.
- 🧼 Remove loose dust from the top of the engine before opening the plug wells. Haryana dust gets everywhere, including places with expensive threads.
- 📦 Keep each new plug protected until you’re ready to install it.
- 🔎 Inspect the new plugs for cracked porcelain or bent electrodes. Don’t aggressively regap fine-wire iridium plugs.
🔨 Step-by-Step Instructions
Follow these steps in order:
Step 1: Gain Access to the Ignition Coils
- Open the hood and confirm that the engine is cold.
- Remove any upper cover or intake piece obstructing the ignition coils, if fitted.
- Use the 10mm socket and 3/8-inch drive ratchet for any visible retaining bolts.
- Place every removed fastener in a clean container.
Step 2: Clean the Coil Area
- Put on your safety glasses.
- Use the compressed-air blow gun or soft detailing brush to remove dirt from around all four ignition coils.
- Don’t force compressed air directly into electrical connectors.
Step 3: Disconnect the First Ignition Coil
- Press the electrical connector’s locking tab and pull the connector straight backward.
- Use the small flat-blade screwdriver only if the locking tab needs gentle assistance.
- Never pull on the wires.
- Complete one cylinder at a time so nothing gets mixed up.
Step 4: Remove the Ignition Coil
- Use the 10mm socket and 3/8-inch drive ratchet to remove the coil retaining bolt.
- Twist the coil gently to release its rubber boot.
- Pull the coil straight upward and place it on a clean shop towel.
- Inspect the boot for cracks, burn tracks, oil, or water.
Step 5: Clean the Spark Plug Well
- Use the compressed-air blow gun or soft detailing brush to remove remaining debris before loosening the plug.
- Stop if the well contains oil or standing water. The liquid must be removed before the spark plug comes out.
Step 6: Remove the Old Spark Plug
- Connect the 14mm spark plug socket and 6-inch extension to the 3/8-inch drive ratchet.
- Lower the socket straight down until it fully engages the plug.
- Turn counterclockwise slowly and remove the plug.
- If it becomes unusually tight, stop and turn it gently back and forth instead of forcing it.
Step 7: Inspect the Removed Plug
- Check that the old plug’s metal sealing washer came out with it.
- Light tan or gray deposits are usually normal.
- A wet, oily, heavily blackened, or damaged plug indicates a problem requiring further diagnosis.
- Compare all four removed plugs after completing the repair.
Step 8: Install the New Plug by Hand
- Place one new plug in the 14mm spark plug socket.
- Attach only the 6-inch extension. Don’t attach the ratchet yet.
- Lower the plug into the well and turn the extension clockwise using your fingers.
- The plug must turn easily for several complete revolutions.
- Remove and restart it if you feel immediate resistance.
- Hand starting prevents costly cross-thread damage.
Step 9: Torque the New Spark Plug
- Attach the 3/8-inch drive torque wrench to the extension.
- Tighten the clean, dry spark plug to 22 Nm (16 ft-lbs).
- Stop as soon as the torque wrench clicks.
- Don’t give it an extra pull after the click.
Step 10: Reinstall the Ignition Coil
- Push the ignition coil straight down until its boot seats firmly on the spark plug.
- Start the coil bolt by hand to prevent cross-threading.
- Use the 10mm socket and 3/8-inch drive ratchet to make the bolt snug without overtightening it.
- Reconnect the electrical connector until its lock clicks.
- Give the connector a gentle pull to verify that it’s locked.
Step 11: Replace the Remaining Three Plugs
- Repeat Steps 3 through 10 for the other three cylinders.
- Keep each plug well covered until you’re actively working on it.
- Make sure all four coil connectors are fully seated.
Step 12: Reassemble the Engine Compartment
- Reinstall any cover or intake component removed earlier.
- Use the 10mm socket and 3/8-inch drive ratchet to reinstall its fasteners snugly.
- Remove every tool, towel, and loose fastener from the engine compartment.
✅ After Repair
- ✅ Enter the vehicle, hold the brake pedal, and start the power system normally.
- 👀 Confirm that the green READY indicator appears and no warning message is displayed.
- 👂 When the gasoline engine starts, listen for smooth operation and abnormal tapping or air-leak noises.
- ⚠️ If the engine shakes or the check-engine light flashes, turn it off immediately and inspect every coil connection.
- 🚙 Take a short drive and verify smooth acceleration without warning lights.
- 📋 Honda associates Maintenance Minder sub-code 4 with both spark-plug replacement and valve-clearance inspection. Don’t mark the entire code complete if the valve-clearance inspection hasn’t been performed. owners.honda.com
💰 DIY vs Shop Cost
Shop Cost: Approximately ₹14,000-₹28,000, depending on local parts and labor
DIY Cost: Approximately ₹5,000-₹11,000 for four plugs
You Save: Approximately ₹9,000-₹17,000 by doing it yourself!
Local labor rates vary. This repair usually takes a shop approximately 0.8-1.2 hours.
🎯 Ready to get started?
HowToo offers fast shipping on the plugs, 14mm spark-plug socket, torque wrench, and other tools needed for the job. Check the parts and tools sections to add everything to your cart.