

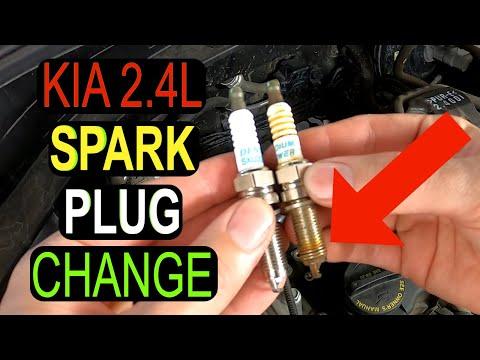







How to Replace Spark Plugs on a 2016-2020 Kia Optima 2.4L GDI (Trim: LX | Engine: Inline 4 2.4L)
Step-by-step DIY instructions with required tools, plug gap, torque specs, and safety tips for 2016, 2017, 2018
How to Replace Spark Plugs on a 2016-2020 Kia Optima 2.4L GDI (Trim: LX | Engine: Inline 4 2.4L)
Step-by-step DIY instructions with required tools, plug gap, torque specs, and safety tips for 2016, 2017, 2018


🔧 Optima - Spark Plug Replacement
Your Optima uses four long-life iridium spark plugs beneath the ignition coils. Replace all four together on a completely cold engine to prevent cylinder-head thread damage.
Difficulty Level: Beginner | Estimated Time: 45-75 minutes
⚠️ Safety & Precautions
- ⚠️ Let the engine cool completely before removing the spark plugs. The aluminum cylinder head is easily damaged when hot.
- ⚠️ Keep dirt and small objects out of the open spark-plug wells.
- ⚠️ Do not apply anti-seize to the new plug threads. It changes the tightening force and can cause over-tightening.
- ⚠️ Do not force a plug that will not turn easily by hand.
- ⚠️ Battery disconnection is not required. Keep the ignition switched off and the key away from your Optima.
🔧 Required Tools
You'll need the following tools for this repair:
- 3/8-inch drive ratchet
- 10mm socket
- 5/8-inch spark-plug socket with rubber insert
- 3/8-inch drive 6-inch extension
- 3/8-inch drive torque wrench rated 10-80 Nm
- 0.040-0.044-inch wire spark-plug gap gauge
- Compressed-air blow gun rated 90 psi
- Clean microfiber cloths
- Nitrile mechanic gloves
- Safety glasses
🔩 Required Parts
HowToo sells all the parts you need for this repair:
- OEM-equivalent iridium spark plugs for the 2.4L GDI engine - Qty: 4
📋 Before You Begin
- 📋 Park your Optima on level ground, select Park, engage the parking brake, and switch the ignition off.
- 📋 Wait until the engine is completely cold, preferably several hours.
- 📋 No infotainment menu, scan-tool procedure, ignition-coil coding, or battery registration is required.
- 📋 Work on one cylinder at a time so every ignition coil returns to its original position.
- 📋 A spark-plug well is the deep opening around each plug. Clean it before opening the cylinder.
🔨 Step-by-Step Instructions
Follow these steps in order:
Step 1: Remove the engine cover
- Put on the safety glasses and nitrile mechanic gloves.
- Grip the plastic engine cover near its mounting points and pull it straight upward by hand. It is retained by rubber grommets rather than bolts.
- Set the cover aside where its rubber mounts cannot be damaged.
Step 2: Clean around the ignition coils
- Use the compressed-air blow gun rated 90 psi to remove sand and debris from around all four coils.
- Keep your face away from the debris and use short bursts of air.
- Wipe remaining loose dirt away with a clean microfiber cloth.
Step 3: Disconnect the first ignition coil
- Press the electrical connector lock and pull the connector straight off by hand. Pull on the connector housing, not its wires.
- If the connector resists, press it inward first, depress the lock, and then pull it off.
- Never pry brittle connectors with excessive force.
Step 4: Remove the first ignition coil
- Use the 10mm socket, 3/8-inch drive 6-inch extension, and 3/8-inch drive ratchet to remove the coil retaining bolt.
- Twist the ignition coil gently by hand to release its rubber boot, then pull the coil straight upward.
- Inspect the boot for oil, cracking, burn marks, or white tracking lines. These can indicate a leaking tube seal or failing coil.
Step 5: Clean and remove the old spark plug
- Use the compressed-air blow gun rated 90 psi again to clean the empty spark-plug well.
- Use the 5/8-inch spark-plug socket with rubber insert, 3/8-inch drive 6-inch extension, and 3/8-inch drive ratchet to loosen the plug counterclockwise.
- Once loose, lift the old plug out with the socket.
- If the plug is unusually tight, stop rather than forcing it. Add no liquid to the open well.
Step 6: Inspect the new spark plug
- Confirm the new plug matches the old plug in thread length, seat style, and terminal shape.
- Use the 0.040-0.044-inch wire spark-plug gap gauge only to verify an approximate factory gap of 1.0-1.1 mm (0.040-0.044 inch).
- Do not lever against or bend the fine iridium center electrode. Replace a plug if its gap or electrode was damaged during shipping.
- Leave the plug threads clean and dry. Do not apply anti-seize.
Step 7: Install the new spark plug by hand
- Place the new plug in the 5/8-inch spark-plug socket with rubber insert attached only to the 3/8-inch drive 6-inch extension.
- Lower it carefully into the well and turn the extension clockwise by hand for several complete turns.
- The plug should spin smoothly. If it binds, remove it and start again to avoid cross-threading, which means engaging the threads at the wrong angle.
Step 8: Tighten the new spark plug
- Attach the 3/8-inch drive torque wrench rated 10-80 Nm to the extension and spark-plug socket.
- Torque to 20 Nm (15 ft-lbs). This is within Kia’s specified service range of 14.7-24.5 Nm (10.8-18.0 ft-lbs).
- Stop as soon as the torque wrench clicks. Do not tighten it again.
Step 9: Reinstall the ignition coil
- Push the coil straight down by hand until its boot is fully seated over the plug.
- Start the retaining bolt by hand, then use the 10mm socket, extension, and torque wrench.
- Torque to 9.8 Nm (87 in-lbs).
- Push the electrical connector onto the coil by hand until its lock clicks.
Step 10: Replace the remaining three plugs
- Repeat Steps 3 through 9 for the other three cylinders, working on only one cylinder at a time.
- Use the same tools and torque specifications for every cylinder.
- Before continuing, verify that all four coil connectors are locked and all four retaining bolts are installed.
Step 11: Reinstall the engine cover
- Align the cover’s mounting points with the rubber grommets.
- Press directly over each mounting point by hand until the cover is fully seated.
- No tool or torque specification is required for the push-on cover.
✅ After Repair
- ✅ Remove all tools and cloths from the engine compartment.
- ✅ Start the engine and let it idle for two to three minutes. It should run smoothly without shaking or unusual ticking.
- ✅ Confirm the check-engine light remains off. A flashing check-engine light indicates an active misfire; switch the engine off immediately and recheck every coil connector.
- ✅ Take a short, gentle test drive and confirm smooth acceleration.
- ✅ No spark-plug reset, coding, or special break-in procedure is required.
💰 DIY vs Shop Cost
Shop Cost: ₹5,000-₹10,000 (parts + labor)
DIY Cost: ₹2,500-₹6,000 (parts only)
You Save: ₹2,500-₹4,000 by doing it yourself!
Local labor rates vary. This repair takes a shop approximately 0.5-1.0 hour.
🎯 Ready to get started?
HowToo makes it easy: same-day/2-day shipping on every part, plus all the tools and specialty tools you need! Check out the parts and tools sections below to add everything to your cart.