

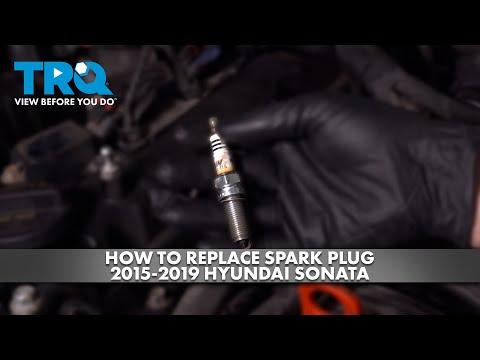







How to Replace Spark Plugs on a 2015-2025 Hyundai Sonata (Engine: Inline 4 2.4L)
Step-by-step DIY guide with required tools, parts, torque specs, and safety tips for 2015, 2016, 2017, 2018, 2019
How to Replace Spark Plugs on a 2015-2025 Hyundai Sonata (Engine: Inline 4 2.4L)
Step-by-step DIY guide with required tools, parts, torque specs, and safety tips for 2015, 2016, 2017, 2018, 2019


🔧 Sonata - Spark Plug Replacement
Your Sonata uses four spark plugs, one beneath each ignition coil on top of the engine. Replacing all four can restore smooth starting, fuel economy, and engine performance.
Difficulty Level: Beginner | Estimated Time: 45-75 minutes
⚠️ Safety & Precautions
- ⚠️ Let the engine cool completely; removing plugs from a hot aluminum cylinder head can damage the threads.
- 🛑 Switch the ignition off, remove the key from the vehicle, and keep the smart key away from the Sonata.
- 🧹 Clean each plug well before removal so dirt cannot enter the engine.
- 🔩 Do not use anti-seize compound; the specified plugs have plated threads, and lubricant can cause overtightening.
- 🔋 Battery disconnection is not required for this repair.
🔧 Required Tools
You'll need the following tools for this repair:
- 3/8-inch drive ratchet
- 3/8-inch drive torque wrench rated 7-30 Nm
- 10mm socket
- 5/8-inch magnetic spark plug socket
- 6-inch 3/8-inch drive extension
- 1.0-1.1mm wire spark plug gap gauge
- Compressed-air blow gun rated 90 PSI maximum
- Soft nylon detailing brush
- Clean lint-free shop towels
- Nitrile mechanic gloves
- Safety glasses
🔩 Required Parts
HowToo sells all the parts you need for this repair:
- OEM-spec iridium spark plugs - Qty: 4
- Dielectric silicone grease - Qty: 1 small tube
📋 Before You Begin
- 🚗 Park your Sonata on level ground, shift into Park, apply the parking brake, and open the hood.
- ❄️ Allow the engine to become completely cold, preferably after sitting for several hours.
- 📏 The new plugs should have a 1.0-1.1mm gap. A gap gauge measures the distance between the electrodes.
- 🔍 Confirm that all four plugs are identical and undamaged before removing anything.
- 📱 No infotainment setting, scan-tool command, or programming procedure is required.
🔨 Step-by-Step Instructions
Follow these steps in order:
Step 1: Remove the engine cover
- Put on the nitrile mechanic gloves and safety glasses.
- Grip the plastic engine cover near its mounting points and pull it straight upward by hand to release the rubber mounting grommets.
- Set the cover aside where it will not be stepped on.
Step 2: Clean around the ignition coils
- Use the soft nylon detailing brush to loosen dust around all four ignition coils.
- Use the compressed-air blow gun at no more than 90 PSI to blow debris away from the top of the engine.
- Keep the air nozzle out of the plug wells for now and wear safety glasses.
Step 3: Disconnect the first ignition coil
- Work on one cylinder at a time to prevent mixing the connectors.
- Press the electrical connector locking tab and pull the connector straight off by hand. Do not pull on its wires.
- Use the 10mm socket, 6-inch extension, and 3/8-inch ratchet to remove the ignition-coil retaining bolt.
- An ignition coil is the long electrical unit that sits directly over each spark plug.
Step 4: Remove the first ignition coil
- Twist the coil gently by hand to loosen its rubber boot, then pull the coil straight upward.
- Inspect the boot for cracks, oil, coolant, or burn marks. A wet plug well should be diagnosed before installing new plugs.
- Use the compressed-air blow gun to clean the empty plug well thoroughly.
- Keep each coil with its original cylinder.
Step 5: Remove the old spark plug
- Insert the 5/8-inch magnetic spark plug socket and 6-inch extension squarely over the plug.
- Attach the 3/8-inch ratchet and turn counterclockwise until the plug is completely loose.
- Lift the plug out carefully with the magnetic socket.
- If the plug is unusually tight or binds after loosening, stop rather than forcing it.
Step 6: Inspect and check the new plug
- Compare the new plug with the removed plug. The thread length, sealing washer, and electrical terminal must match.
- Use the 1.0-1.1mm wire spark plug gap gauge to verify the electrode gap.
- Do not force a gauge between the electrodes or bend the fine iridium center electrode.
- Replace a plug if its gap is incorrect or its ceramic insulator is cracked.
Step 7: Hand-thread the new spark plug
- Place the new plug into the 5/8-inch magnetic spark plug socket and attach only the 6-inch extension.
- Lower it vertically into the plug well.
- Turn the extension clockwise by hand for several complete turns. It should thread smoothly with almost no resistance.
- If resistance appears immediately, remove the plug and start again to prevent cross-threading.
- Cross-threading means the plug entered the cylinder-head threads at the wrong angle.
Step 8: Tighten the new spark plug
- Attach the 3/8-inch torque wrench to the extension and spark plug socket.
- Tighten the plug to 20 Nm (15 ft-lbs), within Hyundai’s specified range of 14.7-24.5 Nm (10.8-18.1 ft-lbs).
- Stop as soon as the torque wrench clicks. Do not tighten it again.
- Do not apply oil or anti-seize to the plug threads.
Step 9: Reinstall the ignition coil
- Apply a very thin film of dielectric silicone grease inside the opening of the rubber coil boot using a clean, gloved fingertip. Keep grease away from the plug terminal and threads.
- Push the coil straight down until its boot seats firmly over the spark plug.
- Install the retaining bolt with the 10mm socket and tighten it using the torque wrench to 10 Nm (89 in-lbs).
- Push the electrical connector onto the coil until its locking tab clicks.
Step 10: Replace the remaining three plugs
- Repeat Steps 3 through 9 for each remaining cylinder using the same listed tools.
- Replace all four plugs during the same service.
- Before continuing, confirm that all four coil connectors are locked and all four retaining bolts are installed.
Step 11: Reinstall the engine cover
- Use a clean lint-free shop towel to wipe the engine-cover mounting areas.
- Align the engine cover with its mounting studs.
- Press straight downward by hand over each mounting point until the cover is fully seated.
✅ After Repair
- ✅ Check that no tools or shop towels remain in the engine compartment.
- 🚘 Start the engine and let it idle for two to three minutes. It should run smoothly without shaking or misfiring.
- 🔎 Verify that the check-engine light remains off and listen for snapping or clicking around the coils.
- 🛣️ Take a short, gentle test drive, then check again for a warning light or rough idle.
- 📋 No spark-plug programming, adaptation reset, or battery registration is required.
💰 DIY vs Shop Cost
Shop Cost: ₹8,000-₹15,000 (parts + labor)
DIY Cost: ₹4,000-₹8,000 (parts only)
You Save: ₹4,000-₹7,000 by doing it yourself!
Labor rates around Sonīpat vary. This repair takes a shop approximately 0.7-1.0 hour, and imported OEM-equivalent iridium plug prices can vary significantly.
🎯 Ready to get started?
HowToo makes it easy: same-day/2-day shipping on every part, plus all the tools and specialty tools you need! Check out the parts and tools sections below to add everything to your cart.