

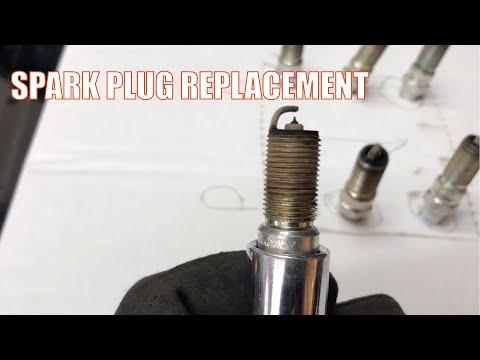





How to Replace Spark Plugs on a 2015-2021 GMC Canyon 3.6L V6 (Engine: Inline 4 2.5L)
Step-by-step DIY guide with tools, parts, torque specs, gaskets, and safety tips for 2015, 2016, 2017, 2018, 2019, 2020, 2021
How to Replace Spark Plugs on a 2015-2021 GMC Canyon 3.6L V6 (Engine: Inline 4 2.5L)
Step-by-step DIY guide with tools, parts, torque specs, gaskets, and safety tips for 2015, 2016, 2017, 2018, 2019, 2020, 2021


🔧 Canyon - Spark Plug Replacement
Replacing the spark plugs on your Canyon helps restore smooth idle, strong acceleration, and proper fuel economy. The 3.6L V6 uses six spark plugs: three are easier to reach at the front bank, and three require removing the upper intake manifold for access.
Difficulty Level: Intermediate | Estimated Time: 2.5-4 hours
⚠️ Safety & Precautions
- ⚠️ Work only on a cold engine. Hot aluminum cylinder heads can be damaged if spark plugs are removed while hot.
- ⚠️ Disconnect the negative battery cable before unplugging ignition coils and intake sensors.
- ⚠️ Keep dirt, bolts, and tools out of the intake ports. An intake port is an opening where air enters the engine.
- ⚠️ Do not over-tighten spark plugs. The cylinder heads are aluminum and threads can strip.
- ⚠️ Use only the correct iridium spark plugs. Do not install copper plugs in your Canyon.
🔧 Required Tools
You'll need the following tools for this repair:
- 10mm socket
- 8mm socket
- 13mm socket
- 5/8-inch spark plug socket
- 3/8-inch drive ratchet
- 3/8-inch drive torque wrench
- 6-inch extension
- 3-inch extension
- Universal joint adapter
- Flathead screwdriver
- Needle-nose pliers
- Pick tool
- Compressed air blow gun
- Spark plug gap gauge
- Fuel line disconnect tool set (specialty)
- Shop vacuum
- Clean shop towels
- Nitrile gloves
- Safety glasses
🔩 Required Parts
HowToo sells all the parts you need for this repair:
- Iridium spark plugs - Qty: 6
- Upper intake manifold gasket set - Qty: 1
- Throttle body gasket - Qty: 1
- Dielectric grease - Qty: 1 small tube
- Mass airflow sensor-safe throttle body cleaner - Qty: 1 can
📋 Before You Begin
- 🅿️ Park your Canyon on level ground, shift into neutral, and set the parking brake.
- ❄️ Let the engine cool completely before starting.
- 🔋 Use a 10mm socket to disconnect the negative battery cable. Move the cable aside so it cannot touch the battery post.
- 🧼 Blow loose dirt off the top of the engine with compressed air before removing any parts.
- 📸 Take photos of hose and connector routing before unplugging anything. This helps during reassembly.
- 🔌 A spark plug gap gauge measures the small opening at the tip of the plug. Check the new plugs before installation.
🔨 Step-by-Step Instructions
Follow these steps in order:
Step 1: Remove the Engine Cover
- Put on safety glasses and nitrile gloves.
- Lift the plastic engine cover straight up by hand to release it from its rubber mounts.
- Set the cover aside in a safe place.
- Pull evenly from both sides.
Step 2: Disconnect the Air Intake Tube
- Use a flathead screwdriver or 8mm socket to loosen the clamp at the throttle body.
- Use a flathead screwdriver or 8mm socket to loosen the clamp at the air filter box.
- Use your fingers or needle-nose pliers to release any small breather hose clips attached to the intake tube.
- Unplug the mass airflow sensor connector by pressing the lock tab and pulling the connector straight off.
- Remove the intake tube and set it aside.
Step 3: Remove the Throttle Body
- Unplug the throttle body electrical connector using your fingers or a pick tool to lift the lock tab gently.
- Use a 10mm socket and ratchet to remove the throttle body bolts.
- Pull the throttle body straight off the intake manifold.
- Remove and discard the old throttle body gasket.
- Cover the throttle opening with a clean shop towel.
- During reassembly, install a new gasket and tighten the throttle body bolts evenly to Torque to 10 Nm (89 in-lbs).
Step 4: Label and Disconnect Upper Intake Connections
- Use your phone to take clear photos of the vacuum hoses, wiring, and brackets on the upper intake manifold.
- Use needle-nose pliers to release hose clamps where needed.
- Use a pick tool gently on stubborn electrical connector locks. Do not pry hard.
- Disconnect the EVAP purge line, vacuum hoses, and electrical connectors attached to the upper intake manifold.
- If a fuel vapor or quick-connect line blocks access, use the fuel line disconnect tool set. A quick-connect fitting is a plastic locking connector that releases with the correct tool.
Step 5: Remove Upper Intake Manifold Bolts
- Use a 10mm socket, 6-inch extension, and ratchet to loosen the upper intake manifold bolts.
- Loosen the bolts in small steps so the manifold lifts evenly.
- Remove the bolts and keep them organized.
- Lift the upper intake manifold straight up and away from the engine.
- Remove the old upper intake manifold gaskets.
- Immediately cover the exposed intake ports with clean shop towels.
- During reassembly, tighten the intake manifold bolts evenly in a crisscross pattern to Torque to 10 Nm (89 in-lbs).
Step 6: Clean Around the Ignition Coils
- Use compressed air blow gun to blow dirt away from all six ignition coils.
- Use a shop vacuum to collect loose debris from the top of the engine.
- Do not allow dirt to fall into the spark plug wells. A spark plug well is the deep hole where the plug sits.
Step 7: Remove the Ignition Coils
- Use a pick tool gently to unlock each ignition coil electrical connector.
- Unplug each coil connector by pulling straight back.
- Use a 10mm socket and ratchet to remove each ignition coil retaining bolt.
- Twist each coil slightly by hand, then pull it straight up and out.
- Keep the coils in order if you plan to reinstall the same coils.
- During reassembly, tighten ignition coil bolts to Torque to 10 Nm (89 in-lbs).
Step 8: Remove the Old Spark Plugs
- Use compressed air blow gun to clean each spark plug well before removing the plug.
- Install the 5/8-inch spark plug socket, 6-inch extension, and ratchet into the first plug well.
- Turn counterclockwise slowly to loosen the spark plug.
- If the plug feels stuck, stop and tighten it slightly, then loosen again gently.
- Remove the spark plug and inspect it for oil, heavy deposits, or broken porcelain.
- Repeat for all six spark plugs.
- Slow and steady prevents thread damage.
Step 9: Check the New Spark Plugs
- Use a spark plug gap gauge to verify the new plug gaps match the under-hood emissions label specification for your Canyon.
- Do not forcefully bend the center electrode on iridium plugs. The center electrode is the tiny precious-metal tip at the end of the plug.
- Do not apply anti-seize unless the spark plug manufacturer specifically requires it. Most modern iridium plugs are pre-coated.
Step 10: Install the New Spark Plugs
- Place one new spark plug into the 5/8-inch spark plug socket.
- Use the extension by hand only to start threading the spark plug clockwise.
- Turn it several full turns by hand. It should spin smoothly.
- If it feels tight right away, remove it and start again. This prevents cross-threading.
- Use a 3/8-inch drive torque wrench with the 5/8-inch spark plug socket to tighten each plug to Torque to 18 Nm (13 ft-lbs).
- Repeat for all six spark plugs.
Step 11: Reinstall the Ignition Coils
- Apply a very small amount of dielectric grease inside each coil boot. Dielectric grease helps seal moisture out of electrical boots.
- Push each ignition coil straight down onto its spark plug until seated.
- Use a 10mm socket and torque wrench to tighten each coil bolt to Torque to 10 Nm (89 in-lbs).
- Reconnect each ignition coil electrical connector until it clicks.
Step 12: Reinstall the Upper Intake Manifold
- Remove the clean shop towels from the intake ports.
- Use a shop vacuum to remove any loose debris around the ports before installation.
- Install the new upper intake manifold gaskets into the manifold grooves.
- Lower the upper intake manifold straight into position.
- Start all manifold bolts by hand first.
- Use a 10mm socket and torque wrench to tighten the bolts evenly in a crisscross pattern to Torque to 10 Nm (89 in-lbs).
Step 13: Reconnect Hoses, Lines, and Wiring
- Use your reference photos to reconnect every vacuum hose and electrical connector.
- Push each connector until it clicks.
- Use needle-nose pliers to reinstall spring clamps where removed.
- If a quick-connect line was removed, push it on until it clicks, then tug lightly by hand to confirm it is locked.
Step 14: Reinstall the Throttle Body
- Remove the clean shop towel from the throttle opening.
- Install a new throttle body gasket.
- Position the throttle body on the intake manifold.
- Use a 10mm socket to start all bolts by hand.
- Use a torque wrench to tighten the bolts evenly to Torque to 10 Nm (89 in-lbs).
- Reconnect the throttle body electrical connector until it clicks.
Step 15: Reinstall the Air Intake Tube
- Set the intake tube between the air filter box and throttle body.
- Use a flathead screwdriver or 8mm socket to tighten both intake tube clamps snugly.
- Reconnect the mass airflow sensor connector until it clicks.
- Reconnect any breather hoses removed earlier.
Step 16: Reconnect the Battery and Final Check
- Use a 10mm socket to reconnect the negative battery cable.
- Check that no tools, towels, or loose bolts remain in the engine bay.
- Press the engine cover back onto its rubber mounts by hand.
✅ After Repair
- ✅ Start your Canyon and let it idle for several minutes.
- ✅ The idle may be slightly high or uneven for a short time while the throttle body relearns.
- ✅ Listen for hissing sounds, which can indicate an intake vacuum leak.
- ✅ If the check engine light turns on, recheck all coil connectors, vacuum hoses, intake tube clamps, and mass airflow sensor connector.
- ✅ Take a short test drive and confirm smooth acceleration with no misfire or hesitation.
- ✅ After the test drive, inspect the intake tube and manifold area one more time for loose connections.
💰 DIY vs Shop Cost
Shop Cost: $450-$750 (parts + labor)
DIY Cost: $90-$220 (parts only)
You Save: $360-$530 by doing it yourself!
Shop labor rates vary but typically run $100-$150/hour. This repair takes a shop approximately 2-3 hours.
🎯 Ready to get started?
HowToo makes it easy: same-day/2-day shipping on every part, plus all the tools and specialty tools you need! Check out the parts and tools sections below to add everything to your cart.