








How to Replace Spark Plugs on a 2015-2019 Honda CR-V (Trim: LX | Engine: Inline 4 2.4L)
Step-by-step DIY guide with required tools, plug gap, torque specs, and safety tips for 2015, 2016
How to Replace Spark Plugs on a 2015-2019 Honda CR-V (Trim: LX | Engine: Inline 4 2.4L)
Step-by-step DIY guide with required tools, plug gap, torque specs, and safety tips for 2015, 2016


🔧 CR-V - Spark Plug Replacement
Your CR-V uses four long-life iridium spark plugs, one for each cylinder. Replacing them involves removing the ignition coils, cleaning the plug wells, and carefully installing the new plugs without damaging the aluminum cylinder head.
Difficulty Level: Beginner | Estimated Time: 1-1.5 hours
⚠️ Safety & Precautions
- ⚠️ Let the engine cool completely before removing the spark plugs.
- ⚠️ Work with the ignition switched off and keep the key away from the vehicle.
- ⚠️ Wear safety glasses when cleaning debris from the plug wells.
- ⚠️ Never force a spark plug; crossed threads can damage the aluminum cylinder head.
- ⚠️ Do not apply anti-seize compound to the replacement plug threads.
- ⚠️ Battery disconnection is not required for this repair.
🔧 Required Tools
You'll need the following tools for this repair:
- 10mm socket
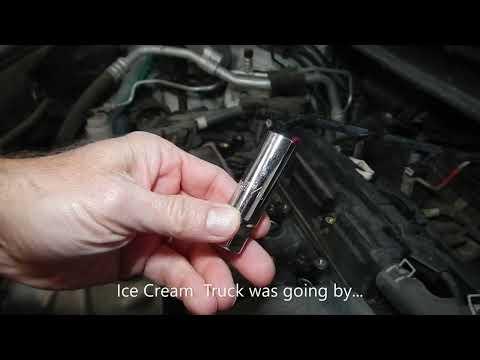
- 14mm thin-wall spark plug socket with rubber retainer
- 3/8-inch-drive ratchet
- 3/8-inch-drive 6-inch extension
- 3/8-inch-drive torque wrench rated 5-50 ft-lbs
- Wire-style spark plug gap gauge marked in millimeters
- Compressed-air blower rated 30 psi maximum
- Air compressor with adjustable regulator
- Clean microfiber cloth
- Nitrile mechanic gloves
- Safety glasses
🔩 Required Parts
HowToo sells all the parts you need for this repair:
- OEM-equivalent iridium spark plugs, 1.0-1.1mm pre-gap - Qty: 4
📋 Before You Begin
- 📍 Park your CR-V on level ground, select Park, and apply the parking brake.
- 🧊 Allow the engine to become completely cold. Several hours after driving is safest.
- 🔑 Switch off the ignition and move the key at least 10 feet from your CR-V.
- 🧹 Clean loose dirt from the top of the engine before opening the spark plug wells.
- 📏 Verify that all four replacement plugs are the correct application and undamaged.
🔨 Step-by-Step Instructions
Follow these steps in order:
Step 1: Remove the Engine Cover
- Put on the nitrile mechanic gloves and safety glasses.
- Grip the plastic engine cover near its mounting points and pull it straight upward by hand.
- Set the cover on a clean microfiber cloth so its rubber mounting grommets are not lost.
Step 2: Clean Around the Ignition Coils
- Use the compressed-air blower at no more than 30 psi to remove loose debris around the four coils.
- An ignition coil is the electrical unit directly above each spark plug.
- Keep your face away from the airflow and do not push dirt deeper into the plug wells.
Step 3: Disconnect the Ignition Coils
- Press each coil connector’s locking tab by hand, then pull the connector straight back.
- Pull on the connector housing, not the wires.
- If a connector resists, press it inward first, depress the tab again, and gently remove it by hand.
- Work one cylinder at a time.
Step 4: Remove the Ignition Coils
- Use the 10mm socket, 6-inch extension, and 3/8-inch-drive ratchet to remove each coil retaining bolt.
- Twist each coil gently by hand to release its rubber boot, then pull it straight upward.
- Inspect each boot for oil, water, cracks, or burn marks. Oil in a plug well can indicate a leaking valve-cover tube seal.
Step 5: Clean the Spark Plug Wells
- Use the compressed-air blower at no more than 30 psi to clear each empty plug well.
- A plug well is the narrow opening where the ignition coil was installed.
- Do not remove a plug until the surrounding well is clean.
Step 6: Remove the Old Spark Plugs
- Fit the 14mm thin-wall spark plug socket to the 6-inch extension and 3/8-inch-drive ratchet.
- Lower the socket straight into the first plug well until it fully seats on the plug.
- Turn the ratchet counterclockwise slowly to loosen and remove the plug.
- Repeat for the remaining three plugs.
- Stop if a plug binds after initially loosening. Turn it slightly inward, then gently work it outward.
Step 7: Inspect and Check the New Plugs
- Use the wire-style spark plug gap gauge to confirm a gap of 1.0-1.1mm (0.039-0.043 inch).
- The gap is the small distance between the center electrode and curved ground electrode.
- Do not force a gauge between the fine iridium electrodes or pry against the center electrode.
- Replace any plug that is dropped, cracked, or outside specification.
- Leave the threads clean and dry. Do not use anti-seize compound.
Step 8: Hand-Thread the New Spark Plugs
- Place one new plug into the 14mm thin-wall spark plug socket and attach only the 6-inch extension.
- Do not attach the ratchet yet.
- Lower the plug straight into the well and turn the extension clockwise by hand for several full rotations.
- The plug should turn smoothly. Remove and restart it if resistance is felt.
- Repeat for all four plugs.
- Hand-threading prevents expensive thread damage.
Step 9: Torque the Spark Plugs
- Attach the 3/8-inch-drive torque wrench to the extension and 14mm thin-wall spark plug socket.
- Tighten each new spark plug to 18 Nm (13 ft-lbs).
- Stop immediately when the torque wrench clicks. Do not tighten further.
Step 10: Reinstall the Ignition Coils
- Push each ignition coil straight over its spark plug by hand until the rubber boot is fully seated.
- Start each retaining bolt by hand to prevent crossed threads.
- Use the 10mm socket, 6-inch extension, and torque wrench to tighten each coil bolt to 12 Nm (9 ft-lbs).
- Push each electrical connector onto its coil by hand until the locking tab clicks.
- Gently tug each connector housing to verify it is locked.
Step 11: Reinstall the Engine Cover
- Inspect the cover’s rubber grommets by hand and return any displaced grommet to the cover.
- Align the cover with its mounting posts.
- Press directly above each mounting point by hand until the cover is fully seated.
✅ After Repair
- ✅ Check that no tools or loose parts remain in the engine compartment.
- ✅ Start the engine and let it idle for two to three minutes.
- ✅ Confirm that the engine idles smoothly and the malfunction indicator light remains off.
- ✅ Switch the engine off and verify that every coil connector remains locked.
- ✅ If the engine misfires or the warning light flashes, shut it off immediately and recheck the coil connectors and plug installation.
- ✅ No programming, scan-tool reset, or infotainment procedure is normally required.
💰 DIY vs Shop Cost
Shop Cost: $220-$380 (parts + labor)
DIY Cost: $45-$90 (parts only)
You Save: $130-$335 by doing it yourself!
Shop labor rates vary but typically run $100-$150/hour. This repair takes a shop approximately 0.8-1.2 hours.
🎯 Ready to get started?
HowToo makes it easy: same-day/2-day shipping on every part, plus all the tools and specialty tools you need! Check out the parts and tools sections below to add everything to your cart.