


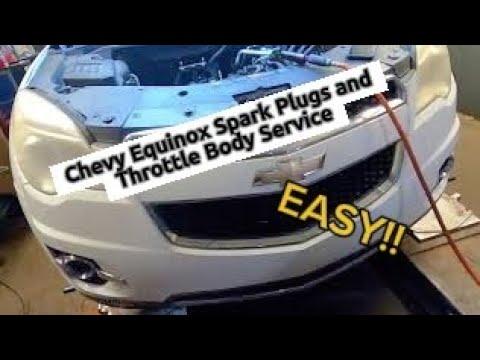


How to Replace Spark Plugs on a 2014 Chevrolet Equinox 2.4L
Step-by-step DIY spark plug change with tools, parts list, torque specs, safety tips, and cost savings for 2010, 2011, 2012, 2013, 2014, 2015, 2016, 2017
How to Replace Spark Plugs on a 2014 Chevrolet Equinox 2.4L
Step-by-step DIY spark plug change with tools, parts list, torque specs, safety tips, and cost savings for 2010, 2011, 2012, 2013, 2014, 2015, 2016, 2017
🔧 Equinox - Spark Plug Replacement
You’ll be replacing all four spark plugs on your Equinox’s 2.4L engine. This will help with smoother running, better fuel economy, and easier starts if the old plugs are worn.
Difficulty Level: Beginner | Estimated Time: 1-1.5 hours
⚠️ Safety & Precautions
- 🔋 Make sure the engine is completely cool before starting to avoid burns.
- 🧤 Turn the ignition OFF and remove the key from the vehicle.
- 🔌 Avoid pulling on ignition coil wires; pull on the connectors only.
- 🧯 Keep metal tools away from the battery positive terminal to prevent sparks.
- 🌫️ Work in a well-ventilated area; do not smoke near the engine bay.
🔧 Required Tools
You'll need the following tools for this repair:
- 3/8" drive ratchet
- 3/8" drive torque wrench (5-60 ft-lbs range)
- 10mm socket
- 5/8" spark plug socket (with rubber insert or magnet)
- 3/8" drive extension (6")
- Flathead screwdriver (small)
- Spark plug gap gauge tool
- Needle-nose pliers
- Clean rag
- Compressed air can or air blower
- Dielectric grease tube
- Mechanic’s gloves
- Safety glasses
🔩 Required Parts
HowToo sells all the parts you need for this repair:
- Iridium spark plugs (correct for 2.4L Ecotec) - Qty: 4
- Throttle body/intake cleaner spray - Qty: 1 (optional, for light cleaning)
- Dielectric grease - Qty: 1 small tube
📋 Before You Begin
- Park the Equinox on level ground, shift to Park, and set the parking brake.
- Let the engine cool fully (at least 30–45 minutes if it was just running).
- Open the hood and secure it with the hood prop rod.
- You do not need to disconnect the battery, but make sure the ignition is OFF and the key is out.
🔨 Step-by-Step Instructions
Follow these steps in order:
Step 1: Remove the engine cover
- Put on your mechanic’s gloves and safety glasses.
- The plastic engine cover on top is usually held by rubber grommets, not bolts.
- Grip the front of the cover with both hands and gently pull upward to pop it loose.
- Lift the rear of the cover and remove it from the engine bay; set it aside.
- If it feels stuck, pull up firmly but evenly.
Step 2: Locate the ignition coils
- The ignition coils are the four black units mounted directly on top of the engine, in a row over the spark plugs.
- Each coil has an electrical connector and is held by a small bolt.
Step 3: Disconnect the ignition coil connectors
- Use the flathead screwdriver to gently lift the locking tab on the first coil’s electrical connector.
- While lifting the tab, pull the connector straight off the coil by hand.
- Repeat this for all four ignition coils.
- Do not pry hard; tabs can break easily.
Step 4: Remove the ignition coils
- Use the 10mm socket and 3/8" drive ratchet to remove the single bolt holding the first coil.
- Set the bolt aside in a small container so it does not get lost.
- Grab the coil and pull it straight upward to remove it from the spark plug well.
- If it feels stuck, gently twist it left and right while pulling up.
- Repeat for the remaining three coils.
Step 5: Clean around the spark plug wells
- Use the compressed air can or air blower to blow out any dirt or debris around each spark plug hole.
- Hold a clean rag nearby to catch loose dust.
- Keeping dirt out of cylinders is very important.
Step 6: Remove the old spark plugs
- Attach the 5/8" spark plug socket to the 3/8" drive extension (6"), then to the 3/8" drive ratchet.
- Insert the socket straight down into the first spark plug well until it seats on the plug.
- Turn the ratchet counterclockwise to loosen the spark plug.
- Once loose, spin it out by hand using the extension.
- Carefully lift the plug out; the rubber insert or magnet in the spark plug socket should hold it.
- Repeat for all four spark plugs.
- If very tight, break loose in small, steady turns.
Step 7: Check and set the gap on new spark plugs
- Use the spark plug gap gauge tool to measure the gap of each new plug.
- Your 2.4L Ecotec typically uses a gap of about 1.1 mm (0.043 in).
- Slide the gauge between the center and side electrode to check.
- If adjustment is needed, gently bend the side electrode using the gap tool, not the center electrode.
- Iridium plugs are usually pre-gapped; adjust only if clearly off.
Step 8: Install the new spark plugs
- Place a new spark plug into the 5/8" spark plug socket with the rubber insert holding it.
- Carefully lower the plug into the first spark plug well, keeping it straight.
- Using just your fingers on the extension, turn the plug clockwise to start threading it by hand.
- Thread at least 5 full turns by hand to avoid cross-threading.
- Once finger-tight, attach the 3/8" drive torque wrench to the extension.
- Tighten the plug to 25 Nm (18 ft-lbs).
- Repeat this process for all four plugs.
- If it doesn’t thread easily, back out and restart.
Step 9: Prepare and reinstall the ignition coils
- Inspect the rubber boots on the coils for cracks or heavy oil; replace coils if badly damaged.
- Apply a small dab of dielectric grease inside the tip of each rubber boot (this helps sealing and future removal).
- Push each coil straight down onto its spark plug until fully seated.
- Reinstall the coil bolts using the 10mm socket and 3/8" drive ratchet.
- Tighten each coil bolt to about 10 Nm (89 in-lbs) using the torque wrench if possible.
Step 10: Reconnect the ignition coil connectors
- Push each electrical connector back onto its ignition coil until you hear or feel a click.
- Gently tug on each connector to make sure it is locked in place.
- Loose connectors can cause misfires.
Step 11: Reinstall the engine cover
- Position the engine cover over the top of the engine, aligning the mounting pegs with the rubber grommets.
- Press down firmly at each corner until the cover snaps into place.
Step 12: Final checks
- Look around the engine bay and make sure you did not leave any tools or rags inside.
- Make sure all coil connectors are plugged in and all coil bolts are installed.
✅ After Repair
- Start the engine and let it idle. It should run smoothly without shaking or flashing warning lights.
- If the engine runs rough or the Check Engine light flashes, shut it off and re-check coil connections and plug wires.
- Take a short test drive, listening for smooth acceleration and checking that the engine feels normal.
- After the test drive, open the hood and do a quick visual check again for anything loose.
💰 DIY vs Shop Cost
Shop Cost: $200-$350 (parts + labor)
DIY Cost: $40-$90 (parts only)
You Save: $160-$260 by doing it yourself!
Shop labor rates vary but typically run $100-$150/hour. This repair takes a shop approximately 0.8-1.0 hours.
🎯 Ready to get started?
HowToo makes it easy: same-day/2-day shipping on every part, plus all the tools and specialty tools you need! Check out the parts and tools sections below to add everything to your cart.
