

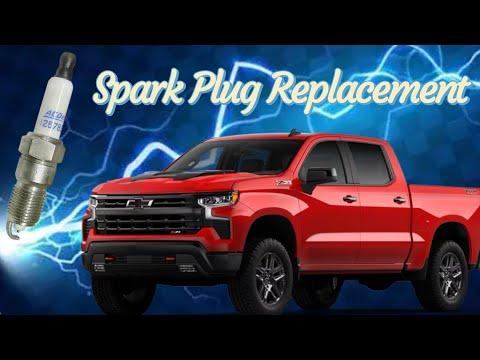





How to Replace Spark Plugs on a 2014-2022 Chevrolet Silverado 1500 5.3L V8 (Trim: LT | Engine: V8 5.3L)
Step-by-step DIY instructions with tools, parts, gap settings, torque specs, and safety tips for 2014, 2015, 2016, 2017, 2018, 2019, 2020, 2021, 2022
How to Replace Spark Plugs on a 2014-2022 Chevrolet Silverado 1500 5.3L V8 (Trim: LT | Engine: V8 5.3L)
Step-by-step DIY instructions with tools, parts, gap settings, torque specs, and safety tips for 2014, 2015, 2016, 2017, 2018, 2019, 2020, 2021, 2022


🔧 Silverado 1500 - Spark Plug Replacement
This is a manageable first DIY job if you work on a completely cold engine and replace one plug at a time. Your Silverado uses eight plugs, and the rear cylinders require patience and short extensions.
Difficulty Level: Intermediate | Estimated Time: 2-3 hours
Assumption: These instructions apply to the stock 5.3L gasoline V8 and tapered-seat replacement plugs.
⚠️ Safety & Precautions
- ⚠️ Let the engine cool completely. The cylinder heads and exhaust manifolds become extremely hot.
- ⚠️ Wear safety glasses when blowing debris away from the plug holes.
- ⚠️ Never remove plugs from a warm aluminum cylinder head. The threads can be damaged.
- ⚠️ Pull each wire by its rubber boot, never by the wire itself.
- ⚠️ Battery disconnection isn't normally required. Keep the ignition switched off and the key away from the truck.
🔧 Required Tools
You'll need the following tools for this repair:
- 3/8-inch drive ratchet
- 5/8-inch magnetic spark plug socket
- 3-inch 3/8-inch drive extension
- 6-inch 3/8-inch drive extension
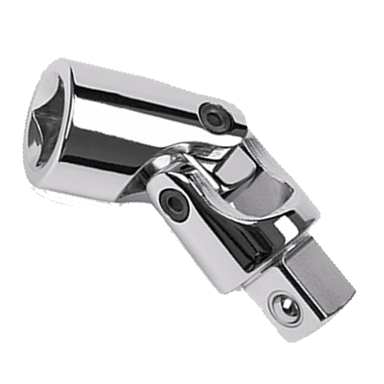
- 3/8-inch drive universal joint
- Inch-pound torque wrench rated to 150 in-lbs minimum
- Insulated spark plug boot puller
- 0.040-inch wire spark plug gap gauge
- Compressed-air blow gun with regulated air supply
- Small nylon cleaning brush
- Clean shop towels
- Mechanic gloves
- Safety glasses
A universal joint is a flexible socket adapter that helps the extension approach a plug at an angle.
🔩 Required Parts
HowToo sells all the parts you need for this repair:
- Long-life iridium spark plugs - Qty: 8
- Dielectric grease - Qty: 1 small tube
- Spark plug wire set - Qty: 1, only if the existing boots or wires are damaged
I’d use the OE-style long-life plug shown in Orion’s picks. Replace all eight together. Nobody wants to repeat the firewall-side plugs next month.
📋 Before You Begin
- 📋 Park your Silverado on level ground, select Park, set the parking brake, and open the hood.
- 📋 Allow the engine to become completely cold, preferably after sitting several hours.
- 📋 Photograph the wire routing before touching anything.
- 📋 Work on only one cylinder at a time so every ignition wire returns to its original position.
- 📋 Do not apply anti-seize to plated replacement-plug threads unless the plug manufacturer specifically requires it.
🔨 Step-by-Step Instructions
Follow these steps in order:
Step 1: Inspect the New Spark Plugs
- Use the 0.040-inch wire spark plug gap gauge to carefully verify each plug against its listed 0.040-inch gap.
- Do not force a flat wedge gauge between delicate fine-wire electrodes.
- Reject any plug with cracked porcelain, damaged threads, or a bent center electrode.
- Check every plug before opening the engine.
Step 2: Remove the First Spark Plug Wire
- Start with an easy-to-reach front cylinder so you can learn the process.
- Use the insulated spark plug boot puller to grip the rubber boot.
- Twist the boot gently to break its seal, then pull it straight from the plug.
- Do not pull on the wire. That can separate the conductor inside its insulation.
Step 3: Clean Around the Plug
- Use the small nylon cleaning brush to loosen dirt around the plug.
- Wear safety glasses and use the compressed-air blow gun with regulated air supply to clear the plug recess.
- Use a clean shop towel to catch loose debris.
- Do not let sand or dirt fall into the cylinder after removing the plug.
Step 4: Remove the Old Spark Plug
- Place the 5/8-inch magnetic spark plug socket over the plug.
- Use the 3/8-inch drive ratchet with the shortest extension that provides access.
- Add the 3/8-inch drive universal joint only where straight access isn't possible.
- Turn counterclockwise slowly. Stop if the plug becomes unusually tight after initially loosening.
- Once loose, finish turning gently and lift the plug from the cylinder head.
Step 5: Inspect the Old Spark Plug
- Check the electrode for heavy wear, wet fuel, oily deposits, or thick black carbon.
- Use a clean shop towel to keep the removed plugs arranged by cylinder position.
- A damaged electrode or an oil-soaked plug may indicate an engine problem beyond normal plug wear.
Step 6: Hand-Start the New Spark Plug
- Place the new plug in the 5/8-inch magnetic spark plug socket.
- Use the 6-inch 3/8-inch drive extension without the ratchet to lower it into the hole.
- Turn the extension clockwise by hand for several full rotations.
- If it doesn't turn smoothly, remove it and start again. Never use the ratchet to force the threads.
- Hand-starting prevents expensive cylinder-head damage.
Step 7: Torque the New Spark Plug
- Attach the inch-pound torque wrench rated to 150 in-lbs minimum to the extension and socket.
- Tighten the dry, tapered-seat plug to 15 Nm (11 ft-lbs or 132 in-lbs).
- Pull smoothly until the torque wrench signals. Do not continue tightening afterward.
Step 8: Reinstall the Spark Plug Wire
- Apply a very small film of dielectric grease inside the mouth of the rubber boot.
- Keep grease off the metal plug terminal and spark plug threads.
- Push the boot straight onto the plug by hand until it seats firmly or clicks into place.
- Gently tug the boot to confirm it's attached.
Step 9: Replace the Remaining Seven Plugs
- Repeat Steps 2 through 8 for one cylinder at a time.
- Use the 3-inch 3/8-inch drive extension where clearance is limited.
- Use the 6-inch 3/8-inch drive extension and 3/8-inch drive universal joint for the rear plugs when needed.
- Move nearby hoses gently by hand, but don't disconnect lines simply to create room.
Step 10: Perform a Final Inspection
- Use the clean shop towels to remove any tools or debris from the engine bay.
- Confirm that all eight boots are fully seated.
- Verify that every wire follows its original route and stays away from the exhaust manifolds.
- Count all eight removed plugs before starting the engine.
✅ After Repair
- ✅ Start the engine and let it idle for several minutes.
- ✅ Listen for a steady idle, clicking, arcing, or an exhaust-like puffing sound around the plugs.
- ✅ If the check-engine light flashes or the engine shakes badly, shut it off immediately and recheck every boot.
- ✅ Take a short, gentle test drive after the idle remains smooth.
- ✅ No computer reset, battery registration, or infotainment procedure is normally required.
💰 DIY vs Shop Cost
Shop Cost: $350-$650 (parts + labor)
DIY Cost: $120-$220 (parts only)
You Save: $230-$430 by doing it yourself!
Local labor rates vary. This repair typically takes a shop approximately 1.5-2.5 hours.
🎯 Ready to get started?
HowToo makes it easy: same-day/2-day shipping on every part, plus all the tools and specialty tools you need! Check out the parts and tools sections below to add everything to your cart.