







How to Replace Spark Plugs on a 2014-2021 Hyundai Tucson
Step-by-step DIY guide with tools, parts, torque specs, and safety tips for 2014, 2015, 2016, 2017, 2018, 2019, 2020, 2021
How to Replace Spark Plugs on a 2014-2021 Hyundai Tucson
Step-by-step DIY guide with tools, parts, torque specs, and safety tips for 2014, 2015, 2016, 2017, 2018, 2019, 2020, 2021


🔧 Tucson - Spark Plug Replacement
Replacing the spark plugs on your Tucson helps restore smooth idle, easy starting, fuel economy, and proper ignition performance. The 2.0L engine uses coil-on-plug ignition, which means each spark plug has its own ignition coil sitting directly above it.
Difficulty Level: Beginner | Estimated Time: 1-2 hours
⚠️ Safety & Precautions
- ⚠️ Work only on a cold engine. Aluminum cylinder heads can be damaged if spark plugs are removed while hot.
- ⚠️ Disconnect the negative battery cable before unplugging ignition coils.
- ⚠️ Keep dirt, tools, and loose hardware out of the spark plug wells.
- ⚠️ Do not overtighten spark plugs. The cylinder head threads are aluminum and can strip.
- ⚠️ Use only the correct replacement spark plugs for your Tucson. Do not install universal-fit plugs.
🔧 Required Tools
You'll need the following tools for this repair:
- 10mm socket
- 3/8-inch drive ratchet
- 3/8-inch drive 6-inch extension
- 5/8-inch spark plug socket
- 3/8-inch drive torque wrench
- Flat-blade screwdriver
- Compressed air nozzle
- Spark plug gap gauge
- Needle-nose pliers
- Magnetic pickup tool
- Battery terminal wrench 10mm
- Nitrile gloves
- Safety glasses
🔩 Required Parts
HowToo sells all the parts you need for this repair:
- Spark plugs - Qty: 4
- Dielectric grease - Qty: 1
📋 Before You Begin
- 🅿️ Park your Tucson on level ground, shift to Park, and set the parking brake.
- ❄️ Let the engine cool completely before starting.
- 🔋 Use a 10mm socket or battery terminal wrench to disconnect the negative battery cable.
- 🧼 Blow loose dirt away from the top of the engine with compressed air before removing parts.
- 📏 A spark plug gap gauge checks the distance between the center electrode and ground strap. Most modern plugs come pre-gapped, but they should still be inspected.
- 🧴 Dielectric grease is a non-conductive silicone grease used inside ignition coil boots to help prevent moisture and sticking.
🔨 Step-by-Step Instructions
Follow these steps in order:
Step 1: Remove the Engine Cover
- Use both hands to lift the plastic engine cover straight upward.
- The cover is held by rubber grommets, not screws.
- Set the cover aside where it will not get stepped on.
- Pull evenly to avoid cracking it.
Step 2: Disconnect the Negative Battery Cable
- Use a 10mm socket or battery terminal wrench 10mm to loosen the negative battery terminal clamp.
- Lift the cable off the battery post and move it aside so it cannot spring back.
- This prevents accidental electrical shorts while unplugging ignition coils.
Step 3: Locate the Ignition Coils
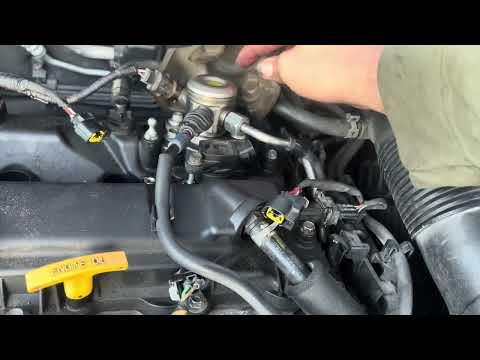
- Look at the top center of the engine. You will see four ignition coils lined up front-to-back across the valve cover.
- Each ignition coil has an electrical connector and one retaining bolt.
- An ignition coil turns battery voltage into the high voltage needed to fire the spark plug.
Step 4: Unplug the Ignition Coil Connectors
- Use your thumb to press the locking tab on each ignition coil connector.
- If a connector is stuck, gently use a flat-blade screwdriver to help release the tab.
- Do not pull on the wires. Pull only on the connector body.
- Old plastic can break easily.
Step 5: Remove the Ignition Coils
- Use a 10mm socket and 3/8-inch drive ratchet to remove the ignition coil retaining bolts.
- Gently twist each ignition coil by hand, then pull it straight upward.
- If a coil boot sticks, use needle-nose pliers carefully on the boot area only if needed.
- Keep the coils in order so each one goes back into the same cylinder.
- During installation later, tighten each ignition coil bolt to Torque to 9.8 Nm (87 in-lbs).
Step 6: Clean the Spark Plug Wells
- Put on safety glasses.
- Use a compressed air nozzle to blow dirt and debris out of each spark plug well.
- A spark plug well is the deep tube where the spark plug sits.
- Do not skip this step. Dirt can fall into the engine when the plug is removed.
Step 7: Remove the Old Spark Plugs
- Install the 5/8-inch spark plug socket onto the 3/8-inch drive 6-inch extension.
- Attach the extension to the 3/8-inch drive ratchet.
- Lower the socket straight down into the first spark plug well.
- Turn counterclockwise slowly to loosen the spark plug.
- Once loose, spin it out by hand using the extension.
- Lift the spark plug out with the spark plug socket.
- If the plug falls out of the socket, use a magnetic pickup tool to remove it.
Step 8: Inspect and Check the New Spark Plugs
- Use a spark plug gap gauge to carefully check the gap on each new plug.
- Do not force the gauge between the electrodes.
- Do not pry on fine-wire iridium or platinum electrodes.
- If the plug gap is incorrect or the plug is damaged, replace it instead of bending it aggressively.
- Handle new plugs gently.
Step 9: Install the New Spark Plugs by Hand
- Place one new spark plug into the 5/8-inch spark plug socket.
- Lower it straight into the spark plug well using the 3/8-inch drive 6-inch extension.
- Turn the extension clockwise by hand only for the first several turns.
- If it does not turn smoothly, stop and back it out. This prevents cross-threading.
- Cross-threading means the plug is going in crooked and can damage the cylinder head.
Step 10: Torque the Spark Plugs
- Attach the 3/8-inch drive torque wrench to the 3/8-inch drive 6-inch extension and 5/8-inch spark plug socket.
- Tighten each spark plug to Torque to 18-22 Nm (13-16 ft-lbs).
- Do not add extra tightening after the torque wrench clicks.
- Do not use anti-seize unless the spark plug manufacturer specifically requires it.
Step 11: Apply Dielectric Grease
- Apply a small pea-sized amount of dielectric grease inside the end of each ignition coil boot.
- Use your gloved fingertip to spread it lightly around the inside of the boot opening.
- Do not fill the boot with grease.
Step 12: Reinstall the Ignition Coils
- Push each ignition coil straight down onto its spark plug until it seats fully.
- Use a 10mm socket to start each ignition coil retaining bolt by hand.
- Use the 3/8-inch drive torque wrench and 10mm socket to tighten each bolt to Torque to 9.8 Nm (87 in-lbs).
Step 13: Reconnect the Ignition Coil Connectors
- Push each ignition coil connector onto its coil until it clicks.
- Lightly tug the connector body by hand to confirm it is locked.
- Make sure the wiring is not pinched or stretched.
Step 14: Reinstall the Engine Cover
- Line up the engine cover with the rubber mounting points.
- Press down firmly by hand until the cover seats evenly.
Step 15: Reconnect the Battery
- Place the negative battery cable back onto the negative battery post.
- Use a 10mm socket or battery terminal wrench 10mm to tighten the terminal clamp snugly.
- Do not overtighten the battery terminal.
✅ After Repair
- ✅ Start your Tucson and let it idle for 1-2 minutes.
- ✅ The engine should idle smoothly with no flashing check engine light.
- ✅ If the engine misfires, shut it off and recheck all ignition coil connectors.
- ✅ Take a short test drive and listen for smooth acceleration.
- ✅ If any warning lights remain, scan for diagnostic trouble codes before driving far.
- ✅ Some radio or clock settings may need to be reset after the battery disconnect.
💰 DIY vs Shop Cost
Shop Cost: $180-$350 (parts + labor)
DIY Cost: $45-$120 (parts only)
You Save: $135-$230 by doing it yourself!
Shop labor rates vary but typically run $100-$150/hour. This repair takes a shop approximately 0.8-1.2 hours.
🎯 Ready to get started?
HowToo makes it easy: same-day/2-day shipping on every part, plus all the tools and specialty tools you need! Check out the parts and tools sections below to add everything to your cart.