

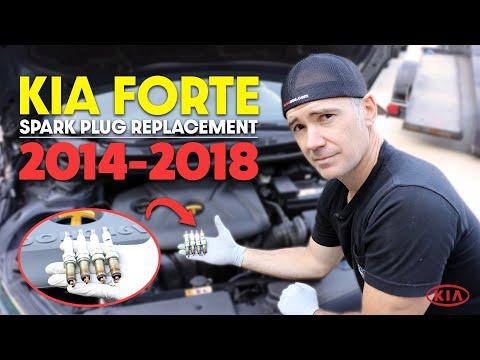







How to Replace Spark Plugs on a 2014-2018 Kia Forte 2.0L (Trim: LX | Engine: Inline 4 2.0L)
Step-by-step DIY instructions with tools, plug gap, torque specs, and safety tips for 2014, 2015, 2016, 2017, 2018
How to Replace Spark Plugs on a 2014-2018 Kia Forte 2.0L (Trim: LX | Engine: Inline 4 2.0L)
Step-by-step DIY instructions with tools, plug gap, torque specs, and safety tips for 2014, 2015, 2016, 2017, 2018


🔧 Forte - Spark Plug Replacement
Replacing all four spark plugs restores a strong, consistent spark for easier starting, smooth idling, and proper fuel economy. On your Forte, each ignition coil sits directly above one spark plug.
Difficulty Level: Beginner | Estimated Time: 45-75 minutes
Assumption: This procedure applies to the stock U.S.-market 2.0L naturally aspirated engine.
⚠️ Safety & Precautions
- ⚠️ Let the engine become completely cold before removing the spark plugs. Aluminum cylinder-head threads are easier to damage when hot.
- ⚠️ Wear safety glasses when using compressed air.
- ⚠️ Remove and install one ignition coil at a time to avoid mixing connections.
- ⚠️ Never allow dirt, tools, or loose hardware to fall into a spark-plug well.
- ⚠️ Do not apply anti-seize compound to the new spark-plug threads. It changes the tightening load and can cause over-tightening.
- 🔋 Battery disconnection is not required. Keep the ignition switched off and the key away from the vehicle.
🔧 Required Tools
You'll need the following tools for this repair:
- 10mm socket
- 3/8-inch drive ratchet
- 3/8-inch drive 6-inch extension
- 16mm magnetic spark-plug socket
- 3/8-inch drive torque wrench rated 10-80 Nm
- Wire-style spark-plug gap gauge marked in millimetres
- Compressed-air blow gun with regulated air supply
- Clean microfiber cloth
- Mechanic's gloves
- Safety glasses
🔩 Required Parts
HowToo sells all the parts you need for this repair:
- OEM-spec iridium spark plugs with 1.0-1.1mm gap - Qty: 4
- Dielectric ignition grease - Qty: 1 small tube
Replace all four spark plugs together. Match the replacement plugs by application; heat range and thread reach must be correct for the 2.0L engine.
📋 Before You Begin
- 🚗 Park your Forte on level ground, select Park or first gear, apply the parking brake, and switch the ignition off.
- 🌡️ Allow the engine to cool for at least two hours.
- 🧹 Clean loose dirt from the top of the engine before opening any spark-plug wells.
- 📏 Check each new plug with the wire-style gap gauge. The specified gap is 1.0-1.1mm (0.039-0.043 inch).
- ⚠️ Iridium center electrodes are fragile. Do not force a gap tool against the fine center electrode; replace any plug that arrives with an incorrect or damaged gap.
🔨 Step-by-Step Instructions
Follow these steps in order:
Step 1: Remove the Engine Cover
- Put on the mechanic's gloves and safety glasses.
- Grasp the plastic engine cover at its corners and pull it straight upward by hand to release its rubber mounting grommets.
- If your cover has retaining fasteners, remove them with the 10mm socket and 3/8-inch drive ratchet before lifting the cover.
- Set the cover on a clean microfiber cloth.
Step 2: Clean Around the Ignition Coils
- Use the compressed-air blow gun to remove sand and debris from around all four ignition coils.
- An ignition coil is the electrical unit directly above each spark plug.
- Keep your face away from the wells while blowing them clean.
Step 3: Disconnect the First Ignition Coil
- Press the locking tab on the first coil's electrical connector and pull the connector straight back by hand.
- Pull on the connector housing, not its wires.
- If the connector resists, press it inward first, depress the tab, and then remove it. Do not pry it with a screwdriver.
Step 4: Remove the First Ignition Coil
- Use the 10mm socket, 6-inch extension, and 3/8-inch drive ratchet to remove the coil retaining bolt.
- Twist the coil gently by hand to release its rubber boot, then pull the coil straight upward.
- Inspect the boot for oil, cracking, burn marks, or white electrical tracking lines.
- Keep every coil with its original cylinder.
Step 5: Clean the Spark-Plug Well
- Use the compressed-air blow gun again to clear the open spark-plug well.
- If oil is pooled inside the well, stop and repair the valve-cover tube-seal leak before installing new plugs.
Step 6: Remove the Old Spark Plug
- Fit the 16mm magnetic spark-plug socket to the 6-inch extension and 3/8-inch drive ratchet.
- Lower the socket straight onto the plug and turn it counterclockwise.
- Once loose, remove the plug slowly so debris does not fall into the cylinder.
- Check the old plug for heavy oil, wet fuel, cracked ceramic, or an unusually white or damaged electrode.
Step 7: Check and Start the New Spark Plug
- Use the wire-style spark-plug gap gauge to verify 1.0-1.1mm (0.039-0.043 inch).
- Place the new plug into the 16mm magnetic spark-plug socket attached only to the 6-inch extension.
- Lower it carefully into the well and turn the extension clockwise by hand for several full turns.
- If it does not turn easily, remove it and start again. This prevents cross-threading, which means damaging the cylinder-head threads by starting the plug crooked.
- Do not put anti-seize on the plug threads.
Step 8: Torque the New Spark Plug
- Attach the 3/8-inch drive torque wrench to the extension and spark-plug socket.
- Tighten the new plug to 20 Nm (15 ft-lbs), within Kia's specified 14.7-24.5 Nm (10.8-18.1 ft-lbs) installation range.
- Stop as soon as the torque wrench clicks. Do not tighten it again.
Step 9: Reinstall the Ignition Coil
- Apply only a thin film of dielectric ignition grease inside the opening at the end of the rubber coil boot. Keep grease away from the plug terminal and threads.
- Push the ignition coil straight down by hand until fully seated.
- Install the retaining bolt with the 10mm socket and tighten it using the 3/8-inch drive torque wrench to 10 Nm (89 in-lbs).
- Reconnect the electrical connector by hand until its lock clicks.
Step 10: Replace the Remaining Spark Plugs
- Repeat Steps 3 through 9 for the other three cylinders using the same listed tools.
- Complete one cylinder before moving to the next.
- Confirm that all four connectors are locked and all four coil bolts are installed.
Step 11: Reinstall the Engine Cover
- Position the engine cover over its rubber grommets and press straight down by hand until seated.
- If equipped with retaining fasteners, start them by hand and snug them evenly with the 10mm socket and 3/8-inch drive ratchet. Do not overtighten plastic-cover fasteners.
✅ After Repair
- ✅ Check the engine bay for tools, loose bolts, and disconnected ignition-coil connectors.
- 🚗 Start your Forte and let it idle for two to three minutes. It should idle smoothly without shaking or warning lights.
- 🔍 Switch the engine off immediately if the check-engine light flashes or the engine misfires. Recheck every coil connector and coil installation.
- 🛣️ Take a short, gentle test drive and confirm normal acceleration.
- 📝 Record the date and odometer reading for future maintenance.
💰 DIY vs Shop Cost
Shop Cost: ₹6,000-₹12,000 (parts + labor)
DIY Cost: ₹3,000-₹7,000 (parts only)
You Save: ₹3,000-₹5,000 by doing it yourself!
Local labor rates vary. This repair takes a shop approximately 0.5-1.0 hour.
🎯 Ready to get started?
HowToo makes it easy: same-day/2-day shipping on every part, plus all the tools and specialty tools you need! Check out the parts and tools sections below to add everything to your cart.