

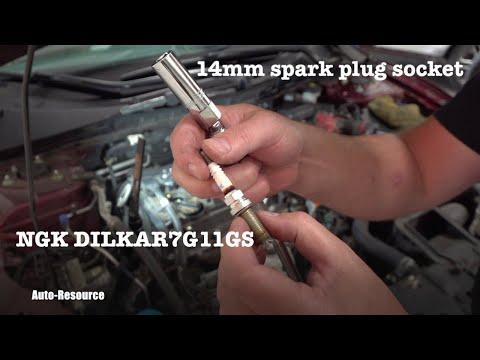






How to Replace Spark Plugs on a 2013 Honda Accord (DIY Step-by-Step Guide)
Tools, OEM-spec iridium plugs, safety tips, and torque specs for a smooth idle and fewer misfires for 2013, 2014, 2015, 2016, 2017
How to Replace Spark Plugs on a 2013 Honda Accord (DIY Step-by-Step Guide)
Tools, OEM-spec iridium plugs, safety tips, and torque specs for a smooth idle and fewer misfires for 2013, 2014, 2015, 2016, 2017


🔧 Accord - Spark Plug Replacement
On your Accord, the spark plugs fire the air/fuel mix in the engine. Replacing them restores smooth idle, fuel economy, and prevents misfires as the plugs wear.
Difficulty Level: Beginner | Estimated Time: 1.0-2.0 hours
⚠️ Safety & Precautions
- ⚠️ Work on a fully cool engine to avoid burns and to protect the aluminum cylinder head threads.
- ⚠️ Keep dirt out of the plug wells—debris can fall into the cylinder and cause damage.
- ⚠️ Do not over-tighten spark plugs; the head is aluminum and threads can strip.
- ⚠️ Battery disconnect is not required, but keep the key away from the car and don’t crank the engine with any ignition coils unplugged.
🔧 Required Tools
You'll need the following tools for this repair:
- Safety glasses
- Nitrile gloves
- 1/4" drive ratchet
- 3/8" drive ratchet
- 3/8" drive extension set (3" and 6")
- 10mm socket
- 5/8" (16mm) spark plug socket
- 3/8" drive torque wrench (ft-lb range)
- Small flat trim tool
- Compressed air blow gun
- Clean shop towels
- Dielectric grease
🔩 Required Parts
HowToo sells all the parts you need for this repair:
- Iridium spark plugs (OEM-spec) - Qty: 4
- Ignition coil boots - Qty: 4 (only if boots are torn/oil-soaked)
📋 Before You Begin
- Park on level ground, shift to Park, and set the parking brake.
- Let the engine cool completely (ideally 1+ hour after driving).
- Set your tools on a clean surface so nothing falls into the engine bay.
🔨 Step-by-Step Instructions
Follow these steps in order:
Step 1: Remove the engine cover (if equipped)
- Use a 10mm socket and 1/4" drive ratchet to remove the engine cover fasteners.
- Lift the cover straight up and set it aside.
Step 2: Unplug the first ignition coil
- Find the ignition coils on top of the engine (one per cylinder).
- Use a small flat trim tool to gently release the electrical connector lock tab, then pull the connector off.
- Do one cylinder at a time.
Step 3: Remove the ignition coil
- Use a 10mm socket with a 1/4" drive ratchet to remove the coil hold-down bolt.
- Twist the coil slightly, then pull it straight up to remove it.
- Wipe the coil boot with a clean shop towel. If you see engine oil inside the plug tube, stop and tell me—there may be a valve cover tube seal leak.
Step 4: Clean the spark plug well
- Use compressed air blow gun to blow out dirt around the spark plug before loosening it.
- Aim away from your face and wear safety glasses.
Step 5: Remove the spark plug
- Install the 5/8" (16mm) spark plug socket on a 3/8" drive extension and 3/8" drive ratchet.
- Lower the socket straight down onto the plug, then loosen and remove the spark plug.
- If it feels extremely tight, stop and tell me—forcing it on a warm engine can damage threads.
Step 6: Install the new spark plug (by hand first)
- Put the new plug into the spark plug socket so it stays straight.
- Thread it in by hand using only the extension (no ratchet at first) until fully seated. This helps prevent cross-threading (threading in crooked).
- Do not use anti-seize unless the plug maker specifically calls for it.
Step 7: Torque the spark plug
- Set your 3/8" drive torque wrench (ft-lb range) to the correct spec. (A torque wrench is a tool that clicks at a set tightness so you don’t over-tighten.)
- Tighten the plug to Torque to 18 Nm (13 ft-lbs).
Step 8: Reinstall the ignition coil
- Add a very small smear of dielectric grease inside the end of the coil boot.
- Push the coil straight down until fully seated on the plug.
- Install the coil bolt using a 10mm socket and 1/4" drive ratchet, then tighten to Torque to 12 Nm (9 ft-lbs).
- Reconnect the coil electrical connector until it clicks.
Step 9: Repeat for the other 3 cylinders
- Repeat Steps 2–8 for each remaining ignition coil and spark plug.
- Keep parts grouped per cylinder.
Step 10: Reinstall engine cover and final check
- Reinstall the engine cover using the 10mm socket and 1/4" drive ratchet.
- Do a quick visual check that all 4 coil connectors are fully locked in.
✅ After Repair
- Start the engine and let it idle for 30–60 seconds. It should run smooth with no shaking.
- If the check engine light comes on or it runs rough, shut it off and re-check that every coil connector is clicked in and each coil bolt is installed.
- Take a short test drive, then re-check for any unusual smells or noises.
💰 DIY vs Shop Cost
Shop Cost: $220-$400 (parts + labor)
DIY Cost: $45-$110 (parts only)
You Save: $110-$300 by doing it yourself!
Shop labor rates vary but typically run $100-$150/hour. This repair takes a shop approximately 1.0-1.5 hours.
🎯 Ready to get started?
HowToo makes it easy: same-day/2-day shipping on every part, plus all the tools and specialty tools you need! Check out the parts and tools sections below to add everything to your cart.