

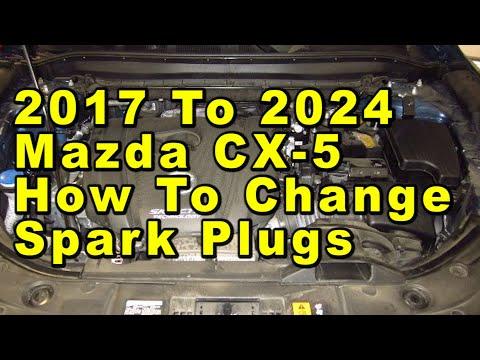







How to Replace Spark Plugs on a 2013-2024 Mazda CX-5 2.5L (Engine: Inline 4 2.5L)
Step-by-step DIY instructions with required tools, parts, torque specs, and safety tips for 2013, 2014, 2015, 2016
How to Replace Spark Plugs on a 2013-2024 Mazda CX-5 2.5L (Engine: Inline 4 2.5L)
Step-by-step DIY instructions with required tools, parts, torque specs, and safety tips for 2013, 2014, 2015, 2016


🔧 CX-5 - Spark Plug Replacement
This is a straightforward job: remove the engine cover and ignition coils, then replace all four spark plugs. Mazda schedules replacement on this non-turbo engine at 75,000 miles (120,000 km). mazdausa.com
Difficulty Level: Beginner | Estimated Time: 1-1.5 hours
⚠️ Safety & Precautions
- ⚠️ Let the engine become completely cold before removing the plugs. The cylinder head is aluminum, and hot threads damage easily.
- 🧤 Wear gloves and safety glasses when using compressed air.
- 🔑 Keep the ignition switched off and the key away from the vehicle.
- 🚫 Never allow dirt, tools, or loose hardware to fall into a spark-plug opening.
- 🔌 Battery disconnection isn’t normally required for this repair.
- 🧴 Don’t put anti-seize on the new plug threads unless the plug manufacturer specifically requires it.
🔧 Required Tools
You'll need the following tools for this repair:
- 8mm socket
- 14mm thin-wall spark plug socket
- 3/8-inch drive ratchet
- 3/8-inch drive 6-inch extension
- 3/8-inch drive inch-pound torque wrench
- 3/8-inch drive foot-pound torque wrench
- 0.040-inch wire spark plug gap gauge
- Compressed-air blow gun
- Clean shop towels
- Nitrile work gloves
- Safety glasses
A spark plug socket is a deep socket with a rubber or magnetic insert that holds the plug securely.
🔩 Required Parts
HowToo sells all the parts you need for this repair:
- Vehicle-matched long-life iridium spark plugs - Qty: 4
Mazda specifies genuine-equivalent long-life plugs for the SKYACTIV-G 2.5. Replace all four together, and don’t clean old iridium plugs with a wire brush because it can damage their fine electrode coating. mazdausa.com
📋 Before You Begin
- 🅿️ Park your CX-5 on level ground, select Park, and apply the parking brake.
- ❄️ Allow the engine to cool for at least two hours, preferably overnight.
- 🧹 Clean loose dirt from around the top of the engine before opening any plug well.
- 📦 Keep the new plugs in their protective sleeves until each one is installed.
- 📏 Confirm each replacement plug matches the listing and isn’t visibly damaged.
🔨 Step-by-Step Instructions
Follow these steps in order:
Step 1: Remove the engine cover
- Grip the plastic engine cover near its mounting points with both hands.
- Pull straight upward to release the cover from its rubber grommets.
- Place it somewhere clean where it won’t be stepped on.
Step 2: Clean around the ignition coils
- Use the compressed-air blow gun while wearing safety glasses.
- Blow dirt away from all four ignition coils and plug wells.
- Don’t continue until the top of the engine is clean.
Step 3: Disconnect the first ignition coil
- Press the locking tab on the electrical connector and pull the connector straight back.
- Pull on the connector body, not the wires.
- If the tab is stubborn, press the connector inward first, then depress the tab.
Step 4: Remove the first ignition coil
- Use the 8mm socket, extension, and ratchet to remove the coil retaining bolt.
- Twist the coil gently to release its rubber boot, then pull it straight upward.
- Inspect the boot for cracks, oil, rust-colored tracking, or burned marks.
- Do one cylinder at a time.
Step 5: Clean the spark-plug well
- Use the compressed-air blow gun to remove dirt from inside the empty well.
- Make sure nothing remains around the plug before loosening it.
Step 6: Remove the old spark plug
- Lower the 14mm thin-wall spark plug socket and 6-inch extension onto the plug.
- Attach the ratchet and turn counterclockwise to loosen the plug.
- Once loose, remove the ratchet and spin the extension by hand.
- Lift the plug out with the spark plug socket.
Step 7: Inspect the old spark plug
- A dry tan or light-gray tip is generally normal.
- A wet oily plug can indicate oil entering the cylinder.
- A fuel-wet or heavily blackened plug can indicate an ignition or mixture problem.
- If one plug looks dramatically different, keep it labeled by cylinder for later diagnosis.
Step 8: Check the new spark plug
- Compare the new and old plugs for matching thread diameter, thread length, and seat design.
- Use the 0.040-inch wire spark plug gap gauge only to verify the supplied gap.
- Don’t force a flat coin-style gauge between fine-wire iridium electrodes.
- Don’t bend the center electrode. Fine-wire tips are delicate.
Step 9: Hand-start the new spark plug
- Place the new plug in the 14mm spark plug socket.
- Use only the extension, without the ratchet, to lower it into the well.
- Turn clockwise by hand until the plug seats.
- If it doesn’t turn smoothly, back it out and restart it. Never force it.
- Hand-threading prevents an expensive cylinder-head repair.
Step 10: Torque the new spark plug
- Attach the 3/8-inch drive foot-pound torque wrench.
- Torque the spark plug to 15-20 Nm (11-15 ft-lbs).
- Use the replacement plug manufacturer’s stated torque if its instructions specify a narrower value.
- Don’t add another turn after the torque wrench clicks. More isn’t better here.
Step 11: Reinstall the ignition coil
- Push the ignition coil straight over the spark plug until the boot is fully seated.
- Install the coil bolt by hand first.
- Use the 3/8-inch drive inch-pound torque wrench and 8mm socket.
- Torque the ignition-coil bolt to 8-10 Nm (71-89 in-lbs).
- Reconnect the electrical connector until its lock clicks.
Step 12: Replace the remaining three plugs
- Repeat Steps 3 through 11 for each remaining cylinder.
- Keep each plug well closed until you’re ready to work on it.
- Confirm every coil bolt and connector is installed before moving on.
Step 13: Reinstall the engine cover
- Inspect the rubber mounting grommets and ensure they’re seated correctly.
- Align the cover over its mounting studs.
- Press directly above each mounting point until the cover snaps into place.
✅ After Repair
- 🔍 Count four connected coil plugs and four installed coil bolts.
- 🚗 Start the engine and let it idle for two minutes.
- 👂 Listen for a smooth idle without shaking, tapping, or misfiring.
- ⚠️ If the check-engine light flashes, shut the engine off immediately and recheck every coil connector.
- 🧪 Take a short test drive, then confirm the engine still idles smoothly.
- 💻 No infotainment reset, battery registration, or programming is required.
💰 DIY vs Shop Cost
Shop Cost: $180-$350 (parts + labor)
DIY Cost: $45-$120 (parts only)
You Save: $60-$230 by doing it yourself!
Shop labor rates vary by area. This repair takes a shop approximately 0.7-1.0 hour.
🎯 Ready to get started?
HowToo makes it easy: same-day/2-day shipping on every part, plus all the tools and specialty tools you need! The spark-plug aisle is open for your CX-5, so you can choose four matched plugs and the correct 14mm socket.