


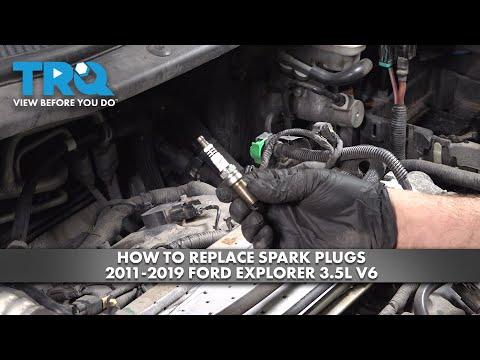






How to Replace Spark Plugs on a 2013-2019 Ford Explorer 3.5L V6 (Trim: Platinum | Engine: V6 3.5L)
Step-by-step instructions with required tools, plug gap, torque specs, and safety tips for 2013, 2014, 2015
How to Replace Spark Plugs on a 2013-2019 Ford Explorer 3.5L V6 (Trim: Platinum | Engine: V6 3.5L)
Step-by-step instructions with required tools, plug gap, torque specs, and safety tips for 2013, 2014, 2015


🔧 Explorer - Spark Plug Replacement
This is an intermediate job: replace all six plugs together, using Motorcraft SP-580-X iridium spark plugs from the vehicle-matched parts list. Ford originally specified SP-534 for this engine, and the specified plug gap is 0.033–0.037 inch (0.75–0.85 mm). fordservicecontent.com
The front three plugs are straightforward. Accessing the rear three requires removing intake plumbing and the upper intake manifold, so careful labeling and cleanliness matter.
Difficulty Level: Intermediate | Estimated Time: 3–5 hours
⚠️ Safety & Precautions
- ⚠️ Let the engine become completely cold before removing any plug. Hot aluminum cylinder-head threads strip easily.
- ⚠️ Disconnect the negative battery terminal before unplugging the throttle body and ignition components.
- ⚠️ Never allow dirt, tools, or hardware to enter an open intake port.
- ⚠️ Never use an impact wrench on spark plugs.
- ⚠️ Start every new plug by hand. If it won’t turn easily, stop and realign it.
🔧 Required Tools
You'll need the following tools for this repair:
- 8mm socket
- 10mm socket
- 5/8-inch magnetic spark plug socket
- 3/8-inch drive ratchet
- 3-inch socket extension
- 6-inch socket extension
- 10-inch socket extension
- 3/8-inch drive inch-pound torque wrench
- Flat-blade screwdriver
- Plastic trim removal tool
- Needle-nose pliers
- Small pick tool
- 0.033–0.037-inch wire-style gap gauge
- Compressed-air blow gun
- Clean shop vacuum
- Masking tape and permanent marker
- Clean lint-free shop towels
- Nitrile gloves
- Safety glasses
🔩 Required Parts
HowToo sells all the parts you need for this repair:
- Motorcraft SP-580-X iridium spark plugs - Qty: 6
- Upper intake manifold gasket set - Qty: 1
- Throttle-body gasket - Qty: 1
- Dielectric ignition grease - Qty: 1 small tube
Use the plug gaskets supplied on the new plugs. Don’t apply anti-seize to plated spark-plug threads unless the plug manufacturer specifically directs it. Anti-seize changes the clamping force and makes over-tightening easier. Nobody wants to learn aluminum thread repair on plug number six.
📋 Before You Begin
- 📋 Park your Explorer on level ground, select Park, apply the parking brake, and let the engine cool completely.
- 📋 Take several photos of the intake hoses, vacuum lines, and electrical connectors before disassembly.
- 📋 Label every disconnected hose and connector with masking tape and a permanent marker.
- 📋 Disconnect the negative battery cable using a 10mm socket. Move the cable aside so it cannot spring back onto the terminal.
- 📋 Keep the doors closed after disconnecting the battery to prevent unnecessary electrical activity.
🔨 Step-by-Step Instructions
Follow these steps in order:
Step 1: Remove the engine cover and intake duct
- Pull the plastic engine cover upward by hand to release its rubber mounting grommets.
- Use a flat-blade screwdriver or the appropriate socket to loosen the intake-duct clamps.
- Disconnect the breather hose and any electrical connector attached to the duct. Release connector locks with a small pick tool, without pulling on the wires.
- Remove the intake duct and place it somewhere clean.
Step 2: Clean around the ignition coils
- Use a clean shop vacuum around the coils and upper engine surfaces.
- Use the compressed-air blow gun carefully to remove loose grit. Wear safety glasses.
- Do not blow debris toward an exposed intake opening.
Step 3: Replace the three accessible front plugs
- Release each ignition-coil connector by hand or with the small pick tool.
- Use an 8mm socket, extension, and ratchet to remove each coil retaining bolt.
- Twist the coil gently by hand, then pull it straight upward. An ignition coil is the component that delivers high voltage directly to each spark plug.
- Inspect the rubber boot for cracking, swelling, oil, or carbon tracking, which looks like a thin black lightning mark.
- Use the compressed-air blow gun to clean each closed plug well before removing the plug.
- Use the 5/8-inch magnetic spark plug socket, extension, and ratchet to loosen and remove the old plug.
- Repeat one cylinder at a time so connectors and coils cannot get mixed up.
Step 4: Check each new spark plug
- Use the wire-style gap gauge to confirm a gap of 0.033–0.037 inch (0.75–0.85 mm). manualzz.com
- Do not force a flat wedge gauge between fine-wire electrodes.
- Inspect the ceramic insulator and electrode for shipping damage.
- Do not install a dropped plug, even if it looks fine.
Step 5: Install the three front plugs
- Place a new plug into the 5/8-inch magnetic spark plug socket.
- Turn the extension by hand for several complete rotations. Do not attach the ratchet until the plug threads smoothly.
- Use the inch-pound torque wrench to tighten each plug to 15 Nm (133 in-lb or 11 ft-lb). howtoo.com
- Put a very thin film of dielectric grease inside the mouth of each coil boot. Keep grease off the metal terminal and spark-plug threads.
- Push each coil firmly onto its plug.
- Install its retaining bolt with the 8mm socket and tighten to 7 Nm (62 in-lb). howtoo.com
- Reconnect the electrical connector until its lock clicks.
Step 6: Disconnect the upper intake manifold
- Use the small pick tool to release the throttle-body and manifold electrical connectors.
- Use needle-nose pliers where necessary to release vacuum and breather-hose clamps.
- Label each connection before removing it.
- Move the wiring harness aside gently. Do not stretch or sharply bend it.
Step 7: Remove the throttle body and upper intake manifold
- Use an 8mm socket and extension to remove the throttle-body fasteners if removal is needed for clearance.
- Use an 8mm socket and extension to loosen the upper intake-manifold fasteners gradually.
- Lift the manifold evenly. Check underneath for a hidden hose or connector before pulling harder.
- Immediately cover every exposed intake port with clean lint-free shop towels.
- Remove the old manifold and throttle-body gaskets by hand. Don’t let debris fall into the engine.
- Count every towel before reassembly.
Step 8: Replace the three rear spark plugs
- Use the clean shop vacuum and compressed-air blow gun to clean around the rear coils.
- Remove each coil connector and retaining bolt using the small pick tool and 8mm socket.
- Pull the coils upward by hand and inspect their boots.
- Remove each old plug using the 5/8-inch magnetic spark plug socket, extension, and ratchet.
- Hand-thread each checked new plug with the socket and extension.
- Use the inch-pound torque wrench to tighten each plug to 15 Nm (133 in-lb or 11 ft-lb). howtoo.com
- Apply a thin film of dielectric grease inside each boot and reinstall the coils.
- Use the 8mm socket and torque wrench to tighten the coil bolts to 7 Nm (62 in-lb). howtoo.com
- Reconnect all three coil connectors.
Step 9: Reinstall the upper intake manifold
- Use the clean shop vacuum to remove loose debris surrounding the covered ports.
- Count and remove every shop towel from the intake ports.
- Fit the new intake-manifold gaskets into their correct grooves by hand.
- Lower the manifold straight into position without dislodging the gaskets.
- Start every manifold fastener by hand, then tighten them evenly from the center outward with the 8mm socket.
- Because published public Ford information does not provide the manifold fastener torque, use the torque printed with the gasket kit or current Ford service information. Do not guess or heavily tighten the plastic manifold.
- Install the new throttle-body gasket and reinstall the throttle body using the 8mm socket.
Step 10: Reconnect hoses and wiring
- Reconnect every labeled vacuum hose, breather hose, throttle-body connector, and wiring clip by hand.
- Compare the connections with the photos taken before disassembly.
- Inspect the entire manifold perimeter for trapped wiring or displaced hoses.
Step 11: Reinstall the intake duct and battery cable
- Reinstall the intake duct and tighten its clamps using the flat-blade screwdriver or appropriate socket.
- Reconnect its breather hose and electrical connector.
- Push the engine cover onto its mounting grommets by hand.
- Use the 10mm socket to reconnect the negative battery cable securely.
✅ After Repair
- ✅ Turn the ignition on for about ten seconds without starting the engine, then switch it off.
- ✅ Start the engine and let it idle. A brief uneven idle can occur while the throttle and fuel corrections relearn after battery disconnection.
- ✅ Listen for a loud hiss, whistling, or unusually high idle. Those signs suggest an intake hose, gasket, or connector was missed.
- ✅ Confirm the check-engine light remains off and the engine accelerates smoothly.
- ✅ If the check-engine light flashes, shut the engine off immediately and recheck the coil connectors, plug installation, and intake connections.
- ✅ After a short road test, inspect the intake plumbing once more.
💰 DIY vs Shop Cost
Shop Cost: $450–$750 USD equivalent (parts + labor)
DIY Cost: $130–$260 USD equivalent (parts and basic consumables)
You Save: Approximately $250–$500 by doing it yourself!
Local labor rates in Sonīpat vary. This repair typically takes a shop approximately 2–3 hours.
🎯 Ready to get started?
HowToo has opened the spark-plug and specialty-tool aisles for your Explorer. Same-day/2-day shipping availability depends on destination, and the list includes the plugs, gap gauges, and spark-plug sockets needed for the job.
