


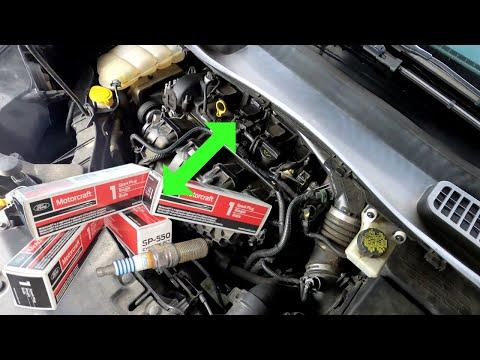







How to Replace Spark Plugs on a 2013-2019 Ford Escape 1.5L EcoBoost (Engine: Inline 4 2.0L)
Step-by-step DIY instructions with required tools, plug gap, torque specs, and safety tips for 2013, 2014, 2015, 2016, 2017, 2018, 2019
How to Replace Spark Plugs on a 2013-2019 Ford Escape 1.5L EcoBoost (Engine: Inline 4 2.0L)
Step-by-step DIY instructions with required tools, plug gap, torque specs, and safety tips for 2013, 2014, 2015, 2016, 2017, 2018, 2019


🔧 Escape - Spark Plug Replacement
This is a solid beginner-friendly job. You’ll remove the four ignition coils, replace one plug at a time, then reinstall everything carefully. The plugs sit in an aluminum cylinder head, so starting them by hand and using a torque wrench are non-negotiable.
Difficulty Level: Beginner | Estimated Time: 1-1.5 hours
Verified specifications: Set each plug gap between 0.025-0.029 inch (0.65-0.75 mm). Ford identifies four spark plugs for this 1.5L EcoBoost engine. fordservicecontent.com)
⚠️ Safety & Precautions
- 🌡️ Let the engine become completely cold before removing the plugs.
- 🧤 Wear gloves and safety glasses.
- 🔑 Keep the ignition switched off and the key away from the vehicle.
- ⚡ Do not pull ignition coils while the engine is running.
- 🧹 Remove dirt from each plug well before loosening the plug.
- 🛑 Stop if a plug needs heavy force. Damaging aluminum threads gets expensive fast.
- 🔋 Battery disconnection is not normally required for this repair.
🔧 Required Tools
You’ll need the following tools for this repair:
- 8mm socket
- 14mm thin-wall spark plug socket
- 3/8-inch-drive ratchet
- 3/8-inch-drive 6-inch extension
- 3/8-inch-drive inch-pound torque wrench
- Wire-style spark plug gap gauge
- Compressed-air blow gun or electronics-safe canned air
- Clean shop towels
- Nitrile gloves
- Safety glasses
A spark plug socket has an insert or magnet that holds the plug while you lift it from the deep well.
🔩 Required Parts
HowToo sells all the parts you need for this repair:
- Vehicle-matched spark plugs - Qty: 4
- Ignition coil boots - Qty: 4 only if cracked, swollen, oil-soaked, or carbon-tracked
Ford specifies an original-equipment-style plug for this engine. The matching spark plugs and plug tools are open in the parts sidebar. fordservicecontent.com
📋 Before You Begin
- 🚗 Park your Escape on level ground, select Park, and apply the parking brake.
- ❄️ Allow the engine to cool for at least two hours.
- 📦 Compare all four replacement plugs before opening the engine.
- 📏 Check each new plug with the wire-style gauge. The correct range is 0.025-0.029 inch (0.65-0.75 mm). fordservicecontent.com
- 🚫 Do not coat the plug threads with anti-seize unless the plug manufacturer specifically requires it. NGK, for example, advises against anti-seize on its plated plugs because it alters tightening force. ngksparkplugs.com
- 🔄 Work on one cylinder at a time so the connectors and coils remain organized.
🔨 Step-by-Step Instructions
Follow these steps in order:
Step 1: Remove the engine cover
- Use both hands to lift the plastic engine cover straight upward from its rubber mounting grommets.
- Set the cover away from the work area so dirt cannot fall from it into the plug wells.
Step 2: Clean around the ignition coils
- Use compressed air and safety glasses to blow loose sand and dirt away from all four coils.
- Keep the air nozzle several inches away from connectors and wiring.
- Clean wells save cylinder walls.
Step 3: Disconnect the first ignition coil
- Press the electrical connector’s locking tab and pull the connector straight back by its plastic housing.
- Do not pull on the wires.
- If the connector sticks, press it inward first, depress the tab, and then pull it back.
Step 4: Remove the first ignition coil
- Use the 8mm socket, extension, and ratchet to remove the coil hold-down bolt.
- Twist the coil gently to break the rubber boot loose, then pull the coil straight upward.
- Inspect the boot for cracks, burned lines, swelling, oil, or coolant.
Step 5: Clean the spark plug well
- Use compressed air again to remove debris from the empty plug well.
- Do not remove the spark plug until the well is clean.
Step 6: Remove the old spark plug
- Place the 14mm thin-wall spark plug socket and 6-inch extension squarely over the plug.
- Use the 3/8-inch-drive ratchet to turn the plug counterclockwise.
- Once loose, spin it out slowly and lift it from the well.
- If it binds, turn it slightly clockwise, then loosen it again. Don’t force it.
Step 7: Inspect the old plug
- A light tan or gray firing tip is generally normal.
- Wet fuel may indicate a misfire. Heavy oil may indicate an internal engine or valve-cover sealing problem.
- A steam-cleaned white plug, unexplained coolant loss, or coolant inside a cylinder needs diagnosis before installing plugs and calling the repair complete.
Step 8: Check the new spark plug
- Use the wire-style spark plug gap gauge to confirm 0.025-0.029 inch (0.65-0.75 mm). fordservicecontent.com
- Do not push against the delicate center electrode.
- Replace a plug if its ceramic insulator is cracked or its electrode is damaged.
Step 9: Start the new plug by hand
- Place the plug in the 14mm thin-wall spark plug socket attached only to the extension.
- Lower it straight into the well.
- Turn the extension clockwise by hand for several complete turns.
- If it does not turn easily, remove it and start again. Never use the ratchet to begin the threads.
Step 10: Torque the spark plug
- Attach the 3/8-inch-drive inch-pound torque wrench to the extension.
- Torque the spark plug to 12 Nm (106 in-lbs or 9 ft-lbs).
- Stop as soon as the torque wrench clicks. Don’t click it repeatedly.
- This light torque is intentional because the plug threads into an aluminum cylinder head. Ford performance installation guidance also uses 12 Nm (106 in-lbs) for comparable EcoBoost plug installation. performanceparts.ford.com
Step 11: Reinstall the ignition coil
- Push the coil straight down until the boot seats fully over the plug.
- Install the hold-down bolt by hand.
- Use the 8mm socket and torque wrench to tighten it to 8 Nm (71 in-lbs). openlaborproject.com
- Push the electrical connector into place until its lock clicks.
Step 12: Replace the remaining plugs
- Repeat Steps 3 through 11 for the remaining three cylinders.
- Keep each open plug well clean and install every plug by hand before using the torque wrench.
Step 13: Reinstall the engine cover
- Inspect the rubber mounting grommets and make sure none remained attached to the old cover locations.
- Align the engine cover over its mounting posts.
- Press straight downward with both hands until every grommet seats.
✅ After Repair
- 🔍 Confirm all four coil connectors are locked and no tools remain in the engine bay.
- 🚙 Start the engine and let it idle for two or three minutes.
- 👂 Listen for a steady idle. A severe shake, flashing check-engine light, or fuel smell means shut the engine off immediately.
- 🧰 If a misfire appears, recheck the coil connectors and verify each coil is fully seated.
- 🛣️ Take a short test drive using light acceleration first, then recheck for warning lights.
- 💻 No programming, battery registration, or infotainment reset is required.
💰 DIY vs Shop Cost
Shop Cost: $180-$350 (parts + labor)
DIY Cost: $40-$100 (parts only)
You Save: $80-$250 by doing it yourself!
Shop labor rates vary by market. This repair generally takes a shop approximately 0.7-1.0 hour.
🎯 Ready to get started?
HowToo makes it easy: same-day/2-day shipping on every part, plus all the tools and specialty tools you need! Check out the parts and tools sections below to add everything to your cart.
