

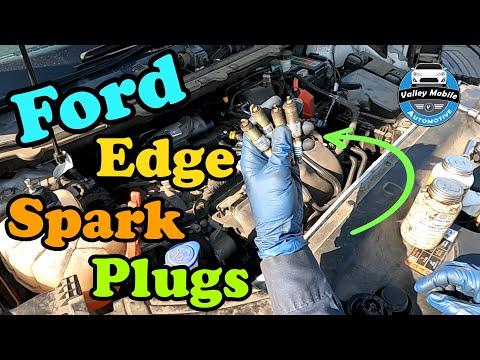





How to Replace Spark Plugs on a 2012-2024 Ford Edge 2.0L EcoBoost (Engine: V6 3.5L)
Step-by-step DIY guide with tools, parts, plug gap, torque specs, and safety tips for 2012, 2013, 2014, 2015, 2016, 2017, 2018, 2019, 2020, 2021, 2022, 2023, 2024
How to Replace Spark Plugs on a 2012-2024 Ford Edge 2.0L EcoBoost (Engine: V6 3.5L)
Step-by-step DIY guide with tools, parts, plug gap, torque specs, and safety tips for 2012, 2013, 2014, 2015, 2016, 2017, 2018, 2019, 2020, 2021, 2022, 2023, 2024


🔧 Edge - Spark Plug Replacement
Replacing the spark plugs on your Edge helps restore smooth starting, clean acceleration, fuel economy, and proper ignition under boost. The 2.0L turbo engine uses individual ignition coils on top of each spark plug, so you’ll remove the coils first, then replace the plugs one at a time.
Difficulty Level: Beginner | Estimated Time: 1-2 hours
⚠️ Safety & Precautions
- ⚠️ Work only on a cold engine. Aluminum cylinder heads can be damaged if spark plugs are removed while hot.
- ⚠️ Disconnect the negative battery cable before unplugging ignition coils.
- ⚠️ Keep dirt out of the spark plug wells. Dirt can fall into the engine when the plug is removed.
- ⚠️ Do not force the new spark plugs. Cross-threading can damage the cylinder head.
- ⚠️ Use the correct spark plug gap if your plugs are not pre-gapped. Most quality replacements are pre-gapped, but always verify before installation.
🔧 Required Tools
You'll need the following tools for this repair:
- 8mm socket
- 10mm socket
- 3/8-inch ratchet
- 3/8-inch extension 6-inch
- 5/8-inch spark plug socket
- Torque wrench 3/8-inch drive inch-pound capable
- Spark plug gap gauge
- Compressed air blow gun
- Plastic trim removal tool
- Dielectric grease packet
- Mechanic gloves
- Safety glasses
🔩 Required Parts
HowToo sells all the parts you need for this repair:
- Iridium spark plugs - Qty: 4
- Intake appearance cover clips - Qty: As needed
📋 Before You Begin
- Park your Edge on level ground, shift to Park, and set the parking brake.
- Let the engine cool completely before starting.
- Open the hood and remove any loose debris around the top of the engine.
- Disconnect the negative battery cable using a 10mm socket. Move the cable aside so it cannot spring back onto the battery post.
- A spark plug socket is a deep socket with a rubber insert or magnet that holds the spark plug without dropping it.
- Dielectric grease is a non-conductive silicone grease used lightly inside the ignition coil boot to help prevent moisture and sticking.
🔨 Step-by-Step Instructions
Follow these steps in order:
Step 1: Remove the Engine Cover
- Use your hands to lift the plastic engine appearance cover straight upward from its rubber mounts.
- If a corner feels stuck, use a plastic trim removal tool to gently help lift it.
- Set the cover aside where it will not get stepped on.
- Pull evenly, not sideways.
Step 2: Locate the Ignition Coils
- Look across the top of the engine for 4 ignition coils. Each coil sits directly over one spark plug.
- An ignition coil is the small electrical unit that sends high voltage to the spark plug.
- Before removing anything, use compressed air blow gun and safety glasses to blow dust away from the coil and spark plug areas.
Step 3: Unplug the Ignition Coil Connectors
- Use your fingers to press the locking tab on each coil connector and slide the connector off.
- If the connector is tight, use a plastic trim removal tool to gently help release the tab.
- Do not pull on the wires.
- Pull the connector body only.
Step 4: Remove the Ignition Coil Bolts
- Use an 8mm socket, 3/8-inch ratchet, and 3/8-inch extension 6-inch to remove the coil hold-down bolt from each ignition coil.
- Keep the bolts in a small tray or safe spot so they are not lost.
Step 5: Remove the Ignition Coils
- Twist each ignition coil gently left and right by hand, then pull it straight upward.
- Set the coils in order from left to right. This helps them go back into the same cylinder.
- Use compressed air blow gun again to blow out each spark plug well before removing the plugs.
- Clean wells prevent engine damage.
Step 6: Remove the Old Spark Plugs
- Place the 5/8-inch spark plug socket onto the first spark plug using the 3/8-inch extension 6-inch and 3/8-inch ratchet.
- Turn counterclockwise slowly to loosen the spark plug.
- Once loose, continue turning by hand with the extension until the plug comes out.
- Remove one plug at a time so nothing gets mixed up.
- If a plug feels stuck, stop and gently tighten it slightly, then loosen again. Do not force it.
Step 7: Check the New Spark Plug Gap
- Use a spark plug gap gauge to verify the electrode gap on each new spark plug.
- For the 2.0L EcoBoost engine, set the spark plug gap to 0.028-0.031 in unless the plug manufacturer specifies otherwise for the exact plug.
- Do not pry hard on iridium plug tips. Iridium tips are delicate and can be damaged easily.
- Most iridium plugs arrive pre-gapped.
Step 8: Install the New Spark Plugs by Hand
- Place one new spark plug into the 5/8-inch spark plug socket.
- Lower it carefully into the spark plug well using the 3/8-inch extension 6-inch.
- Thread the plug clockwise by hand only for the first several turns.
- If it does not turn smoothly, remove it and start again.
- Torque to 13 Nm (115 in-lbs) using the torque wrench 3/8-inch drive inch-pound capable.
Step 9: Reinstall the Ignition Coils
- Apply a very small amount of dielectric grease packet inside the end of each ignition coil boot.
- Push each ignition coil straight down onto its spark plug until it seats fully.
- Use the 8mm socket, 3/8-inch extension 6-inch, and torque wrench 3/8-inch drive inch-pound capable to install the coil bolts.
- Torque to 6 Nm (53 in-lbs).
- Do not overtighten. These bolts are small.
Step 10: Reconnect the Ignition Coil Connectors
- Push each electrical connector back onto its ignition coil by hand until it clicks.
- Gently tug each connector to confirm it is locked.
Step 11: Reinstall the Engine Cover
- Line up the engine cover with its rubber mounts.
- Press down firmly by hand at each mounting point until it seats.
- If any cover clips were damaged, replace them with intake appearance cover clips.
Step 12: Reconnect the Battery
- Place the negative battery cable back onto the battery post.
- Use a 10mm socket to tighten the terminal nut snugly.
- Do not overtighten the battery terminal.
✅ After Repair
- Start your Edge and let it idle for 1-2 minutes.
- The idle may be slightly uneven for a few seconds after the battery reconnects. It should smooth out quickly.
- Check that there are no warning lights flashing and no misfire feeling.
- Take a short test drive with gentle acceleration first, then a moderate acceleration check.
- If the check engine light flashes, stop driving and recheck the coil connectors and spark plug installation.
- Reset the clock and one-touch window functions if needed after the battery disconnect.
💰 DIY vs Shop Cost
Shop Cost: $220-$380 (parts + labor)
DIY Cost: $45-$95 (parts only)
You Save: $175-$285 by doing it yourself!
Shop labor rates vary but typically run $100-$150/hour. This repair takes a shop approximately 1-1.5 hours.
🎯 Ready to get started?
HowToo makes it easy: same-day/2-day shipping on every part, plus all the tools and specialty tools you need! Check out the parts and tools sections below to add everything to your cart.