

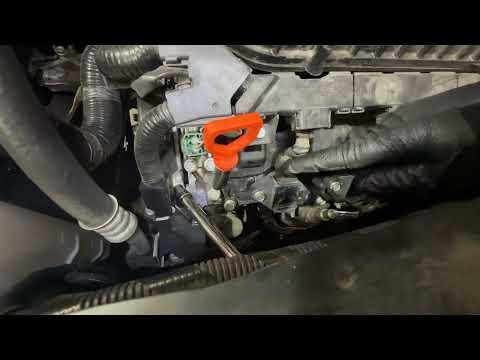






How to Replace Spark Plugs on a 2011-2026 Honda Odyssey 3.5L V6 (Engine: V6 3.5L)
Step-by-step DIY guide with tools, iridium plugs, torque specs, and safety tips for 2011, 2012, 2013, 2014, 2015, 2016, 2017, 2018, 2019, 2020, 2021, 2022, 2023, 2024, 2025, 2026
How to Replace Spark Plugs on a 2011-2026 Honda Odyssey 3.5L V6 (Engine: V6 3.5L)
Step-by-step DIY guide with tools, iridium plugs, torque specs, and safety tips for 2011, 2012, 2013, 2014, 2015, 2016, 2017, 2018, 2019, 2020, 2021, 2022, 2023, 2024, 2025, 2026


🔧 Odyssey - Spark Plug Replacement
Replacing the spark plugs on your Odyssey helps restore smooth starts, clean idle, fuel economy, and proper power from the V6 engine. This job requires removing the ignition coils, then replacing all six spark plugs—three in the front bank and three at the rear bank.
Difficulty Level: Intermediate | Estimated Time: 1.5-2.5 hours
⚠️ Safety & Precautions
- ⚠️ Work only on a completely cool engine. Aluminum cylinder heads can be damaged if spark plugs are removed while hot.
- ⚠️ Disconnect the negative battery terminal before unplugging ignition coils.
- ⚠️ Keep dirt, sand, and small hardware away from the spark plug holes. Anything dropped inside can damage the engine.
- ⚠️ Do not over-tighten spark plugs. The cylinder head threads are aluminum and can strip.
- ⚠️ Use only the correct iridium-style replacement spark plugs specified for your Odyssey.
🔧 Required Tools
You'll need the following tools for this repair:
- 10mm socket
- 3/8-inch ratchet
- 3/8-inch extension set
- 5/8-inch spark plug socket
- 3/8-inch torque wrench
- Flathead screwdriver
- Needle-nose pliers
- Compressed air nozzle
- Spark plug gap gauge
- Magnetic pickup tool
- Dielectric grease
- Nitrile gloves
- Safety glasses
- Fender cover
🔩 Required Parts
HowToo sells all the parts you need for this repair:
- Iridium spark plugs - Qty: 6
- Ignition coil boot grease - Qty: 1
📋 Before You Begin
- Park your Odyssey on level ground, shift to Park, and apply the parking brake.
- Let the engine cool fully before starting.
- Open the hood and use a fender cover to protect the paint.
- Use a 10mm socket to disconnect the negative battery cable, then move the cable aside so it cannot touch the battery post.
- A spark plug socket is a deep socket with a rubber insert or magnet that holds the spark plug while you remove or install it.
- A torque wrench tightens bolts or spark plugs to the exact tightness Honda requires.
🔨 Step-by-Step Instructions
Follow these steps in order:
Step 1: Remove the Engine Cover
- Use your hands to lift the plastic engine cover upward from its rubber mounting grommets.
- Set the cover somewhere safe so it does not get scratched or stepped on.
- Pull straight up, not sideways.
Step 2: Locate the Ignition Coils
- Look for six ignition coils. An ignition coil is the small electrical part sitting directly above each spark plug.
- There are three coils on the front side of the engine and three on the rear side near the firewall.
- Use a flashlight if needed to see the rear bank clearly.
Step 3: Clean Around the Coil Area
- Put on safety glasses.
- Use the compressed air nozzle to blow dirt away from the top of each ignition coil and spark plug tube.
- This prevents debris from falling into the engine when the spark plugs are removed.
Step 4: Disconnect the First Ignition Coil Connector
- Use your thumb to press the locking tab on the ignition coil electrical connector.
- If the tab is stiff, use a flathead screwdriver gently to help release it.
- Pull the connector straight off the coil. Do not pull on the wires.
- Work one plug at a time.
Step 5: Remove the Ignition Coil Bolt
- Use a 10mm socket, 3/8-inch extension, and 3/8-inch ratchet to remove the ignition coil retaining bolt.
- Place the bolt in a safe spot so it does not fall into the engine bay.
Step 6: Remove the Ignition Coil
- Grip the ignition coil by hand and twist it gently left and right.
- Pull the coil straight upward out of the spark plug tube.
- If it feels stuck, keep twisting gently while lifting. Do not pry hard with metal tools.
Step 7: Remove the Old Spark Plug
- Insert the 5/8-inch spark plug socket with a 3/8-inch extension into the spark plug tube.
- Use the 3/8-inch ratchet to turn the spark plug counterclockwise.
- Once loose, spin it out slowly and lift it out with the spark plug socket.
- If the plug does not come out with the socket, use a magnetic pickup tool to lift it out carefully.
Step 8: Inspect the Old Spark Plug
- Look at the tip of the old spark plug.
- Light tan or gray is normal.
- Heavy oil, wet fuel, broken porcelain, or white blistering may point to another engine issue.
- Keep the old plugs in order if you want to compare cylinder condition later.
Step 9: Check the New Spark Plug
- Use a spark plug gap gauge to lightly verify the new plug gap.
- The correct gap is typically 0.044 inch for this Honda V6 application.
- Do not forcefully bend the center electrode on iridium plugs. Iridium tips are delicate.
- Do not apply anti-seize to the spark plug threads unless the plug manufacturer specifically requires it.
Step 10: Install the New Spark Plug by Hand
- Place the new spark plug into the 5/8-inch spark plug socket.
- Lower it straight into the spark plug tube using the 3/8-inch extension only, without the ratchet attached.
- Turn the extension clockwise by hand until the plug threads in smoothly.
- If it feels tight right away, stop and back it out. This prevents cross-threading, which means the plug is going in crooked.
- Hand-start every spark plug first.
Step 11: Torque the New Spark Plug
- Attach the 3/8-inch torque wrench to the extension and 5/8-inch spark plug socket.
- Tighten the spark plug to Torque to 18 Nm (13 ft-lbs).
- Do not add extra tightening after the torque wrench clicks.
Step 12: Reinstall the Ignition Coil
- Apply a small amount of dielectric grease inside the rubber ignition coil boot.
- Push the ignition coil straight down onto the new spark plug until it seats fully.
- Install the coil bolt by hand first.
- Use the 10mm socket and 3/8-inch torque wrench to tighten the ignition coil bolt to Torque to 12 Nm (9 ft-lbs).
Step 13: Reconnect the Coil Connector
- Push the electrical connector onto the ignition coil until it clicks.
- Lightly tug the connector by hand to make sure it is locked.
Step 14: Repeat for the Remaining Five Spark Plugs
- Repeat Steps 4 through 13 for each remaining ignition coil and spark plug.
- Use the 10mm socket for each coil bolt.
- Use the 5/8-inch spark plug socket for each spark plug.
- The rear bank is tighter. Take your time and use the 3/8-inch extension set to find the best reach.
- Patience prevents broken connectors.
Step 15: Reinstall the Engine Cover
- Line up the plastic engine cover with its rubber mounting grommets.
- Press down firmly by hand until the cover snaps into place.
Step 16: Reconnect the Battery
- Place the negative battery cable back onto the battery post.
- Use the 10mm socket to tighten the battery terminal snugly.
- Do not over-tighten the terminal clamp.
✅ After Repair
- Start your Odyssey and let it idle for a few minutes.
- The idle may fluctuate briefly after battery reconnect, then should smooth out.
- Listen for misfires, ticking, or popping sounds.
- Check that all ignition coil connectors are fully clicked in place.
- Take a short test drive and confirm smooth acceleration.
- If the check engine light comes on or flashes, stop driving and recheck the coil connectors and plug seating.
- Reset the clock, radio presets, and auto window settings if needed after battery disconnect.
💰 DIY vs Shop Cost
Shop Cost: $350-$650 (parts + labor)
DIY Cost: $70-$160 (parts only)
You Save: $280-$490 by doing it yourself!
Shop labor rates vary but typically run $100-$150/hour. This repair takes a shop approximately 1.5-2.0 hours.
🎯 Ready to get started?
HowToo makes it easy: same-day/2-day shipping on every part, plus all the tools and specialty tools you need! Check out the parts and tools sections below to add everything to your cart.