

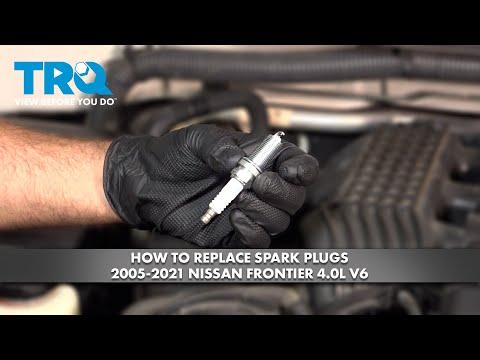





How to Replace Spark Plugs on a 2005-2019 Nissan Frontier 4.0L V6 (Engine: V6 4.0L)
Step-by-step DIY guide with tools, parts, torque specs, and safety tips for 2005, 2006, 2007, 2008, 2009, 2010, 2011, 2012, 2013, 2014, 2015, 2016, 2017, 2018, 2019
How to Replace Spark Plugs on a 2005-2019 Nissan Frontier 4.0L V6 (Engine: V6 4.0L)
Step-by-step DIY guide with tools, parts, torque specs, and safety tips for 2005, 2006, 2007, 2008, 2009, 2010, 2011, 2012, 2013, 2014, 2015, 2016, 2017, 2018, 2019


🔧 Frontier - Spark Plug Replacement
Changing the spark plugs on your Frontier restores strong ignition, smooth idle, and good fuel economy. On the 4.0L V6, the ignition coils sit directly on top of each plug, and the left-side rear plugs are tight, so patience matters.
Difficulty Level: Intermediate | Estimated Time: 2-3 hours
⚠️ Safety & Precautions
- ⚠️ Work only on a completely cool engine to avoid burns and damaged aluminum threads.
- ⚠️ Disconnect the negative battery cable before unplugging ignition coils.
- ⚠️ Do not let dirt fall into the spark plug wells or engine cylinders.
- ⚠️ Start each new spark plug by hand before using a ratchet. Cross-threading can damage the cylinder head.
- ⚠️ Use only the correct long-life iridium-style spark plugs. Do not gap them unless the plug maker specifically requires it.
🔧 Required Tools
You'll need the following tools for this repair:
- 10mm socket
- 12mm socket
- 5/8-inch spark plug socket
- 3/8-inch drive ratchet
- 3/8-inch drive torque wrench
- 3-inch extension
- 6-inch extension
- 3/8-inch universal joint adapter
- Flat-blade screwdriver
- Needle-nose pliers
- Compressed air nozzle
- Spark plug gap gauge
- Magnetic pickup tool
- Fender cover
- Nitrile gloves
- Safety glasses
🔩 Required Parts
HowToo sells all the parts you need for this repair:
- Iridium spark plugs - Qty: 6
- Upper intake collector gasket - Qty: 1
- Throttle body gasket - Qty: 1
- Dielectric grease - Qty: 1 small tube
📋 Before You Begin
- Park your Frontier on level ground and let the engine cool completely.
- Open the hood and place a fender cover over the painted fender area.
- Use a 10mm socket to disconnect the negative battery cable.
- The spark plug socket has a rubber insert that grips the plug so you can lift it out safely.
- A universal joint adapter lets the socket bend slightly, which helps reach tight rear plugs.
🔨 Step-by-Step Instructions
Follow these steps in order:
Step 1: Remove the Engine Cover and Intake Tube
- Use a 10mm socket to remove the engine cover fasteners, then lift the cover off.
- Use a flat-blade screwdriver to loosen the air intake tube clamps.
- Use needle-nose pliers to release any small hose clamps on the intake tube.
- Lift the intake tube out of the way.
- Take photos before unplugging hoses.
Step 2: Unplug Ignition Coils
- There is one ignition coil on top of each spark plug.
- Use your fingers or a flat-blade screwdriver gently to release each ignition coil connector tab.
- Do not pull on the wires. Pull only on the plastic connector body.
- If a connector is stuck, use the flat-blade screwdriver to gently lift the lock tab.
Step 3: Remove the Right-Side Ignition Coils
- Start with the passenger-side bank because it is easier to access.
- Use a 10mm socket to remove the ignition coil hold-down bolt from each coil.
- Twist each coil gently by hand, then pull it straight up.
- Set the coils in order so they go back into the same cylinder positions.
Step 4: Clean Around the Spark Plug Wells
- Put on safety glasses.
- Use a compressed air nozzle to blow dirt out of each spark plug well.
- This prevents debris from falling into the cylinder after the plug is removed.
Step 5: Remove the Right-Side Spark Plugs
- Use a 5/8-inch spark plug socket, 6-inch extension, and 3/8-inch drive ratchet.
- Turn the plug counterclockwise slowly until it is loose.
- Lift the plug out with the spark plug socket.
- If the plug falls out of the socket, use a magnetic pickup tool to retrieve it.
Step 6: Remove the Upper Intake Collector for Left-Side Access
- The left-side rear spark plugs are tight on the 4.0L V6, so removing the upper intake collector gives safe working room.
- Use a 10mm socket and 12mm socket to remove intake collector brackets and fasteners.
- Use needle-nose pliers to release vacuum hose clamps.
- Use a flat-blade screwdriver to loosen air hose clamps if needed.
- Lift the upper intake collector carefully and set it aside.
- Remove and discard the old upper intake collector gasket.
- Cover open intake ports immediately.
Step 7: Remove the Left-Side Ignition Coils
- Use a 10mm socket with a 3-inch extension to remove each ignition coil bolt.
- Twist each coil gently, then pull it straight up.
- Keep the coils in order.
Step 8: Remove the Left-Side Spark Plugs
- Use a 5/8-inch spark plug socket, 6-inch extension, 3/8-inch universal joint adapter, and 3/8-inch drive ratchet.
- Turn each spark plug counterclockwise slowly.
- Remove one plug at a time so you stay organized.
- If resistance feels abnormal, stop and tighten the plug slightly, then loosen again slowly.
Step 9: Check the New Spark Plugs
- Use a spark plug gap gauge to verify the plug gap only if the plug manufacturer allows checking.
- The typical specification is about 0.043 in / 1.1 mm.
- Do not pry against the fine iridium center electrode.
- Do not apply anti-seize unless the spark plug manufacturer specifically says to use it.
Step 10: Install the New Spark Plugs
- Place one new spark plug into the 5/8-inch spark plug socket.
- Use the 6-inch extension by hand to start threading the plug clockwise.
- Turn it several full turns by hand before using the ratchet.
- Use a 3/8-inch drive torque wrench to tighten each spark plug to Torque to 19.6 Nm (14 ft-lbs).
- Hand-starting prevents expensive thread damage.
Step 11: Reinstall the Ignition Coils
- Apply a small dab of dielectric grease inside each coil boot opening.
- Push each ignition coil straight down until seated on the spark plug.
- Use a 10mm socket to install each coil hold-down bolt.
- Tighten the ignition coil bolts to Torque to 7 Nm (62 in-lbs).
- Reconnect each ignition coil electrical connector until it clicks.
Step 12: Reinstall the Upper Intake Collector
- Remove any covers from the intake ports.
- Install the new upper intake collector gasket.
- Set the upper intake collector back in place carefully.
- Use a 10mm socket and 12mm socket to start all fasteners by hand.
- Use a 3/8-inch drive torque wrench to tighten the intake collector fasteners evenly to Torque to 25 Nm (18 ft-lbs).
- Reconnect all vacuum hoses and brackets with needle-nose pliers and the correct sockets.
Step 13: Reinstall the Intake Tube and Engine Cover
- Install the intake tube back onto the air box and throttle body.
- Use a flat-blade screwdriver to tighten the hose clamps snugly.
- Use needle-nose pliers to reinstall any small hose clamps.
- Use a 10mm socket to reinstall the engine cover.
Step 14: Reconnect the Battery
- Use a 10mm socket to reconnect the negative battery cable.
- Make sure the terminal is tight and does not rotate by hand.
✅ After Repair
- Start your Frontier and let it idle for 2-3 minutes.
- Listen for smooth idle and check that there are no hissing vacuum leaks.
- If the idle is rough, recheck ignition coil connectors and intake hoses.
- Take a short test drive and confirm normal acceleration.
- If the check engine light appears, scan for codes before driving far.
💰 DIY vs Shop Cost
Shop Cost: $450-$750 (parts + labor)
DIY Cost: $90-$180 (parts only)
You Save: $360-$570 by doing it yourself!
Shop labor rates vary but typically run $100-$150/hour. This repair takes a shop approximately 2-3 hours.
🎯 Ready to get started?
HowToo makes it easy: same-day/2-day shipping on every part, plus all the tools and specialty tools you need! Check out the parts and tools sections below to add everything to your cart.