






How to Replace Spark Plugs on a 2005-2018 Toyota Avalon 3.5L V6 (Trim: Limited | Engine: V6 3.5L)
Step-by-step DIY guide with required tools, parts, torque specs, and safety tips for 2005, 2006, 2007, 2008, 2009, 2010, 2011, 2012, 2013, 2014, 2015, 2016, 2017, 2018
How to Replace Spark Plugs on a 2005-2018 Toyota Avalon 3.5L V6 (Trim: Limited | Engine: V6 3.5L)
Step-by-step DIY guide with required tools, parts, torque specs, and safety tips for 2005, 2006, 2007, 2008, 2009, 2010, 2011, 2012, 2013, 2014, 2015, 2016, 2017, 2018


🔧 Avalon - Spark Plug Replacement
Your Avalon uses six long-life iridium spark plugs. The front three are easy to reach, but the rear three require removal of the windshield cowl and upper intake plenum—the chamber that distributes air to the engine.
Difficulty Level: Advanced | Estimated Time: 3-5 hours
Assumption: This procedure is for the stock U.S.-market 3.5L V6.
⚠️ Safety & Precautions
- ⚠️ Work only when the engine is completely cold; aluminum cylinder-head threads are easily damaged when hot.
- ⚠️ Disconnect the negative battery terminal before unplugging ignition or throttle-body connectors.
- ⚠️ Keep dirt, hardware, and tools out of the open intake ports. Cover them immediately after removing the plenum.
- ⚠️ Never crank or start the engine while the intake plenum is removed.
- ⚠️ Do not pull ignition coils by their wiring.
- ⚠️ Do not apply anti-seize to the new plug threads unless the plug manufacturer specifically requires it; most plated iridium plugs are installed dry.
- ⚠️ Do not bend or adjust the delicate iridium center electrodes.
🔧 Required Tools
You'll need the following tools for this repair:
- 10mm socket
- 12mm socket
- 14mm socket
- 5/8-inch spark plug socket with rubber retainer
- 1/4-inch drive ratchet
- 3/8-inch drive ratchet
- 3-inch extension
- 6-inch extension
- 10-inch extension
- 3/8-inch drive universal joint
- Torque wrench rated 5-25 Nm
- Torque wrench rated 15-80 Nm
- Flat-blade screwdriver
- Phillips No. 2 screwdriver
- Plastic trim-clip removal tool
- 90-degree pick tool
- Hose-clamp pliers
- Needle-nose pliers
- Compressed-air blow gun
- Clean shop vacuum
- Magnetic pickup tool
- Paint marker
- Clean lint-free shop towels
- Masking tape
- Nitrile gloves
- Safety glasses
🔩 Required Parts
HowToo sells all the parts you need for this repair:
- OEM-spec iridium spark plugs - Qty: 6
- Upper intake plenum gasket - Qty: 1
- Throttle-body gasket - Qty: 1
- Windshield-cowl retaining clips - Qty: As needed
Use plugs cataloged specifically for your Avalon. The nominal factory gap is approximately 1.1 mm (0.043 inch); inspect it without forcing a wedge-style gauge between the electrodes.
📋 Before You Begin
- 📋 Park your Avalon on level ground, select Park, apply the parking brake, and allow the engine to cool completely.
- Open the hood and photograph the hose and connector routing before disassembly.
- Use masking tape and a paint marker to label every disconnected hose and electrical connector.
- Battery disconnection may erase learned idle values and temporarily disable automatic window operation.
- Have clean lint-free shop towels ready before opening the intake system.
🔨 Step-by-Step Instructions
Follow these steps in order:
Step 1: Disconnect the battery
- Use a 10mm socket and 1/4-inch drive ratchet to loosen the negative battery-terminal nut.
- Lift the negative terminal off the battery and position it so it cannot spring back onto the post.
- Wait at least 90 seconds before disconnecting engine electrical connectors.
Step 2: Remove the engine cover and air-intake duct
- Lift the decorative engine cover straight upward by hand to release its rubber mounting grommets.
- Use a 10mm socket and 1/4-inch drive ratchet to remove the air-cleaner inlet fasteners.
- Unplug the mass-airflow sensor by pressing its locking tab by hand; do not pull on the wires.
- Use a flat-blade screwdriver to loosen the intake-hose clamps.
- Release the breather hose with hose-clamp pliers, then remove the air-intake duct and air-cleaner lid.
- Cover the exposed duct opening with a clean lint-free shop towel.
Step 3: Remove the windshield wiper arms
- Use masking tape and a paint marker to mark each blade’s resting position on the windshield.
- Use a plastic trim-clip removal tool to lift the wiper-arm nut caps.
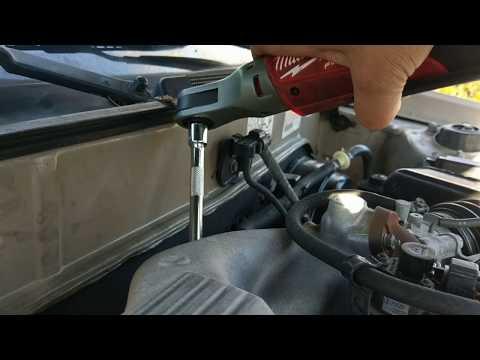
- Use a 14mm socket and 3/8-inch drive ratchet to remove both wiper-arm nuts.
- Rock each arm gently at its hinge while lifting it from the splined shaft. Do not pry against the windshield.
Step 4: Remove the cowl panels and wiper assembly
- Use a plastic trim-clip removal tool to release the cowl clips and remove the rubber edge seal.
- Separate the plastic cowl panels carefully and lift them away from the windshield.
- Unplug the wiper-motor connector by hand.
- Use a 10mm socket, 3/8-inch drive ratchet, and 6-inch extension to remove the wiper-linkage mounting bolts.
- Lift the complete wiper-linkage assembly out of the cowl area.
- Use a 10mm socket and 3/8-inch drive ratchet to remove the metal cowl reinforcement fasteners, then remove the reinforcement.
- Keep every fastener grouped by component on a clean lint-free shop towel.
Step 5: Disconnect the throttle body and plenum attachments
- Use masking tape and a paint marker to label the throttle-body connector, vacuum hoses, breather hoses, and purge lines.
- Release electrical connector locks with a 90-degree pick tool, then unplug the connectors by hand.
- Use hose-clamp pliers or needle-nose pliers to move the spring clamps back, then twist the hoses gently before removing them.
- Use a 10mm socket, 3/8-inch drive ratchet, and 3-inch extension to remove the throttle-body bolts.
- Move the throttle body aside without opening the cooling system if the attached coolant hoses provide enough room. Do not stretch or sharply bend the hoses.
- If the throttle body is fully removed, discard its old gasket and cover the opening with a clean lint-free shop towel.
Step 6: Remove the upper intake plenum
- Use a 12mm socket, 3/8-inch drive ratchet, and appropriate extension to remove the plenum support-bracket bolts and nuts.
- Use a 12mm socket, 3/8-inch drive ratchet, and 6-inch extension to loosen the upper plenum fasteners gradually.
- Check the rear and underside of the plenum carefully for any remaining hose, connector, or bracket.
- Lift the plenum straight upward. Do not pry between aluminum sealing surfaces.
- Immediately cover every exposed intake port with clean lint-free shop towels.
- Use a clean shop vacuum around the covered ports. Do not allow debris to fall into the engine.
- Remove and discard the old upper intake plenum gasket by hand.
- Photograph each bracket before moving it.
Step 7: Remove the front ignition coils
- Use compressed air and a blow gun to clean dirt from around the three front ignition coils.
- Press each coil connector lock and unplug it by hand.
- Use a 10mm socket, 1/4-inch drive ratchet, and 3-inch extension to remove each coil retaining bolt.
- Twist each coil gently by hand, then pull it straight out of its spark-plug well.
- Arrange the coils in cylinder order so each one returns to its original position.
Step 8: Replace the front three spark plugs
- Use compressed air and a blow gun again to remove debris from each spark-plug well.
- Use a 5/8-inch spark plug socket, 10-inch extension, and 3/8-inch drive ratchet to loosen and remove one plug at a time.
- Inspect the old plug for oil, heavy fuel deposits, cracked ceramic, or unusual electrode wear.
- Place the new plug in the 5/8-inch spark plug socket and lower it gently into the well.
- Turn the extension by hand for several full revolutions. If it does not turn smoothly, remove it and start again.
- Use a torque wrench, 10-inch extension, and 5/8-inch spark plug socket to torque each spark plug to 18 Nm (13 ft-lbs).
- Do not use anti-seize or thread lubricant on OEM-spec plated plugs.
Step 9: Replace the rear three spark plugs
- Use compressed air and a blow gun to clean around the rear ignition coils.
- Disconnect the rear coil connectors by hand.
- Use a 10mm socket, 1/4-inch drive ratchet, and 3-inch extension to remove the coil bolts.
- Remove the coils by twisting and lifting them straight upward.
- Use a 5/8-inch spark plug socket, 10-inch extension, universal joint, and 3/8-inch drive ratchet where clearance requires it.
- Install each new plug by turning the extension by hand first.
- Use a torque wrench, appropriate extension, universal joint if necessary, and 5/8-inch spark plug socket to torque each spark plug to 18 Nm (13 ft-lbs).
- Keep the universal joint as straight as possible while tightening for an accurate torque reading.
Step 10: Reinstall all six ignition coils
- Inspect each coil boot for cracks, oil, moisture, or carbon tracking—the thin black lines left by escaping voltage.
- Push each coil firmly over its spark plug by hand until fully seated.
- Install the coil bolts with a 10mm socket and 3-inch extension, starting them by hand.
- Use a torque wrench, 10mm socket, and 3-inch extension to torque the ignition-coil bolts to 10 Nm (89 in-lbs).
- Reconnect every coil connector until its lock clicks.
Step 11: Reinstall the upper intake plenum
- Use a clean lint-free shop towel to wipe the plenum sealing surfaces. Do not use abrasive tools.
- Install the new upper intake plenum gasket by hand in its correct groove.
- Count and remove every shop towel from the intake ports before lowering the plenum.
- Set the plenum straight down without disturbing the gasket.
- Start all plenum fasteners by hand using a 12mm socket and extension only.
- Tighten the plenum fasteners gradually from the center outward with a torque wrench and 12mm socket. Torque to 21 Nm (15 ft-lbs).
- Reinstall the support-bracket fasteners with a torque wrench and 12mm socket. Torque to 21 Nm (15 ft-lbs).
- Reconnect all labeled vacuum hoses, breather hoses, purge lines, and electrical connectors by hand and with hose-clamp pliers as applicable.
Step 12: Reinstall the throttle body and intake duct
- If removed, position a new throttle-body gasket and install the throttle body.
- Start the throttle-body bolts by hand using a 10mm socket and extension.
- Use a torque wrench and 10mm socket to torque the throttle-body bolts to 10 Nm (89 in-lbs).
- Reconnect the throttle-body connector and all hoses until their locks and clamps are fully seated.
- Install the air-intake duct and air-cleaner lid.
- Use a flat-blade screwdriver to tighten the intake-hose clamps securely without crushing the plastic duct.
- Reconnect the mass-airflow sensor until its lock clicks.
Step 13: Reinstall the cowl and wiper system
- Position the metal cowl reinforcement and install its fasteners with a 10mm socket and 3/8-inch drive ratchet.
- Position the wiper-linkage assembly and install its bolts with a 10mm socket and 3/8-inch drive ratchet.
- Reconnect the wiper-motor connector by hand.
- Install the plastic cowl panels, rubber seal, and retaining clips with the plastic trim-clip removal tool.
- Align the wiper arms with the masking-tape marks.
- Install the wiper-arm nuts with a 14mm socket and torque wrench. Torque to 26 Nm (19 ft-lbs).
- Press the nut caps into place by hand.
Step 14: Reconnect the battery
- Place the negative terminal fully onto the battery post.
- Use a torque wrench and 10mm socket to torque the negative-terminal nut to 5.4 Nm (48 in-lbs).
- Reinstall the engine cover by aligning its grommets and pressing it downward by hand.
✅ After Repair
- ✅ Turn the ignition on for approximately 10 seconds without starting the engine, then switch it off.
- Start the engine and let it idle. A slightly uneven idle may occur briefly while the electronic throttle system relearns.
- Listen for hissing around the intake plenum. Hissing, rough idle, or a check-engine light can indicate a disconnected hose or intake leak.
- Verify that no warning lights remain on and that the engine accelerates smoothly.
- Test the windshield wipers with a wet windshield. Confirm that the arms park correctly and do not strike the trim or each other.
- If automatic window operation was lost, fully close each affected window and hold its switch upward for several seconds.
- After a short road test, inspect the intake duct, vacuum hoses, and throttle-body area again.
💰 DIY vs Shop Cost
Shop Cost: ₹28,000-₹48,000 (parts + labor)
DIY Cost: ₹7,000-₹16,000 (parts only)
You Save: ₹21,000-₹32,000 by doing it yourself!
Local labor rates and imported-part prices vary. This repair takes a shop approximately 2.5-4 hours.
🎯 Ready to get started?
HowToo makes it easy: same-day/2-day shipping on every part, plus all the tools and specialty tools you need! Check out the parts and tools sections below to add everything to your cart.