


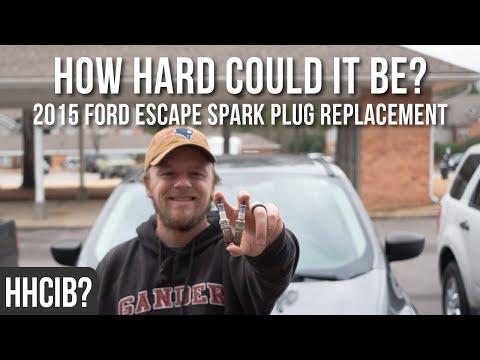







How to Replace Spark Plugs on a 2001-2022 Ford Escape 2.5L (Trim: S | Engine: Inline 4 2.5L)
Step-by-step DIY instructions with required tools, plug gap, torque specs, and safety tips for 2001, 2002, 2003, 2004
How to Replace Spark Plugs on a 2001-2022 Ford Escape 2.5L (Trim: S | Engine: Inline 4 2.5L)
Step-by-step DIY instructions with required tools, plug gap, torque specs, and safety tips for 2001, 2002, 2003, 2004


🔧 Escape - Spark Plug Replacement
This is a solid beginner-friendly job. Replace all four spark plugs with the engine completely cold, and work one cylinder at a time so the ignition coil connectors stay organized.
Difficulty Level: Beginner | Estimated Time: 1-1.5 hours
Assumption: These instructions cover the stock 2.5L naturally aspirated engine.
⚠️ Safety & Precautions
- 🧊 Let the engine cool for at least two hours. Removing plugs from a hot aluminum cylinder head can damage its threads.
- 🔑 Keep the ignition switched off and the key away from the vehicle.
- 🧹 Do not let dirt fall into the open spark-plug holes.
- ⚡ Never start or crank the engine while an ignition coil is disconnected.
- 🔋 Battery disconnection is not required for this repair.
🔧 Required Tools
You'll need the following tools for this repair:
- 8mm socket
- 3/8-inch drive ratchet
- 3/8-inch drive 6-inch extension
- 5/8-inch spark plug socket
- 3/8-inch drive inch-pound torque wrench
- 0.049-0.053-inch spark plug gap gauge
- Compressed-air blower with safety nozzle
- Small flat-blade screwdriver
- Clean shop towels
- Mechanic's gloves
- Safety glasses
🔩 Required Parts
HowToo sells all the parts you need for this repair:
- Vehicle-matched spark plugs - Qty: 4
- Dielectric silicone grease - Qty: 1 small tube
Ford specifies a plug gap of 0.049-0.053 inch (1.25-1.35 mm) for this engine. fordservicecontent.com
📋 Before You Begin
- 🅿️ Park your Escape on level ground, select Park, and apply the parking brake.
- 🧊 Open the hood and confirm that the engine is completely cold.
- 📦 Remove all four new plugs from their boxes and inspect their porcelain for cracks.
- 📏 Use the gap gauge to verify each plug measures 0.049-0.053 inch (1.25-1.35 mm). Do not force a fine-wire electrode sideways.
- 🚫 Do not apply anti-seize compound unless the plug manufacturer specifically requires it. It can alter tightening force.
🔨 Step-by-Step Instructions
Follow these steps in order:
Step 1: Locate the ignition coils
- Find the four black ignition coils arranged in a row across the top of the engine.
- Each coil sits directly over one spark plug. This design is called “coil-on-plug.”
- Use compressed air with a safety nozzle to remove loose dirt around all four coils.
Step 2: Disconnect the first ignition coil
- Press the electrical connector release and pull the connector straight off the first coil.
- If the latch is stubborn, gently lift it with the small flat-blade screwdriver. Do not pull on the wires.
- Use the 8mm socket, extension, and ratchet to remove the coil retaining bolt.
Step 3: Remove the ignition coil
- Grip the coil body, twist it gently, and pull it straight upward.
- Inspect the rubber boot for cracks, swelling, oil, or white burn marks.
- Use compressed air with a safety nozzle to clean the empty spark-plug well before removing the plug.
- Dirt belongs outside the engine.
Step 4: Remove the old spark plug
- Place the 5/8-inch spark plug socket and 6-inch extension fully over the plug.
- Use the 3/8-inch drive ratchet to turn the plug counterclockwise.
- If the plug feels unusually tight, stop. Tighten it slightly, loosen it again, and work slowly rather than forcing it.
- Lift the loosened plug out with the spark plug socket.
Step 5: Inspect the old spark plug
- Check for heavy black deposits, wet fuel, oil, a cracked insulator, or a burned electrode.
- A dry light-tan or gray appearance is generally normal.
- If the plug is oily or damaged, keep it identified with its cylinder position for later diagnosis.
Step 6: Start the new plug by hand
- Place the new plug into the 5/8-inch spark plug socket attached only to the extension.
- Lower it carefully into the well without dropping it.
- Turn the extension clockwise by hand for several complete turns.
- If it does not turn easily, remove it and start again. Cross-threading means the plug enters crooked and damages the cylinder head.
Step 7: Tighten the new spark plug
- Attach the inch-pound torque wrench to the extension and spark plug socket.
- Torque to 12 Nm (106 in-lbs).
- Do not keep tightening after the torque wrench clicks.
Step 8: Reinstall the ignition coil
- Apply a very small smear of dielectric silicone grease inside the opening of the rubber coil boot. Dielectric grease seals out moisture.
- Push the coil straight down until the boot seats over the plug.
- Install the retaining bolt with the 8mm socket and tighten it snugly by hand without forcing the small bolt.
- Reconnect the electrical connector until its lock clicks.
Step 9: Replace the remaining three plugs
- Repeat Steps 2 through 8 for each remaining cylinder.
- Finish one cylinder completely before moving to the next one.
- Confirm that all four coils are seated and all four electrical connectors are locked.
✅ After Repair
- 🔍 Remove every tool and shop towel from the engine compartment.
- 🚙 Start the engine and let it idle for two to three minutes.
- 👂 Listen for a smooth idle. A shaking engine or flashing check-engine light usually indicates a loose coil connector or an improperly seated coil.
- 🛣️ Take a short test drive, then check again for a warning light or rough running.
- 🧰 If a problem appears, shut the engine off and recheck all four coil connectors before driving farther.
💰 DIY vs Shop Cost
Shop Cost: $180-$350 (parts + labor)
DIY Cost: $25-$85 (parts only)
You Save: $95-$325 by doing it yourself!
Shop labor rates vary by location. This repair generally takes a shop approximately 0.7-1.0 hour.
🎯 Ready to get started?
HowToo makes it easy: same-day/2-day shipping on every part, plus all the tools and specialty tools you need! Check out the parts and tools sections below to add everything to your cart.
