

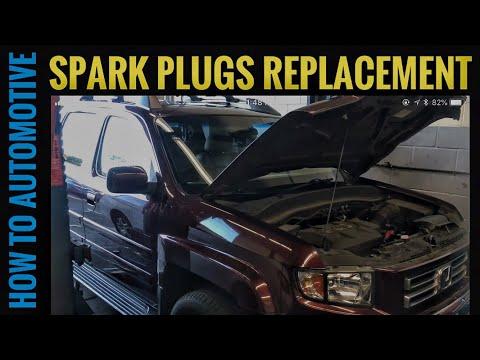






How to Replace Spark Plugs in a 2009-2019 Honda Ridgeline 3.5L V6 (Trim: RT | Engine: V6 3.5L)
Step-by-step DIY instructions with required tools, parts, torque specs, and safety tips for 2009, 2010, 2011, 2012, 2013, 2014, 2017, 2018, 2019
How to Replace Spark Plugs in a 2009-2019 Honda Ridgeline 3.5L V6 (Trim: RT | Engine: V6 3.5L)
Step-by-step DIY instructions with required tools, parts, torque specs, and safety tips for 2009, 2010, 2011, 2012, 2013, 2014, 2017, 2018, 2019


🔧 Ridgeline - Spark Plug Replacement
Your Ridgeline uses six long-life iridium spark plugs, one for each cylinder. Replace them only when the engine is completely cold, and work on one cylinder at a time so the ignition coils and connectors do not get mixed up.
Difficulty Level: Intermediate | Estimated Time: 1.5-2.5 hours
Assumption: These instructions are for the stock U.S.-market 3.5L V6 engine.
⚠️ Safety & Precautions
- Allow the engine to cool for at least three hours. Removing plugs from a hot aluminum cylinder head can damage its threads.
- Wear safety glasses when cleaning debris from the spark plug wells.
- Keep dirt, tools, and loose hardware out of the open spark plug holes.
- Do not use anti-seize compound on the new plug threads. The specified iridium plugs have plated threads, and lubricant can cause over-tightening.
- Do not pry against ignition coils or pull on their wiring.
- Battery disconnection is not required. Keep the ignition switched off and the key away from your Ridgeline.
🔧 Required Tools
You'll need the following tools for this repair:
- 10mm socket
- 5/8-inch magnetic spark plug socket
- 3/8-inch-drive ratchet
- 3-inch 3/8-inch-drive extension
- 6-inch 3/8-inch-drive extension
- 3/8-inch-drive torque wrench rated 5-50 Nm
- 0.039-0.043-inch wire-style spark plug gap gauge
- Low-pressure compressed-air gun with nozzle
- LED inspection flashlight
- Clean microfiber cloth
- Nitrile mechanic gloves
- Safety glasses
🔩 Required Parts
HowToo sells all the parts you need for this repair:
- Honda-specification iridium spark plugs - Qty: 6
- Dielectric silicone grease - Qty: 1 small tube
Use plugs specifically cataloged for your Ridgeline. Do not substitute standard copper or platinum plugs.
📋 Before You Begin
- Park your Ridgeline on level ground, shift into Park, apply the parking brake, and switch the ignition off.
- Open the hood and wait until the engine is completely cold.
- Place all six new plugs on a clean surface where dirt cannot reach their threads.
- A spark plug well is the deep opening surrounding each plug. Clean each well before removing its plug.
- No infotainment menu, scan-tool command, battery registration, or programming is required.
🔨 Step-by-Step Instructions
Follow these steps in order:
Step 1: Remove the Engine Cover
- Use both gloved hands to lift the decorative engine cover straight upward from its rubber mounting grommets.
- Set the cover on a clean microfiber cloth so its mounting points are not damaged.
- Use an LED inspection flashlight to locate the three ignition coils on the front cylinder bank and three on the rear bank.
Step 2: Inspect the New Spark Plugs
- Use a 0.039-0.043-inch wire-style spark plug gap gauge to confirm each plug gap is approximately 1.0-1.1 mm (0.039-0.043 inch).
- Do not force the gauge or bend the fine center electrode. Replace any plug that is dropped, cracked, or incorrectly gapped.
- Leave the threads clean and dry. Do not apply anti-seize compound.
Step 3: Disconnect the First Ignition Coil
- Begin with an easy-to-reach front-bank coil and complete one cylinder before moving to the next.
- Use a gloved finger to depress the electrical connector’s locking tab, then pull the connector straight off the coil body.
- Do not pull on the wires. Use the LED inspection flashlight if the locking tab is difficult to see.
Step 4: Remove the Ignition Coil
- Use a 10mm socket, 3-inch extension, and 3/8-inch-drive ratchet to remove the coil retaining bolt.
- Grip the coil body with a gloved hand. Twist it gently, then pull it straight out of the spark plug well.
- Inspect the rubber boot for oil, water, cracking, or burn marks. Oil inside the well may indicate a valve-cover tube-seal leak.
Step 5: Clean the Spark Plug Well
- Put on safety glasses before using the low-pressure compressed-air gun.
- Use the compressed-air gun with nozzle to blow dirt away from the plug and out of the well.
- Keep your face away from the well while blowing it clean.
Step 6: Remove the Old Spark Plug
- Fit the 5/8-inch magnetic spark plug socket to the 6-inch extension and 3/8-inch-drive ratchet.
- Lower the socket straight onto the plug and turn counterclockwise until the plug is completely loose.
- Lift the plug out slowly with the magnetic socket. Use the LED inspection flashlight to confirm nothing fell into the open hole.
- Stop if the plug requires excessive force. Apply steady pressure rather than jerking the ratchet.
Step 7: Examine the Removed Plug
- Use the LED inspection flashlight to inspect the plug tip. Light tan or gray deposits are generally normal.
- Wet fuel, heavy oil, a broken electrode, or thick deposits can indicate an engine problem that needs diagnosis.
- Use a clean microfiber cloth to place the old plugs in cylinder order for comparison.
Step 8: Hand-Install the New Spark Plug
- Place one new plug into the 5/8-inch magnetic spark plug socket attached only to the 6-inch extension. Do not attach the ratchet yet.
- Lower the plug straight into the well and turn the extension clockwise by hand for several complete turns.
- The plug should thread easily. If it binds, remove it and restart to prevent cross-threading.
- Hand-start every plug before using a ratchet.
Step 9: Torque the Spark Plug
- Attach the 3/8-inch-drive torque wrench to the extension and spark plug socket.
- Tighten the plug in one smooth motion to 18 Nm (13 lb-ft).
- Stop immediately when the torque wrench clicks. Do not tighten the plug again.
Step 10: Reinstall the Ignition Coil
- Use a gloved fingertip to place a very small amount of dielectric silicone grease inside the opening at the end of the coil boot. Keep grease away from the metal terminal and plug threads.
- Push the ignition coil straight over the plug until the boot is fully seated.
- Start the retaining bolt by hand, then use the 10mm socket and 3/8-inch-drive torque wrench to tighten it to 12 Nm (9 lb-ft).
- Push the electrical connector onto the coil until its lock clicks.
Step 11: Replace the Remaining Five Plugs
- Repeat Steps 3 through 10 for each remaining cylinder using the same listed tools.
- Use the 3-inch extension where clearance is limited and the 6-inch extension for the deeper rear-bank access.
- Confirm every coil connector clicks into place and every retaining bolt is installed.
- Do not remove more than one coil and plug at a time.
Step 12: Reinstall the Engine Cover
- Use the LED inspection flashlight to check the engine compartment for forgotten tools or loose hardware.
- Align the engine cover with its rubber mounting grommets.
- Use both gloved hands to press directly over each mounting point until the cover is fully seated.
✅ After Repair
- Start the engine and let it idle for two to three minutes. It should run smoothly without shaking or a flashing malfunction indicator lamp.
- Switch the engine off immediately if it misfires. Recheck that all six coil connectors are locked and the coils are fully seated.
- Use the LED inspection flashlight to confirm the engine cover is secure and no wiring is trapped beneath it.
- Take a short test drive after the idle check. No spark plug break-in or computer reset is required.
- If a warning light remains on, the stored diagnostic trouble code should be read before replacing additional parts.
💰 DIY vs Shop Cost
Shop Cost: ₹18,000-₹35,000 (imported parts + labor)
DIY Cost: ₹9,000-₹20,000 (parts only)
You Save: ₹9,000-₹15,000 by doing it yourself!
Specialist labor around Sonīpat and Delhi NCR commonly varies by shop. Imported Honda plug availability can significantly affect the final price, and this repair typically takes a shop approximately 1.0-1.5 hours.
🎯 Ready to get started?
HowToo makes it easy: same-day/2-day shipping on every part, plus all the tools and specialty tools you need! Check out the parts and tools sections below to add everything to your cart.