

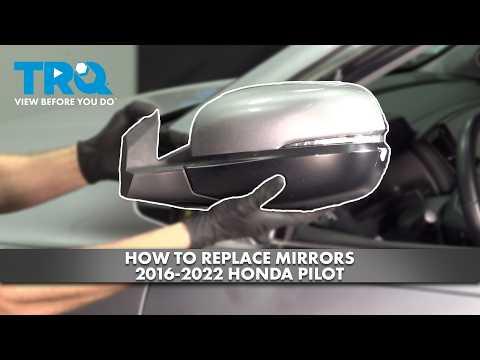







How to Replace Side View Mirrors on a 2017-2018 Honda Pilot
Step-by-step DIY guide with tools, parts, torque specs, safety tips, and testing for 2017, 2018
How to Replace Side View Mirrors on a 2017-2018 Honda Pilot
Step-by-step DIY guide with tools, parts, torque specs, safety tips, and testing for 2017, 2018


🔧 Pilot - Side View Mirror Replacement
This repair replaces a damaged exterior side view mirror assembly on your Pilot. The mirror is held to the front door with mounting nuts behind the interior door trim, and the electrical connector must be unplugged before removal.
Difficulty Level: Beginner | Estimated Time: 1-2 hours per side
⚠️ Safety & Precautions
- ⚠️ Disconnect the negative battery cable before unplugging door electrical connectors to reduce the chance of short circuits.
- ⚠️ Work with the window fully raised so the glass is protected while the door panel is off.
- ⚠️ Do not pull hard on the door panel; hidden clips and wiring can break.
- ⚠️ Support the mirror with one hand while removing the final mounting nut so it does not fall and scratch the paint.
- ⚠️ If your replacement mirror includes camera, heated glass, turn signal, or blind-spot features, the replacement must match the original mirror features.
🔧 Required Tools
You'll need the following tools for this repair:
- 10mm socket
- Ratchet handle
- 3-inch socket extension
- Phillips #2 screwdriver
- Plastic trim removal tool set
- Small flat-blade screwdriver
- Panel clip remover (specialty)
- Torque wrench inch-pound 20-150 in-lb
- Painter's tape 1-inch
- Magnetic parts tray
- Nitrile gloves
- Safety glasses
🔩 Required Parts
HowToo sells all the parts you need for this repair:
- Side view mirror assembly - Qty: 1 per side
- Door trim panel clips - Qty: 3-6 recommended
- Mirror mounting nuts - Qty: 3 if damaged or missing
📋 Before You Begin
- Park your Pilot on level ground and turn the ignition off.
- Raise the window fully on the door you are working on.
- Apply 1-inch painter's tape around the mirror base on the painted door surface to help prevent scratches.
- Disconnect the negative battery cable using a 10mm socket. Wait at least 3 minutes before unplugging door connectors.
- A trim removal tool is a plastic pry tool that helps remove panels without scratching the interior.
- A panel clip is a plastic fastener that snaps the door panel to the metal door shell.
🔨 Step-by-Step Instructions
Follow these steps in order:
Step 1: Protect the Door and Mirror Area
- Use 1-inch painter's tape around the outside mirror base where it meets the door.
- Put on safety glasses and nitrile gloves.
- Place a magnetic parts tray nearby for screws and nuts.
- Take photos before unplugging connectors.
Step 2: Disconnect the Battery
- Open the hood and locate the battery negative terminal.
- Use a 10mm socket and ratchet handle to loosen the negative battery cable clamp.
- Move the cable away from the battery post so it cannot spring back and touch.
Step 3: Remove the Interior Door Handle Trim
- Use a small flat-blade screwdriver wrapped with a small piece of painter's tape to gently open the small screw cover behind the interior door handle.
- Use a Phillips #2 screwdriver to remove the screw behind the cover.
- Place the screw in the magnetic parts tray.
Step 4: Remove the Armrest Screw Cover and Screw
- Use a plastic trim removal tool to carefully lift the screw cover inside the door pull/armrest area.
- Use a Phillips #2 screwdriver to remove the exposed screw.
- Place the screw in the magnetic parts tray.
Step 5: Release the Door Panel Clips
- Start at the lower rear edge of the door panel.
- Slide a plastic trim removal tool between the door panel and metal door shell.
- Use a panel clip remover to pop the clips loose one at a time around the bottom and sides of the panel.
- Do not pry against the painted outside surface of the door.
- Slow, even pressure prevents broken clips.
Step 6: Lift the Door Panel Off
- Once the clips are loose, use both hands to lift the door panel straight upward off the window ledge.
- Do not pull it far away yet; wiring is still attached.
- Support the panel with one hand or rest it close to the door.
Step 7: Disconnect Door Panel Electrical Connectors
- Use your fingers to press the locking tabs on the window switch and door lock connectors.
- If a connector is tight, use a small flat-blade screwdriver to gently depress the lock tab while pulling the connector body.
- Do not pull on the wires.
- Set the door panel somewhere safe with the finished side facing up.
Step 8: Remove the Mirror Sail Trim
- The sail trim is the small triangular interior trim piece directly opposite the outside mirror.
- Use a plastic trim removal tool to gently pry the sail trim away from the door.
- Remove it slowly so the clips do not break.
Step 9: Unplug the Side Mirror Connector
- Locate the mirror wiring connector inside the upper front area of the door.
- Press the connector lock tab with your fingers.
- If needed, use a small flat-blade screwdriver to depress the tab gently.
- Pull the connector apart by the plastic housings, not the wires.
Step 10: Remove the Mirror Mounting Nuts
- Support the outside mirror with one hand.
- Use a 10mm socket, 3-inch socket extension, and ratchet handle to remove the mirror mounting nuts from inside the door.
- There are typically 3 mounting nuts.
- Keep the nuts in the magnetic parts tray.
- Hold the mirror before the last nut.
Step 11: Remove the Old Mirror Assembly
- From outside the door, gently pull the mirror straight away from the door.
- Guide the wiring harness through the opening carefully.
- If the gasket sticks, use a plastic trim removal tool to gently separate it from the door.
- Do not use a metal screwdriver on the painted door surface.
Step 12: Install the New Mirror Assembly
- Feed the new mirror wiring harness through the door opening.
- Set the mirror gasket flat against the door.
- Start all mirror mounting nuts by hand first to avoid cross-threading.
- Use a 10mm socket, 3-inch socket extension, and torque wrench inch-pound 20-150 in-lb to tighten the mounting nuts evenly.
- Torque to 8 Nm (71 in-lbs).
- Do not overtighten; the mirror base can crack.
Step 13: Reconnect the Mirror Connector
- Plug the mirror connector into the door harness until it clicks.
- Use your fingers to lightly tug the connector body and confirm it is locked.
- Route the harness the same way it was originally routed so it does not interfere with the window.
Step 14: Temporarily Test the Mirror
- Reconnect the negative battery cable using a 10mm socket and ratchet handle.
- Turn the ignition to ON without starting the engine.
- Test mirror glass movement using the mirror switch.
- If equipped, test the turn signal and heated mirror function.
- Turn the ignition off after testing.
- If everything works, disconnect the negative battery cable again using a 10mm socket before reinstalling the door panel.
Step 15: Reinstall the Mirror Sail Trim
- Align the triangular sail trim clips with the holes in the door.
- Press the trim into place by hand until the clips snap in.
- Do not strike the trim with a tool.
Step 16: Reconnect Door Panel Connectors
- Bring the door panel close to the door.
- Reconnect the window switch and door lock connectors by hand until each clicks.
- Make sure no wiring is pinched behind the panel.
Step 17: Reinstall the Door Panel
- Hook the top of the door panel over the window ledge.
- Line up the door panel clips with their holes.
- Press around the edges by hand to snap the clips into place.
- If a clip is missing or damaged, replace it before snapping the panel fully in.
Step 18: Reinstall Door Panel Screws and Covers
- Use a Phillips #2 screwdriver to reinstall the armrest screw.
- Use a Phillips #2 screwdriver to reinstall the interior handle screw.
- Snap the screw covers back into place by hand.
- Do not overtighten the screws; the plastic can strip.
Step 19: Reconnect the Battery Final Time
- Reconnect the negative battery cable.
- Use a 10mm socket and ratchet handle to tighten the terminal clamp snugly.
- Torque to 5 Nm (44 in-lbs).
✅ After Repair
- ✅ Turn the ignition ON and confirm the mirror adjusts left, right, up, and down.
- ✅ If equipped, test the mirror turn signal, heated mirror, and blind-spot indicator.
- ✅ Confirm the window moves fully up and down without scraping or slowing.
- ✅ Check that the door lock switch and window switch work correctly.
- ✅ If the auto window function lost memory, hold the window switch down until fully open, then hold it up until fully closed and continue holding for 2 seconds.
- ✅ Remove the painter's tape and inspect the paint around the mirror base.
- ✅ Road test carefully and confirm the mirror stays stable with no wind noise.
💰 DIY vs Shop Cost
Shop Cost: $350-$800 per side (parts + labor)
DIY Cost: $120-$450 per side (parts only)
You Save: $200-$350 per side by doing it yourself!
Shop labor rates vary but typically run $100-$150/hour. This repair takes a shop approximately 1-2 hours.
🎯 Ready to get started?
HowToo makes it easy: same-day/2-day shipping on every part, plus all the tools and specialty tools you need! Check out the parts and tools sections below to add everything to your cart.